Create a Submission Link via Make.com
When you want to send a form to a client or recipient for signing or completion, you don’t have to give them a blank form. By combining the Make.com automation platform with FillFaster, you can generate a unique link for each recipient, with some details already pre-filled automatically (such as name, phone number, case number, and so on).
Essential background – How do your CRM and FillFaster work together?
Section titled “Essential background – How do your CRM and FillFaster work together?”Before diving into Make.com, it’s important to understand how information flows. Your CRM (for example: HubSpot, Salesforce, Pipedrive, monday.com, and others) is the “source of truth” where your customer details are stored.
For your FillFaster form to fill itself in, you need to build a Make scenario with at least two core steps:
-
The CRM step (trigger / source): Choose what starts the process. For example: “When a new lead is created in the CRM”, or “When the customer status changes to ‘Send a form’”. Make will automatically pull all information about that customer from your CRM.
-
The FillFaster step (action): The data pulled from the CRM is mapped into FillFaster fields and generates the unique link.
Step 1: Set up the trigger in Make and add the FillFaster module
Section titled “Step 1: Set up the trigger in Make and add the FillFaster module”Log in to your Make account and create a new scenario.
Click the large + button in the center of the screen and search for your CRM app.
From the list of actions, choose the trigger that fits your needs – for example: Watch Items/Deals (or Watch Boards Items in monday.com, to run the automation whenever a new item/customer/deal is created) or Watch Specific Fields (to run the automation only when a specific field or status changes to “Send a form”).
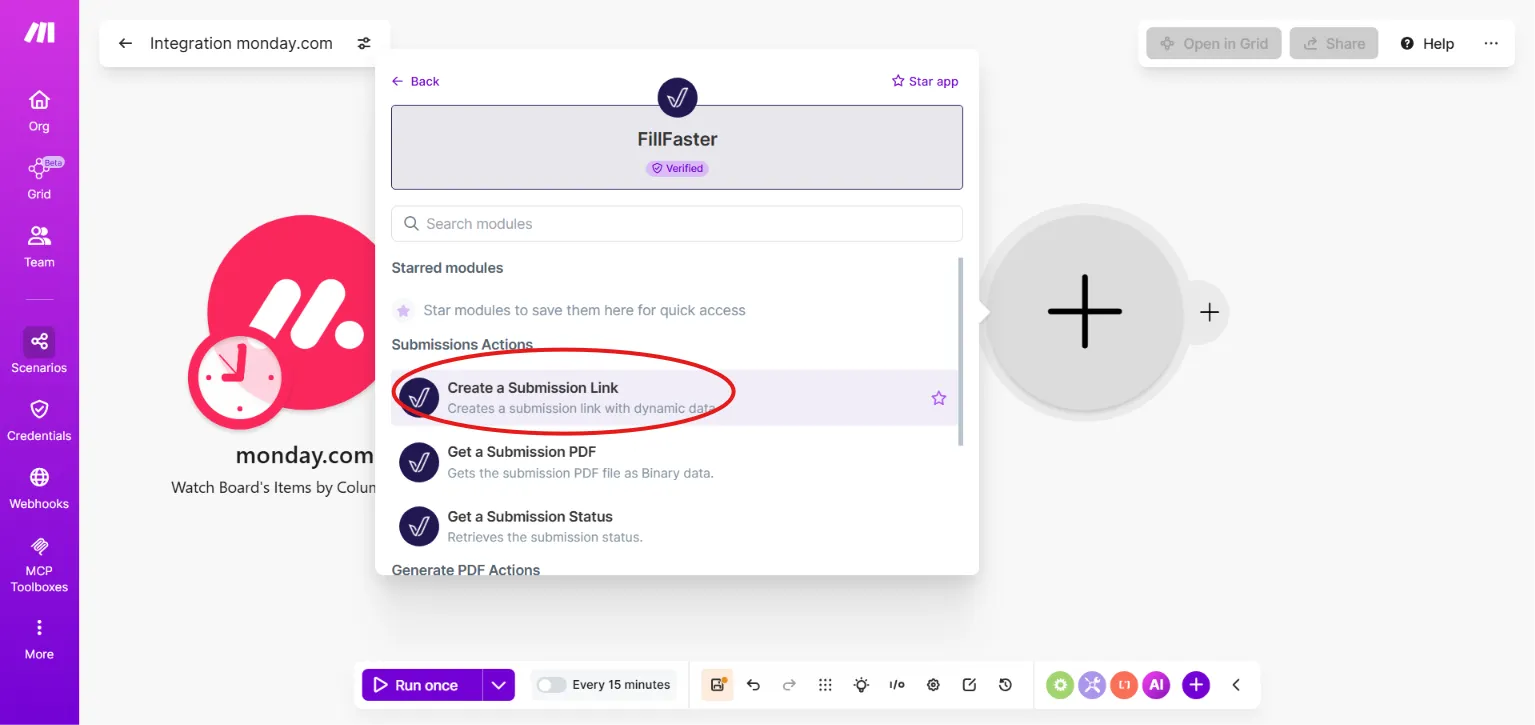
Hover over the CRM module you just configured, and click the + button on the right to add a new step to the scenario.
In the search window that opens, search for the FillFaster app.

From the list of actions, select Create Submission Link.
Step 2: Choose the form template and map data fields
Section titled “Step 2: Choose the form template and map data fields”In the Form ID field, select the relevant form from the dropdown list or enter its ID.
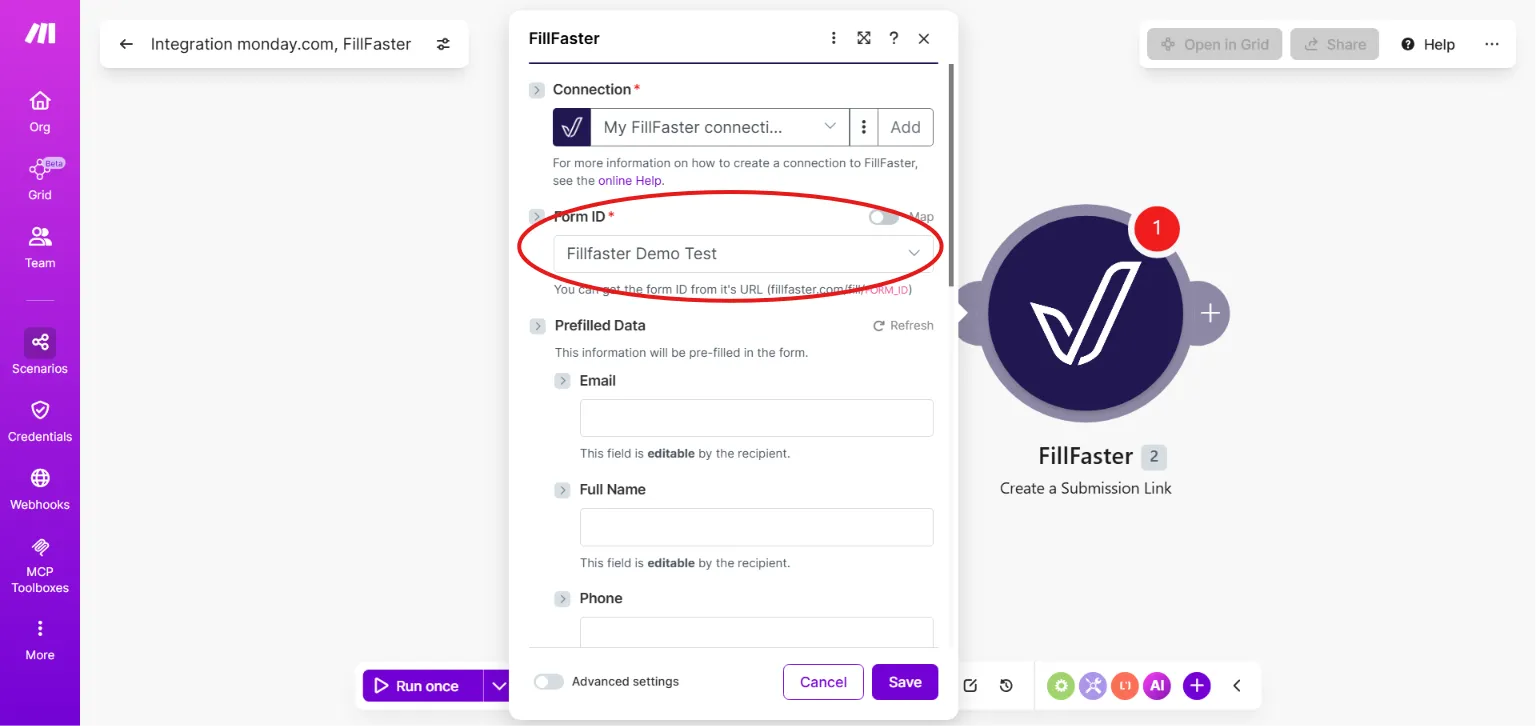
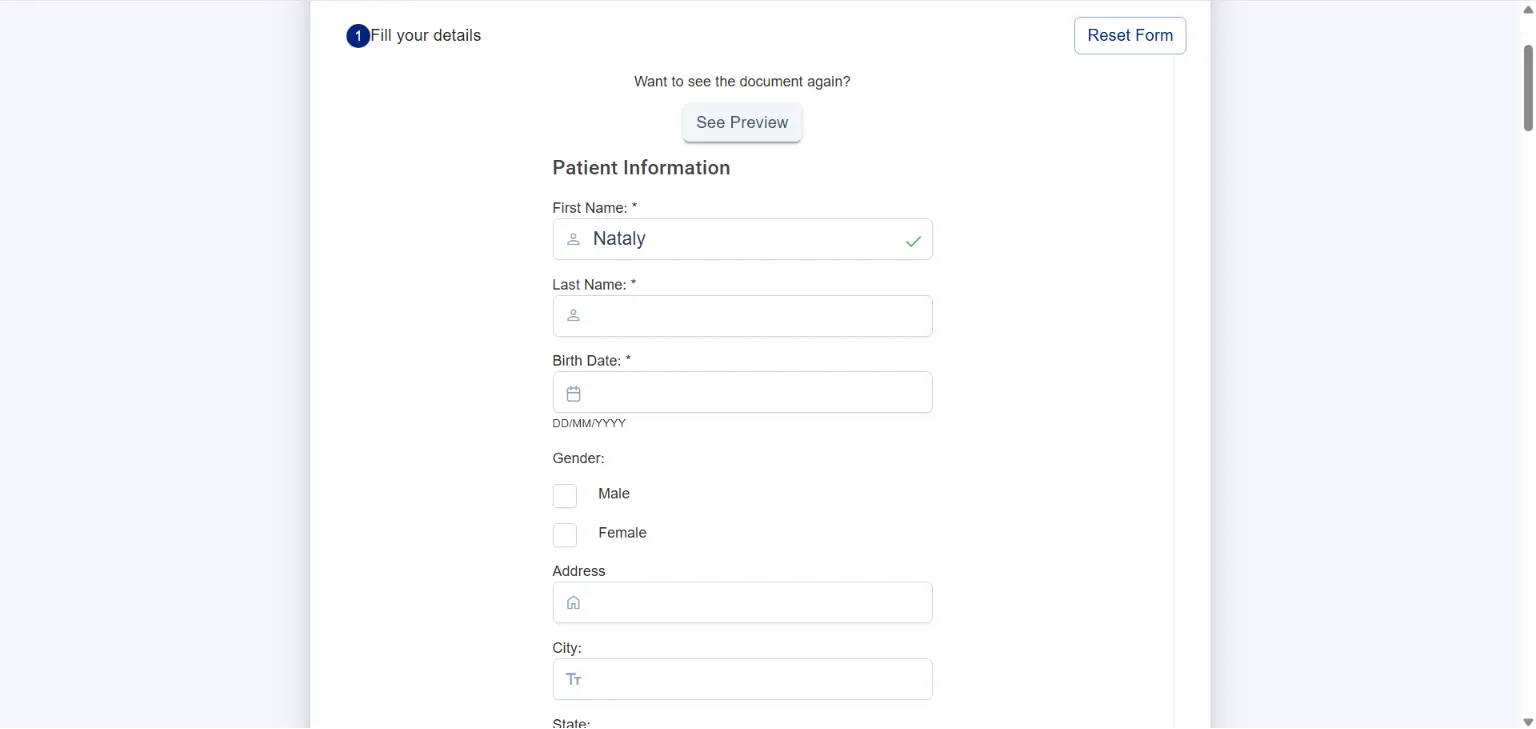
After you select the template, the module expands and shows all fillable fields in the form you chose (for example: full name, ID number, address, and so on).
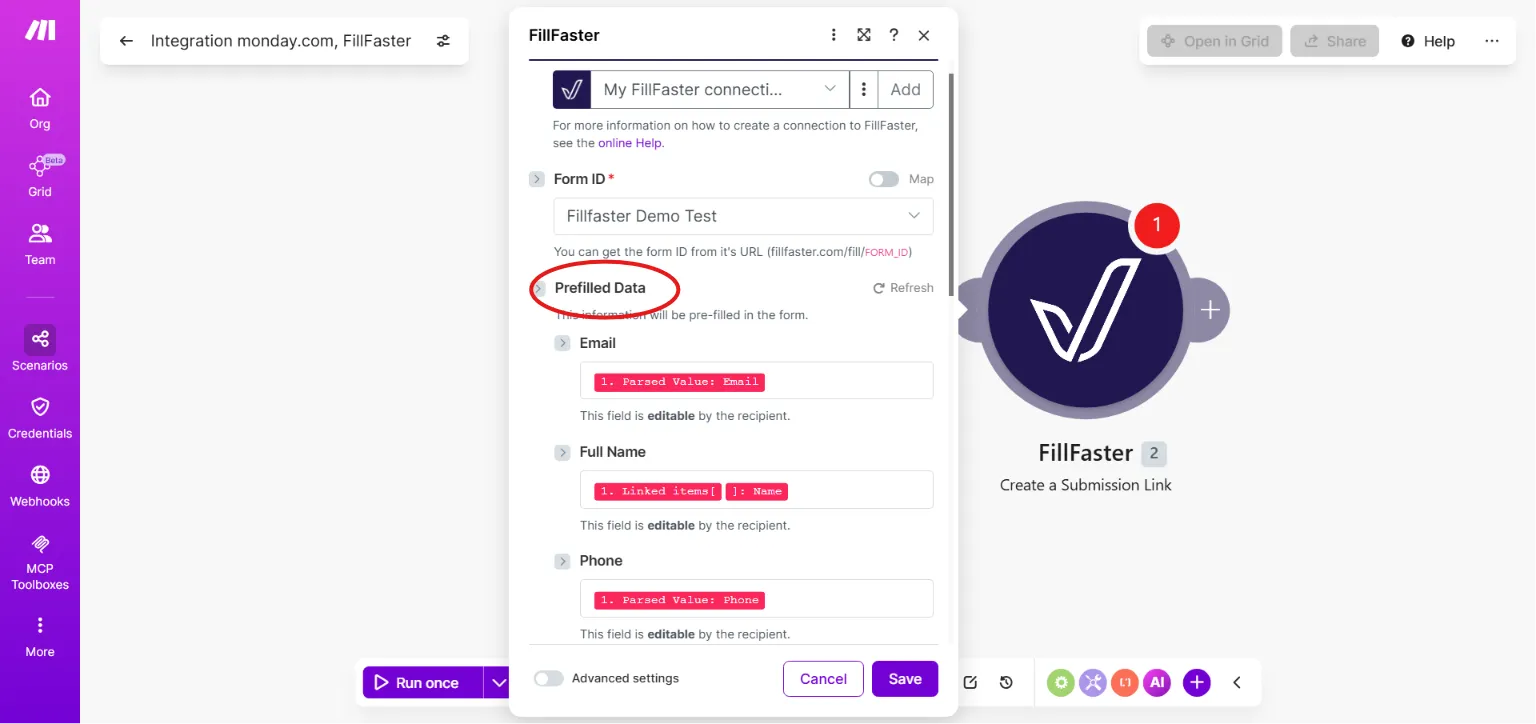
This is where the automation magic happens:
Dynamic mapping: Click the relevant field. A window opens with the data Make pulled from the previous step (your CRM). Drag or click the matching field from the CRM (for example, take the “First Name” field from the CRM and map it to the “First name” field in the form).
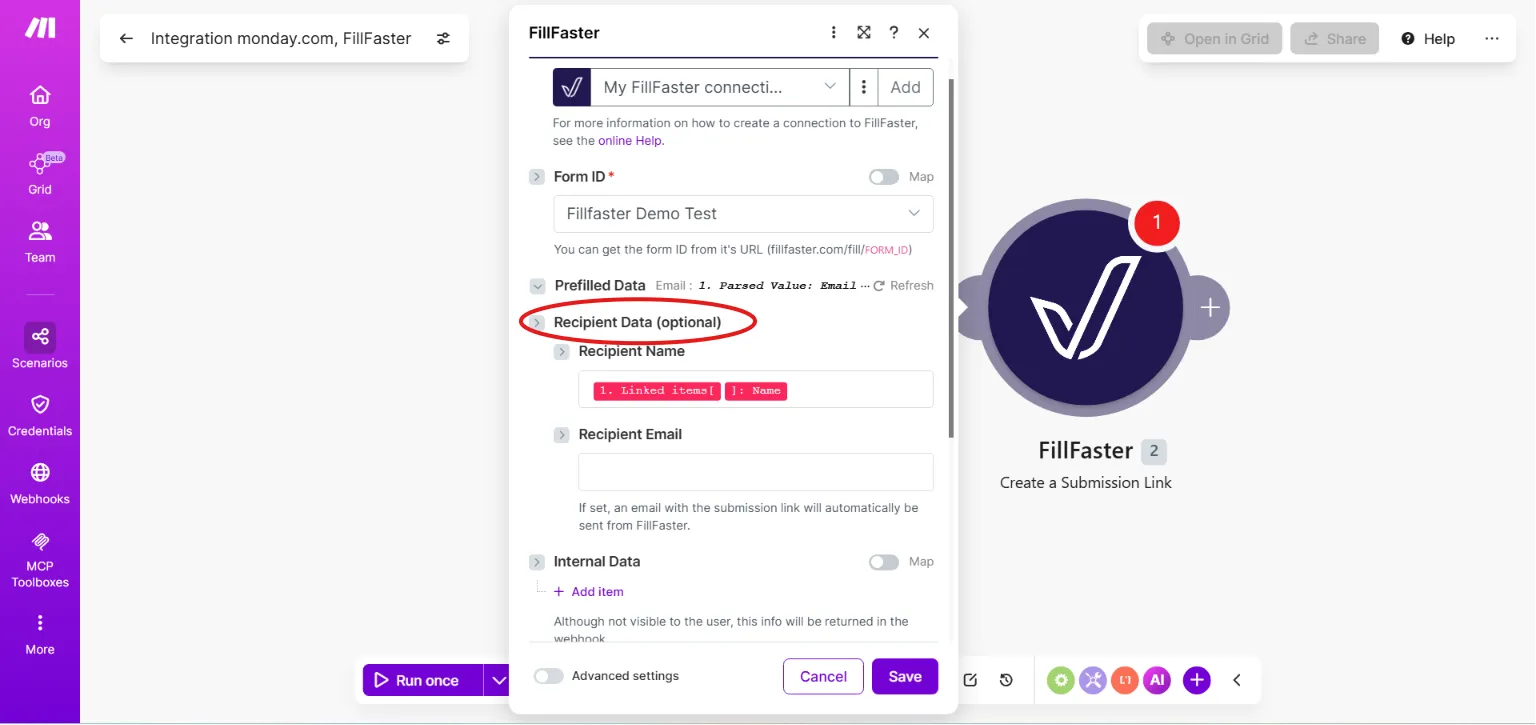
Step 3: Set recipient data
Section titled “Step 3: Set recipient data”In this section, you define who the form is intended for:
Recipient Name: Map the customer’s name from the CRM here.
Recipient Email (optional):
Here’s an important trick: if you enter the customer’s email address here, FillFaster will automatically send them the link by email as soon as the process runs.
If you leave this field empty, the system only generates the link inside Make, and you can send it yourself later in the workflow (for example, via WhatsApp or another messaging platform).
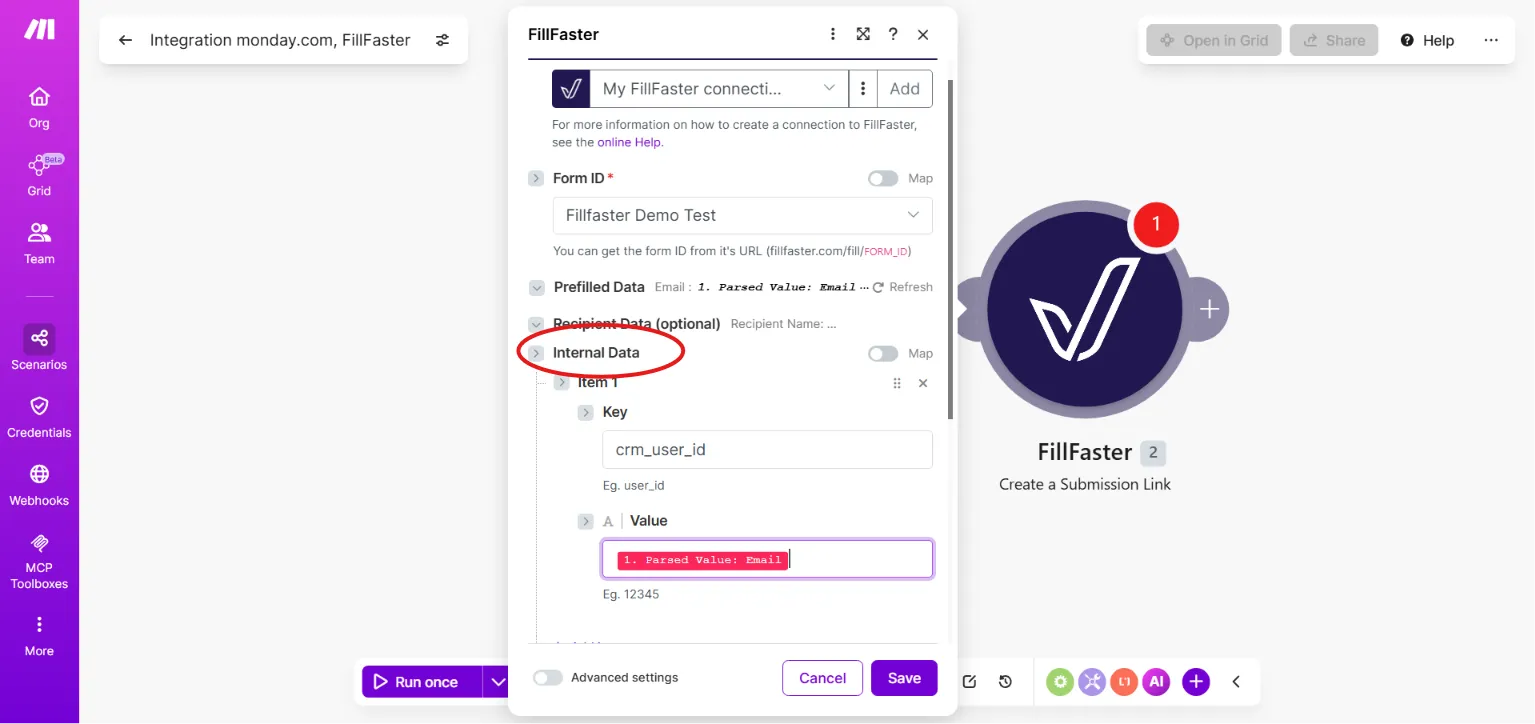
Step 4: Add internal data – critical for connecting back to your CRM!
Section titled “Step 4: Add internal data – critical for connecting back to your CRM!”This section is “behind the scenes” and is critical for automation builders. The information you add here won’t be visible to the recipient who opens the form.
What is it for? When the customer finishes signing the form, FillFaster sends a notification (webhook) back to Make to indicate the form was signed. For Make to know which CRM customer to update, it needs a unique identifier.
What to do? In the Internal Data field, we recommend adding the customer’s ID from the CRM (for example, Record ID or Lead ID). When the form is signed, this ID comes back to you so you can find the customer in the CRM instantly and change their status to “Signed successfully”.
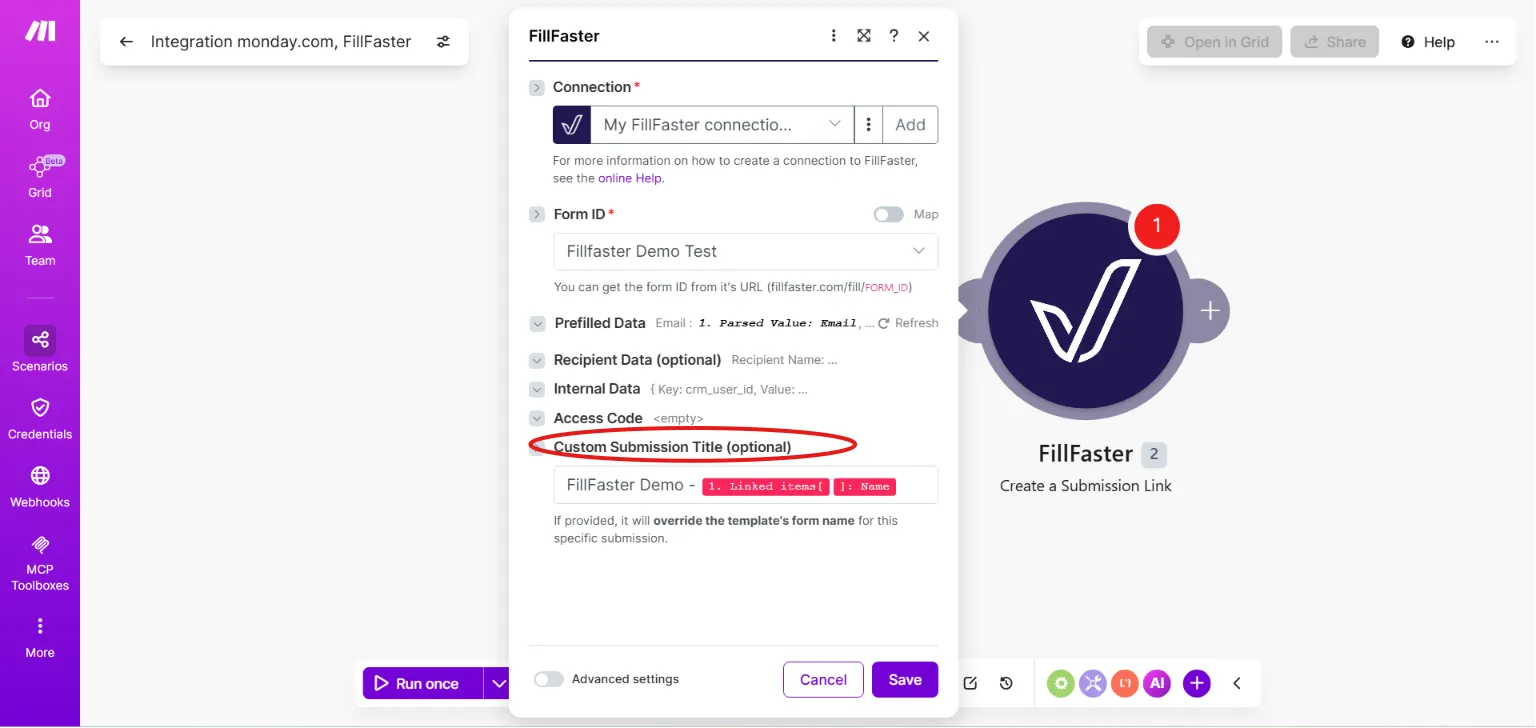
Optional: Set a custom submission title
Section titled “Optional: Set a custom submission title”By default, the form uses the general name you gave it in the template. If you want this specific submission to appear under a unique name in your FillFaster admin area (so you can easily tell customers apart), you can set a custom title.
Recommended format: “Contract name - [customer name from CRM]”.
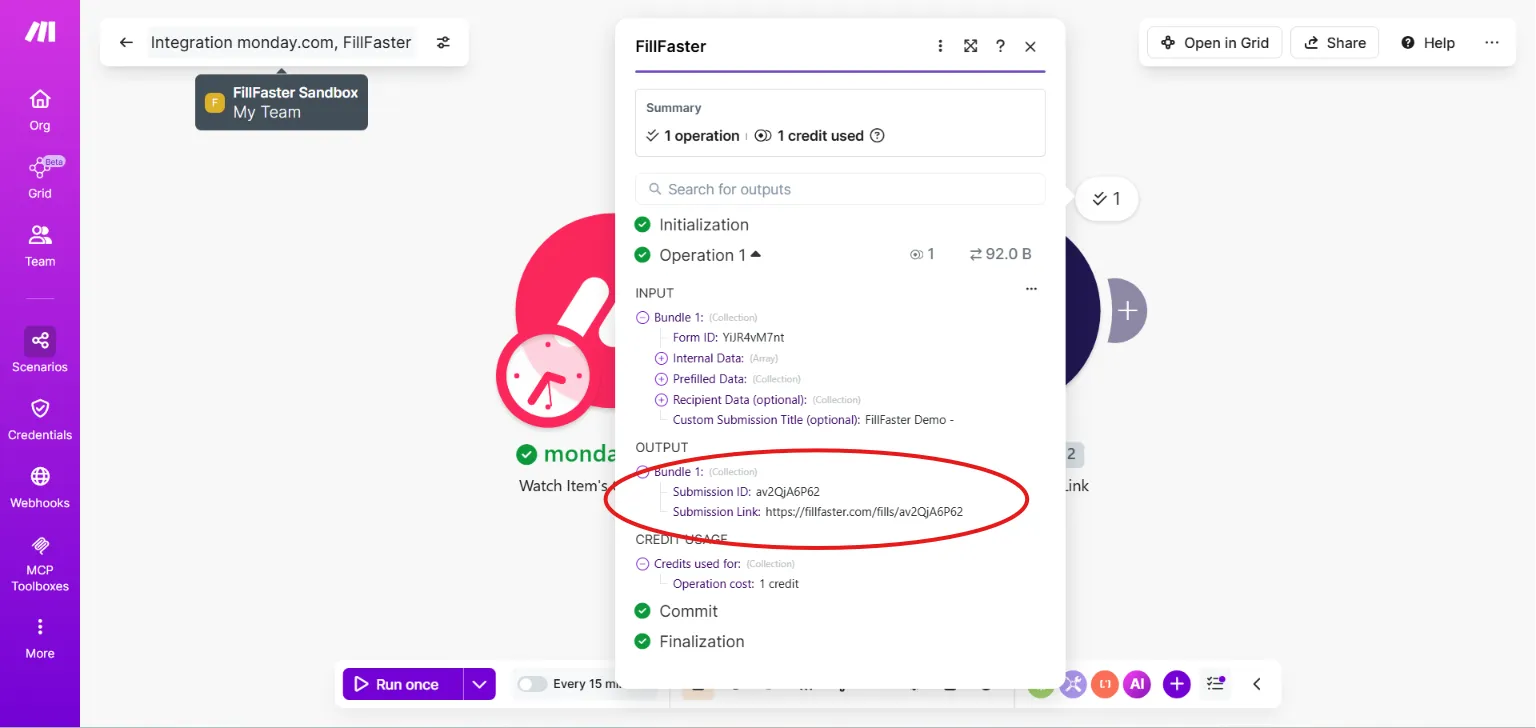
Step 5: Generate and send the link
Section titled “Step 5: Generate and send the link”After you’ve configured all the fields:
Save your scenario in Make.
Click Run once to test that everything works.
The system immediately generates a unique link (URL) for you.
You can take this link (output from the FillFaster module) to later steps in Make – for example: send it via SMS through a messaging system, send it on WhatsApp, or write it to a dedicated field in your CRM so sales reps can copy it with one click.
Step 6: Recipient interaction
Section titled “Step 6: Recipient interaction”When your customer clicks the generated link:
The form opens with all fields you mapped from the CRM already filled in (saving them time and preventing typing errors).
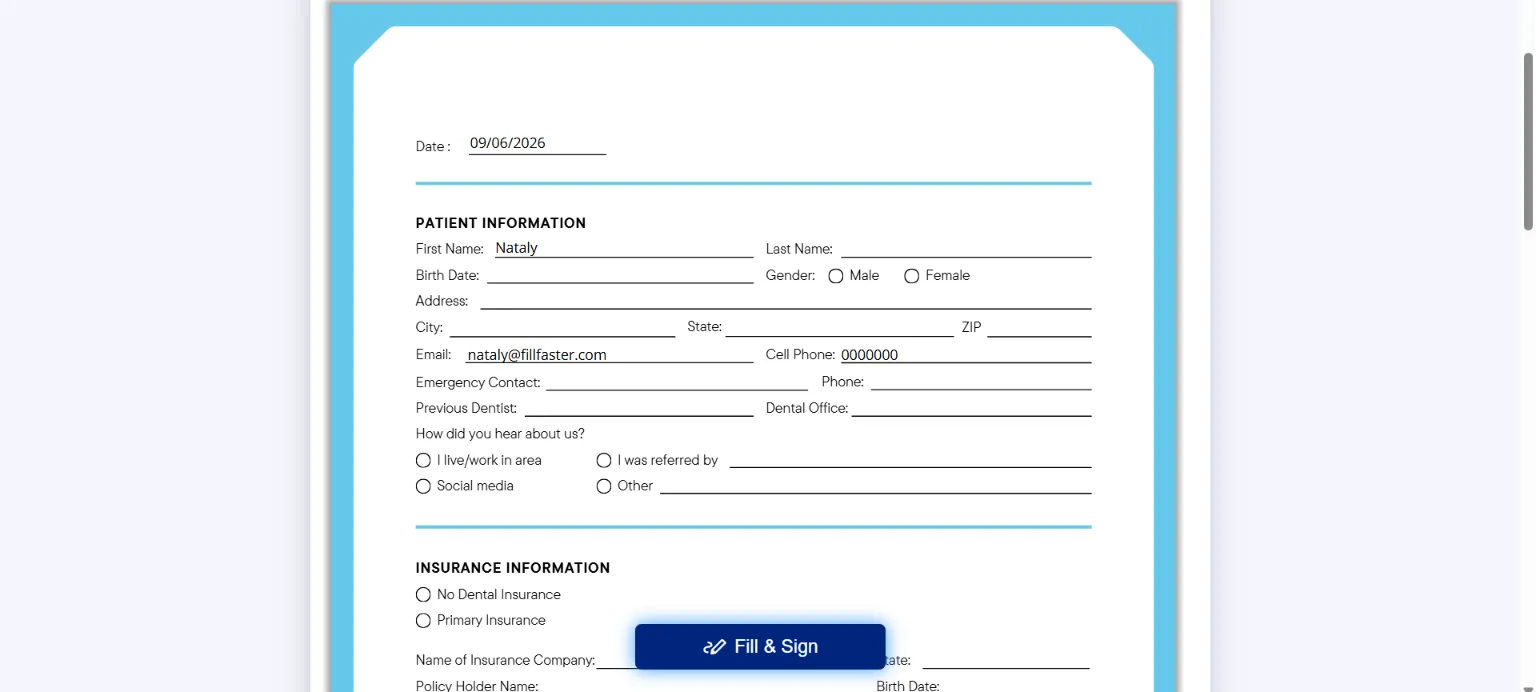
Depending on the settings you defined in the template, the customer can edit certain fields, complete missing details, and finally click the Sign / Submit button to finish the process officially and securely.
Thank you for using FillFaster. See you in the next guide!