How to Add a Dynamic PDF to a Submission Link via Make.com
תוכן זה אינו זמין עדיין בשפה שלך.
Learn how to seamlessly integrate dynamic PDFs into your submission links using Make.com with this step-by-step guide.
Form Builder Setup
Section titled “Form Builder Setup”Add a New Data Field
Section titled “Add a New Data Field”Go to the form builder and add a new data field. Select “File Upload”.
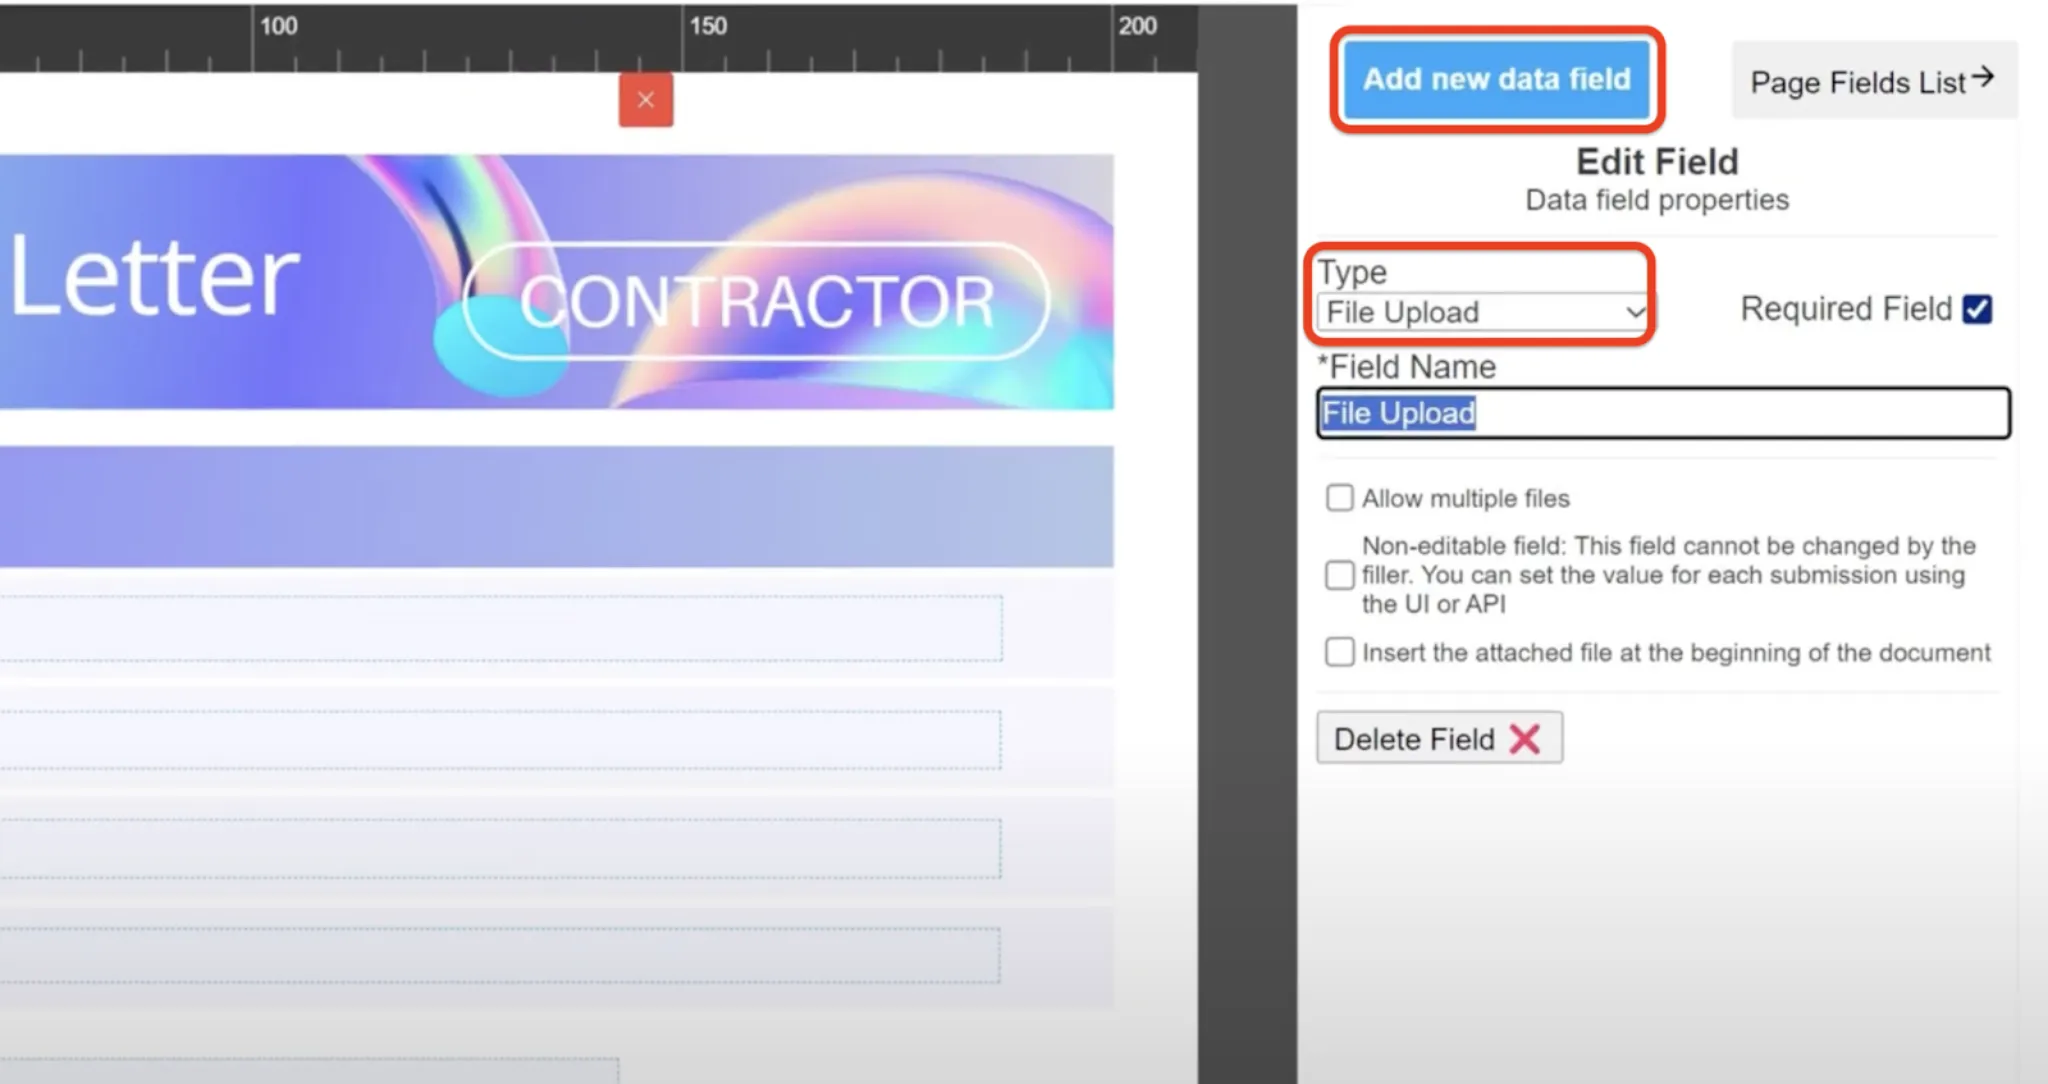
Rename the Field
Section titled “Rename the Field”Change the field name to a descriptive name, we will use it later.

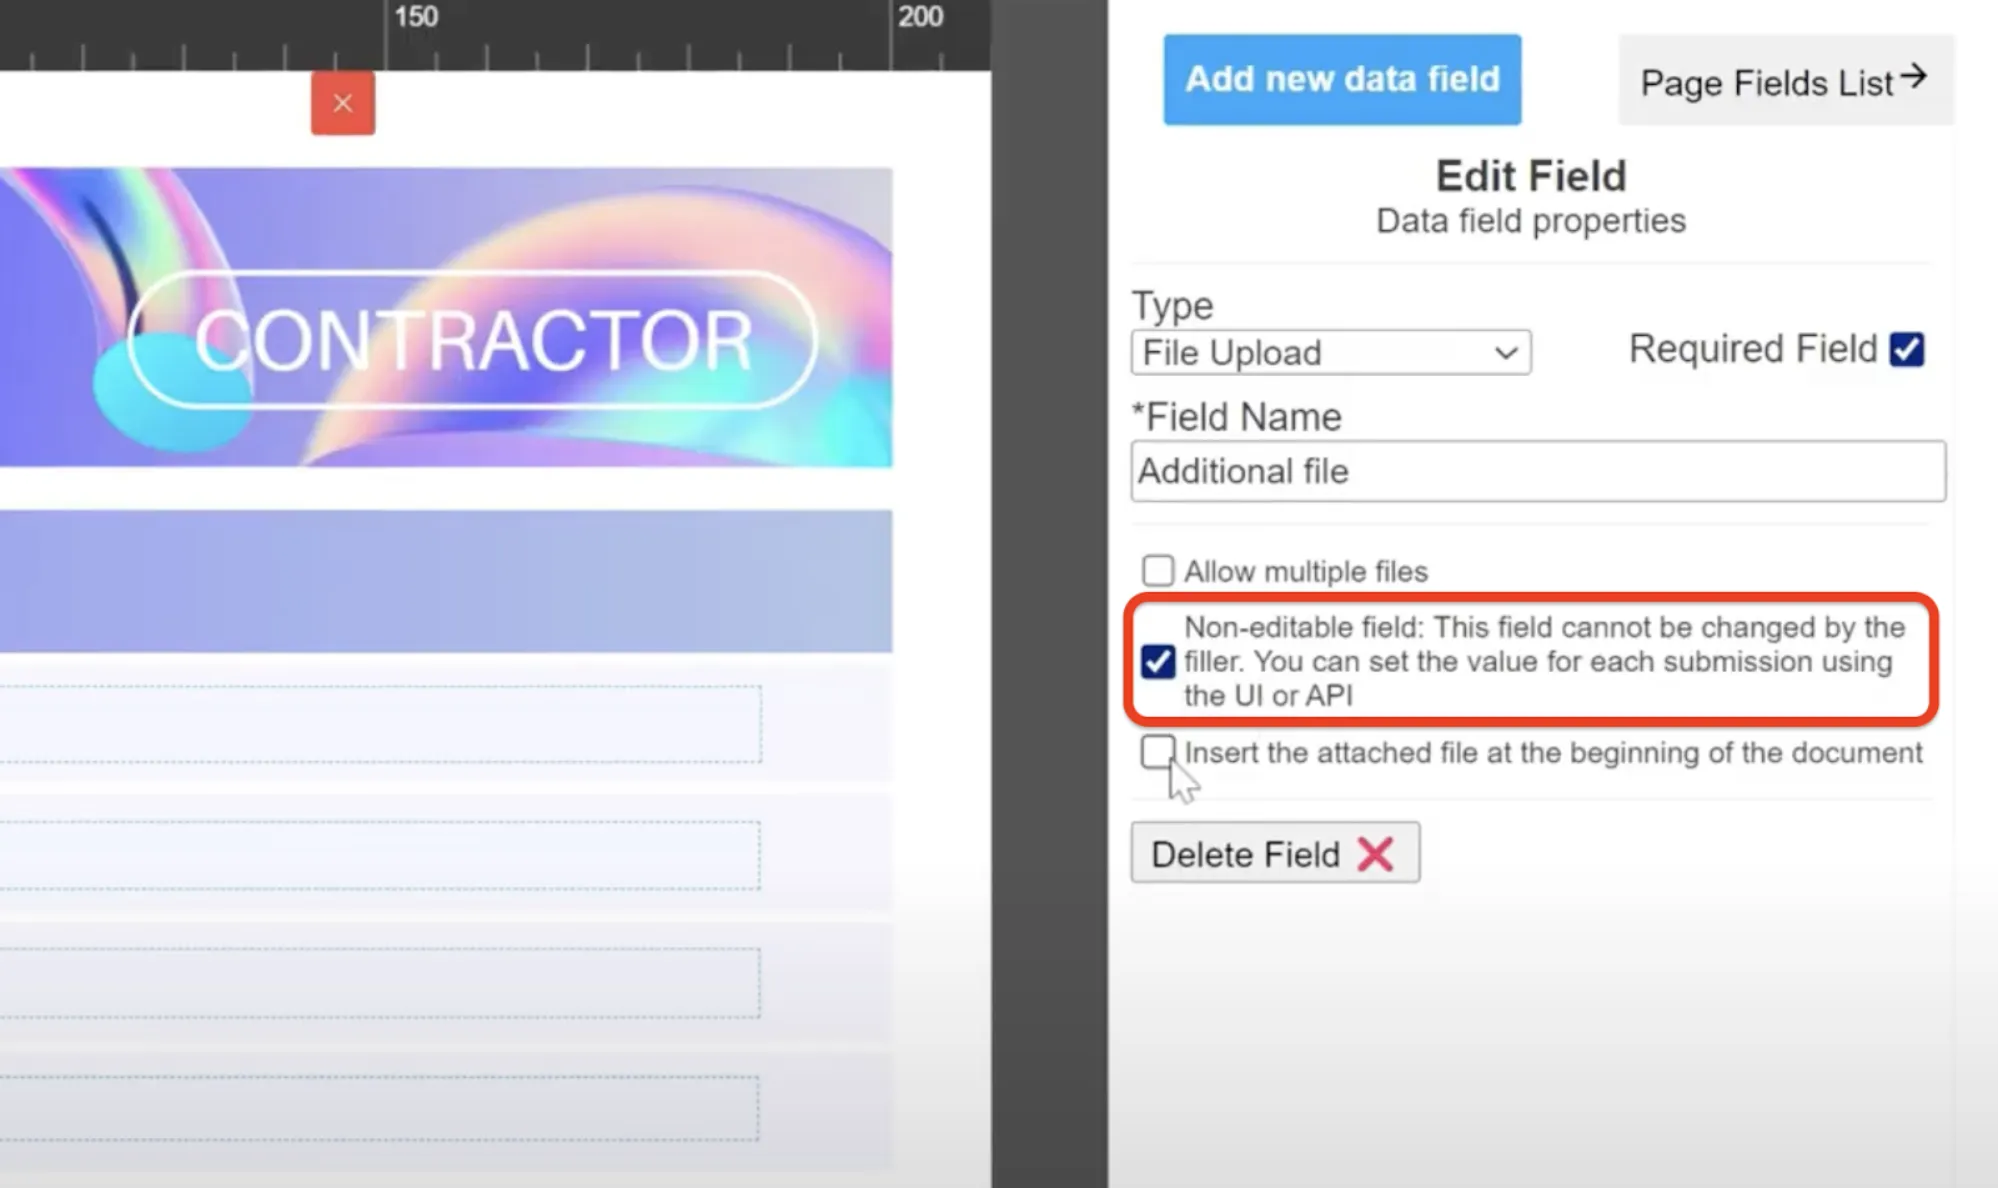
Set Field Properties
Section titled “Set Field Properties”Decide if you want the field to be non-editable or changeable by the recipient. “Non-editable” means the customer cannot change it, which is useful for automations.
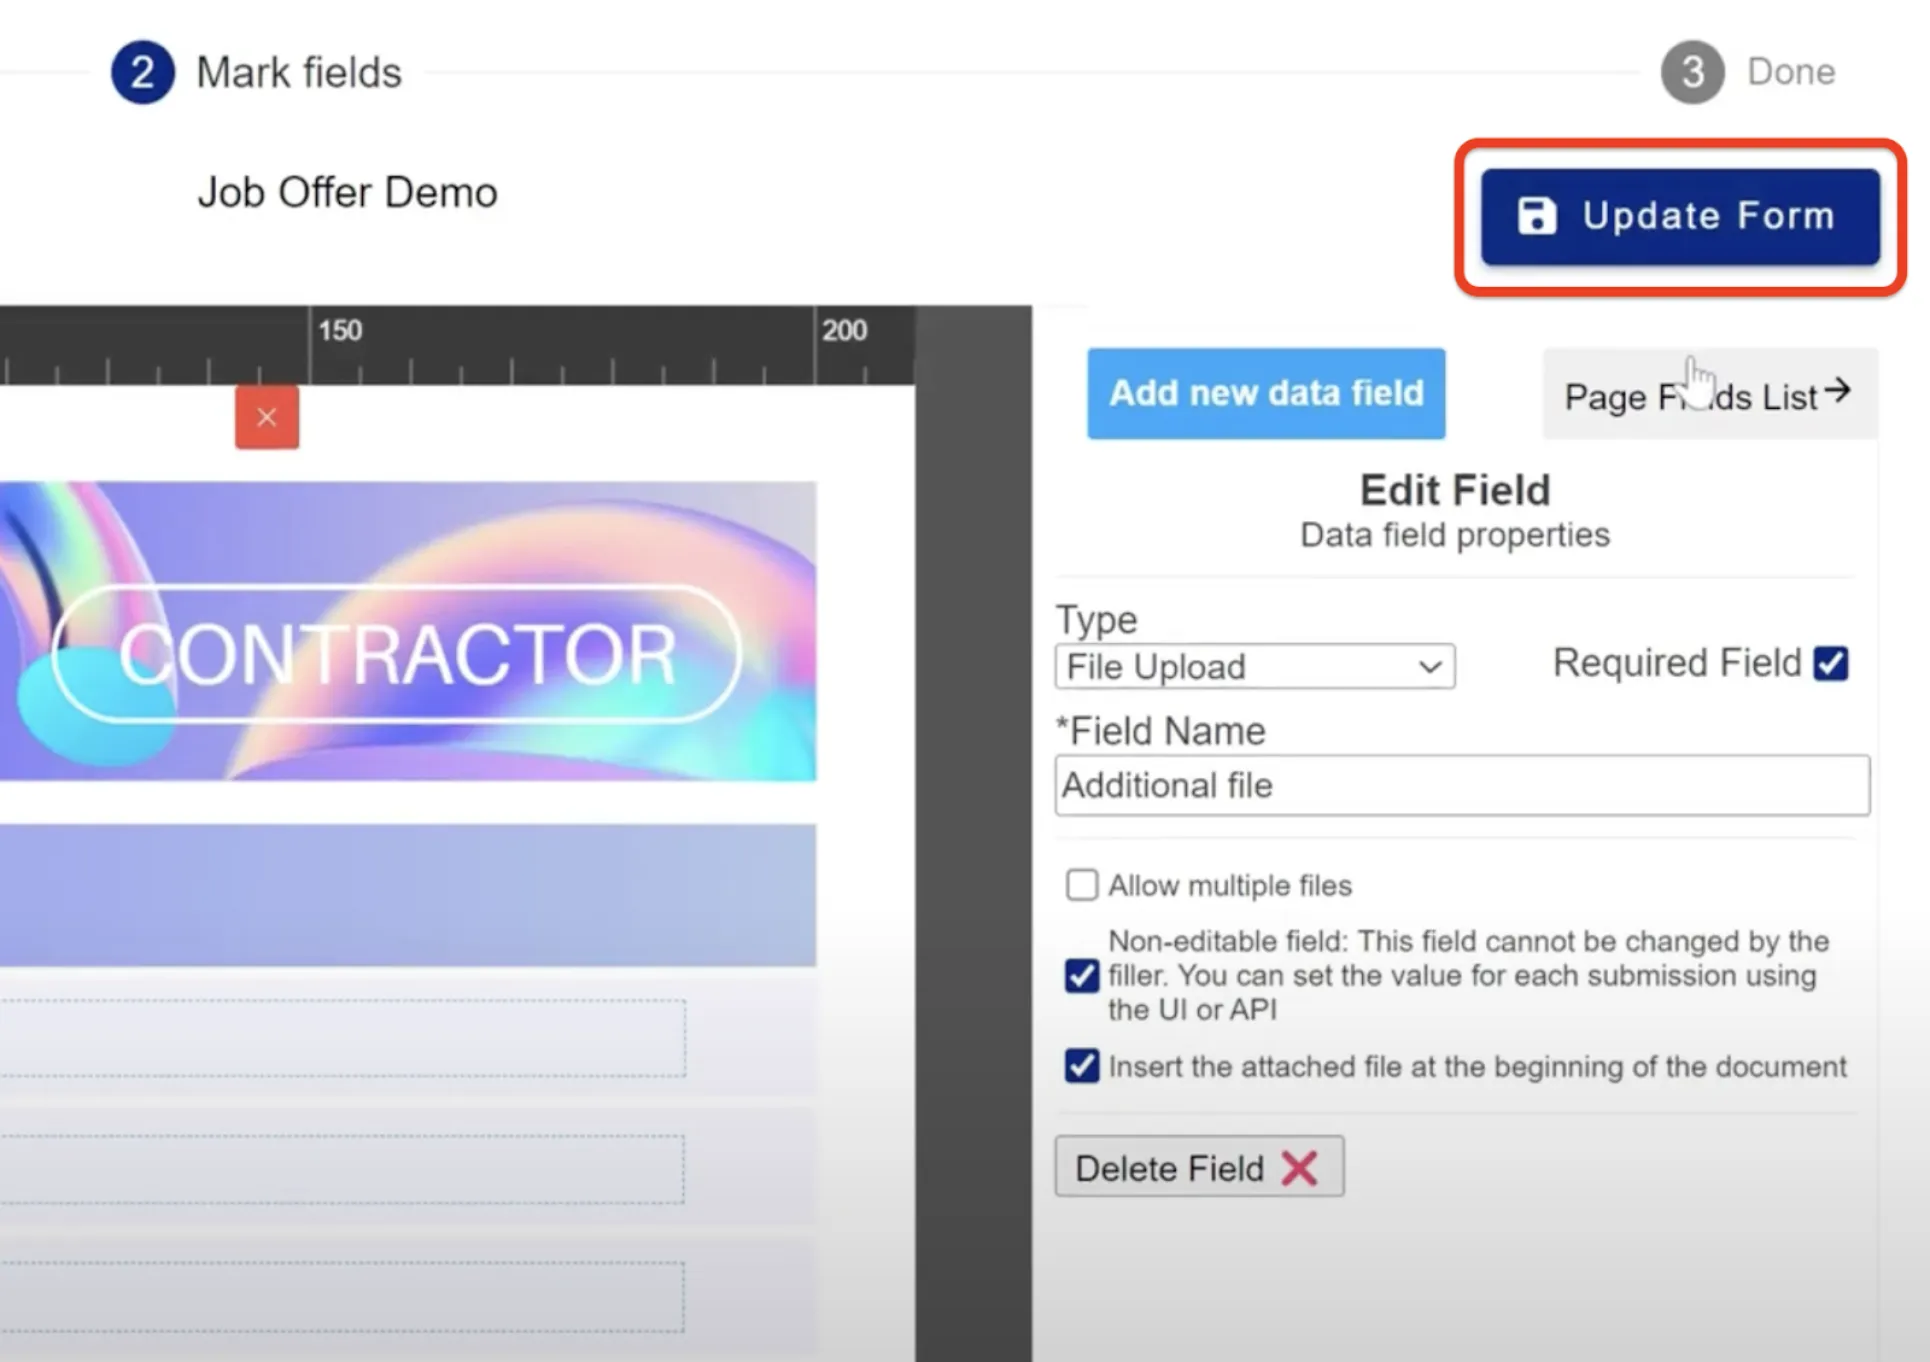
Position of the PDF
Section titled “Position of the PDF”Choose whether to place the PDF at the beginning or the end of the temple document. By default, it is placed at the end. For this example, we’ll place it at the beginning.

Save and Update
Section titled “Save and Update”Save and update the form.
Make.com Configuration
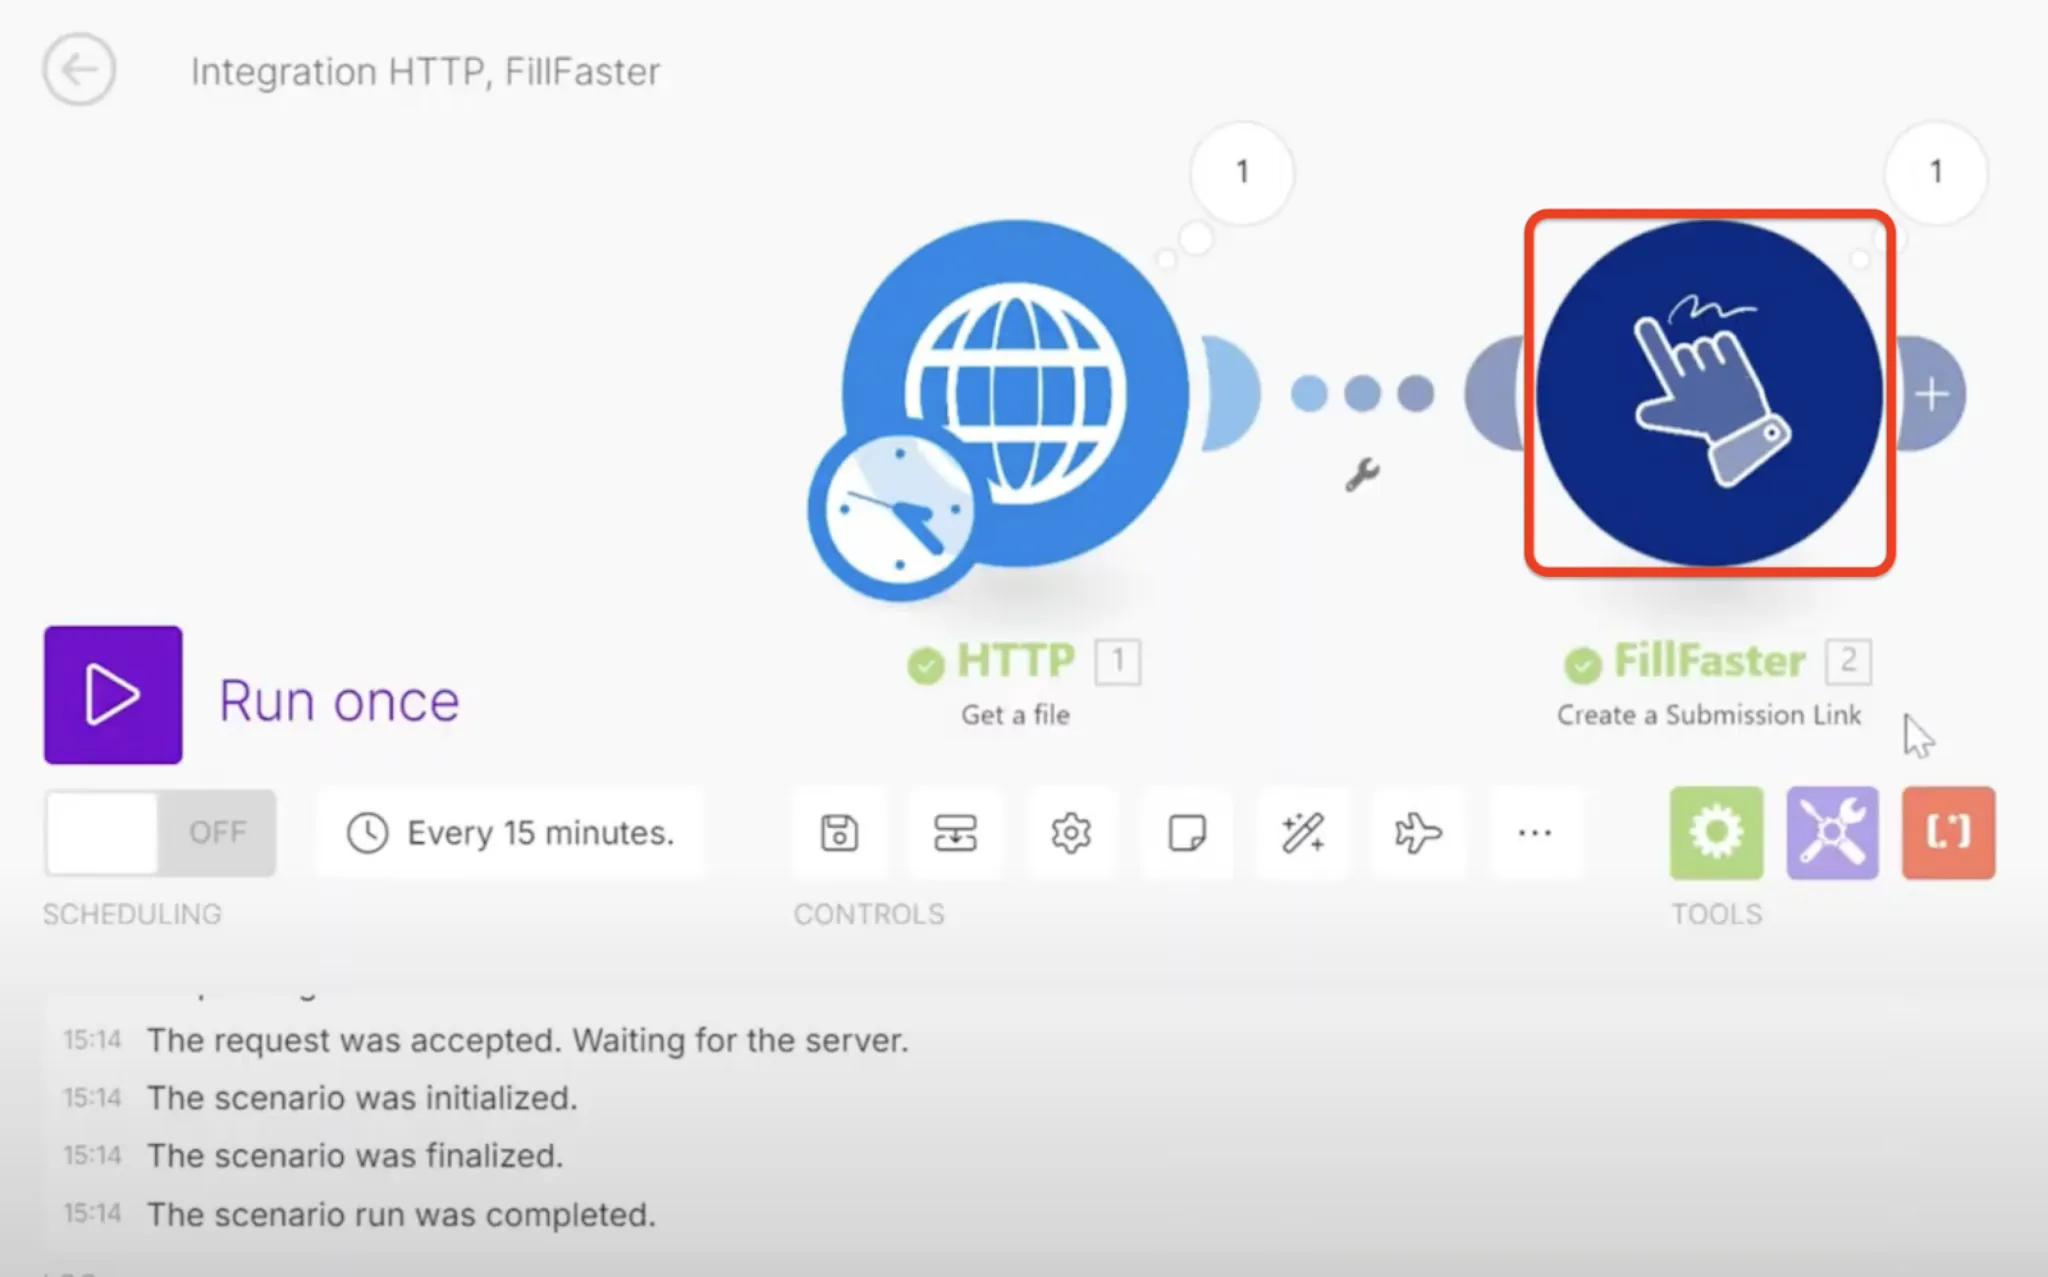
Section titled “Make.com Configuration”Create a Submission Link
Section titled “Create a Submission Link”In the “create a submission link” module, select the form and fill in the necessary data.
Advanced Settings
Section titled “Advanced Settings”Toggle on advanced settings.
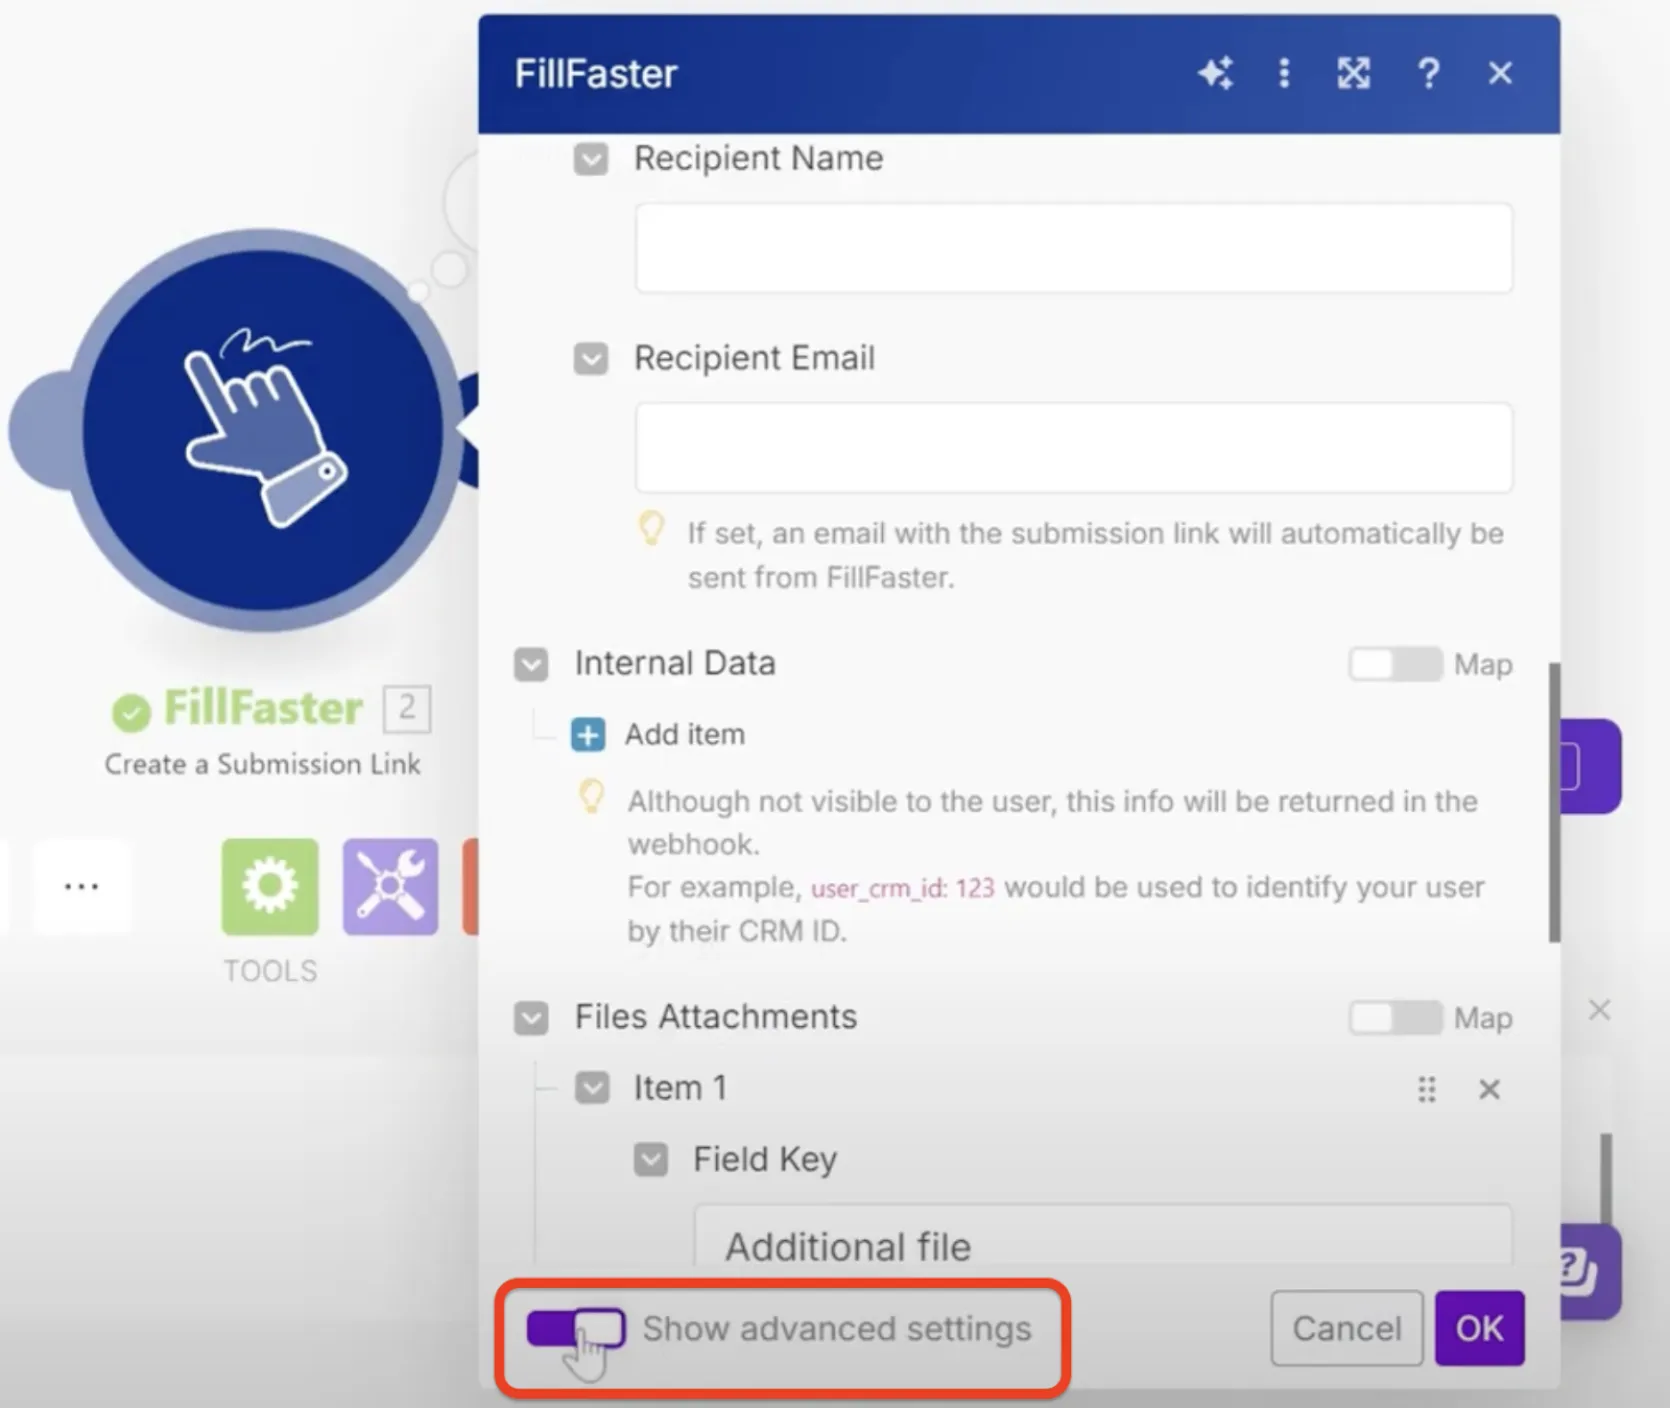
File Attachments
Section titled “File Attachments”Manually add the field key of the “File Upload” field. Copy and paste it from your FillFaster template form.
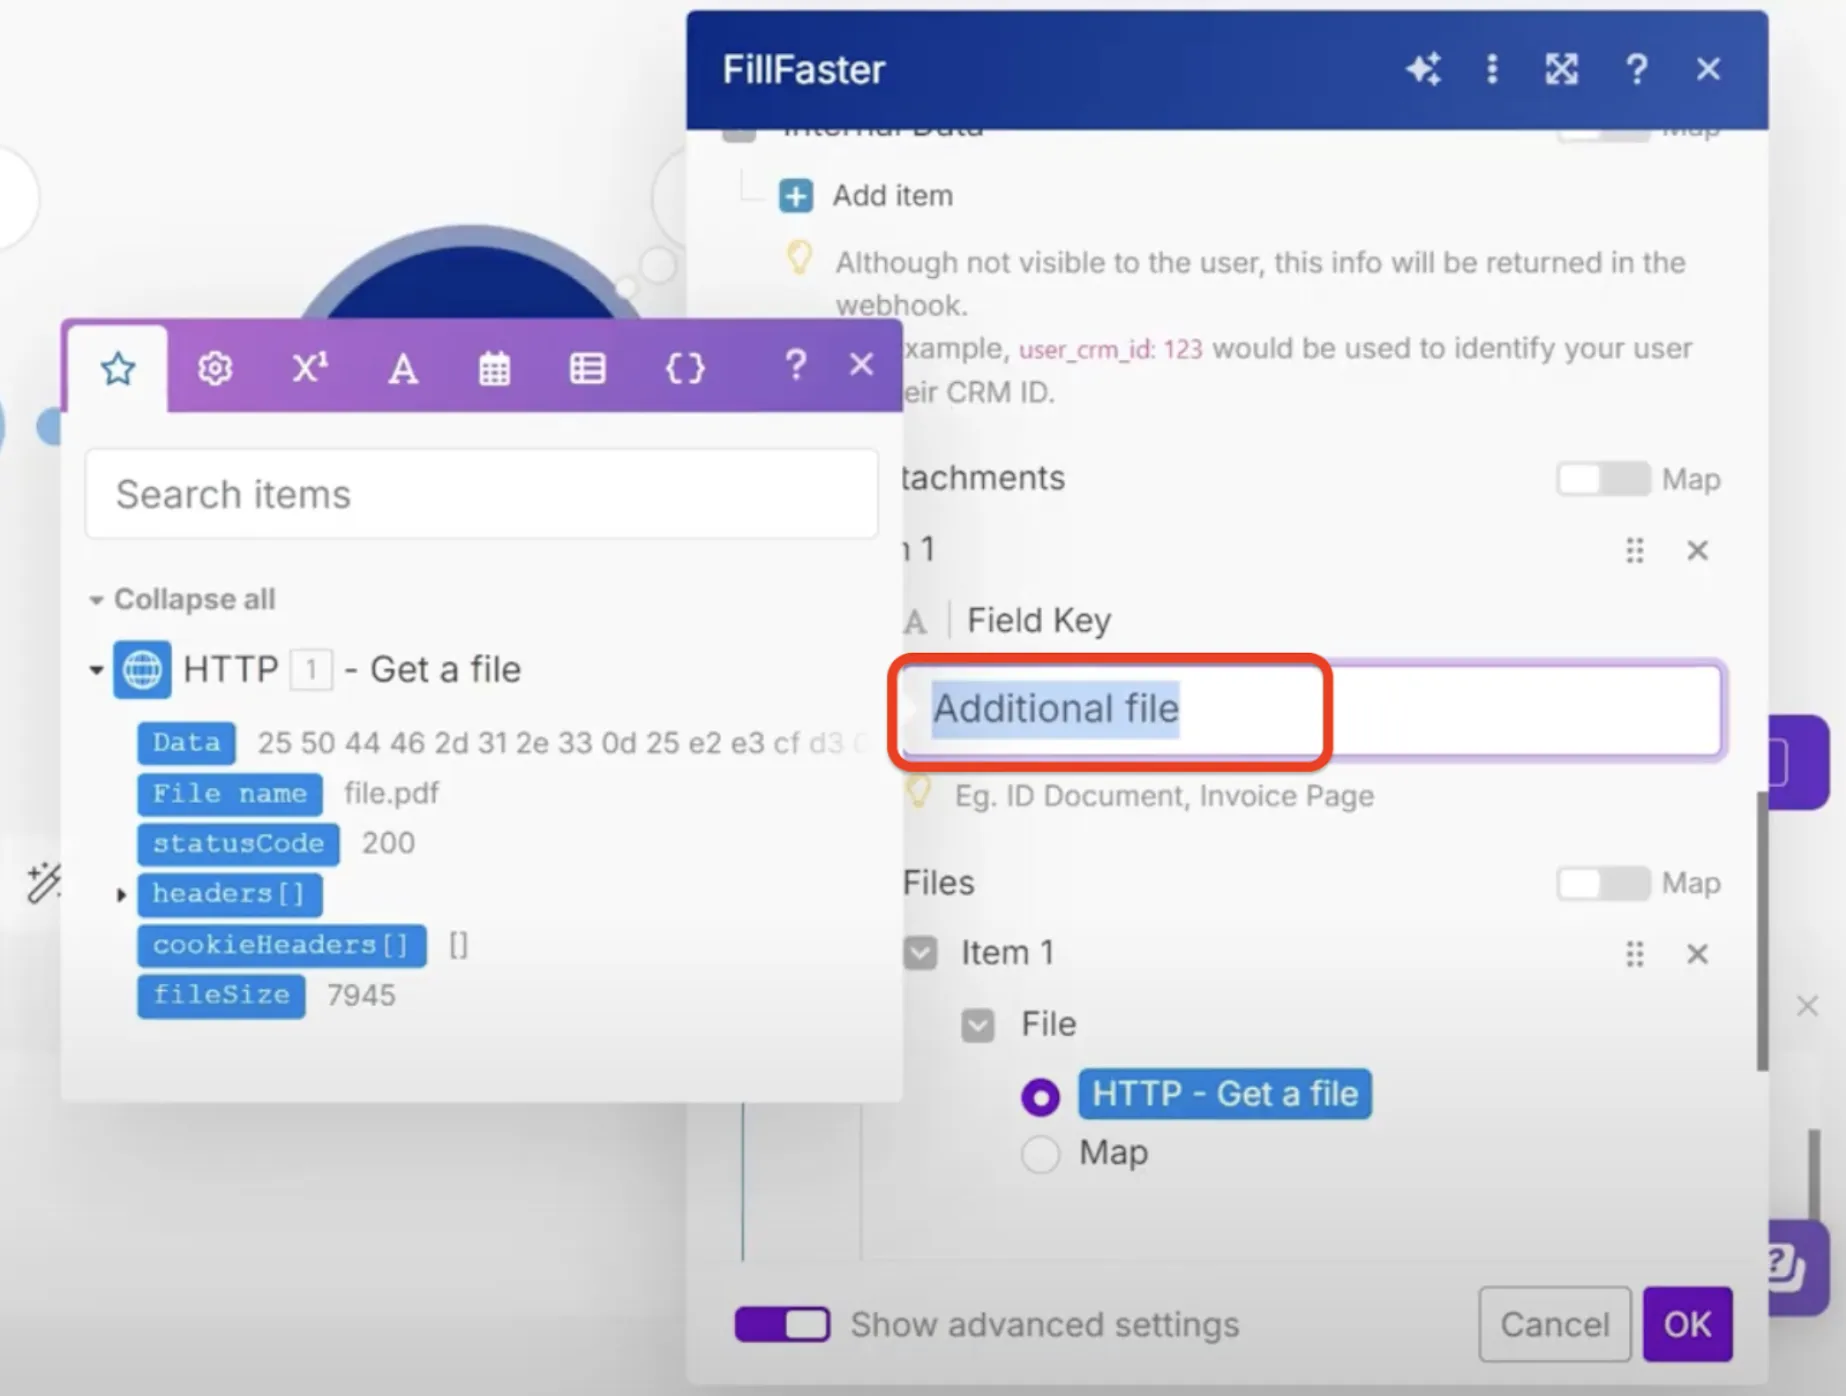
Add Files
Section titled “Add Files”You can add one or more files, such as images or PDFs. For example, a PDF from sources like Google Docs, Google Drive, file storage, and more.
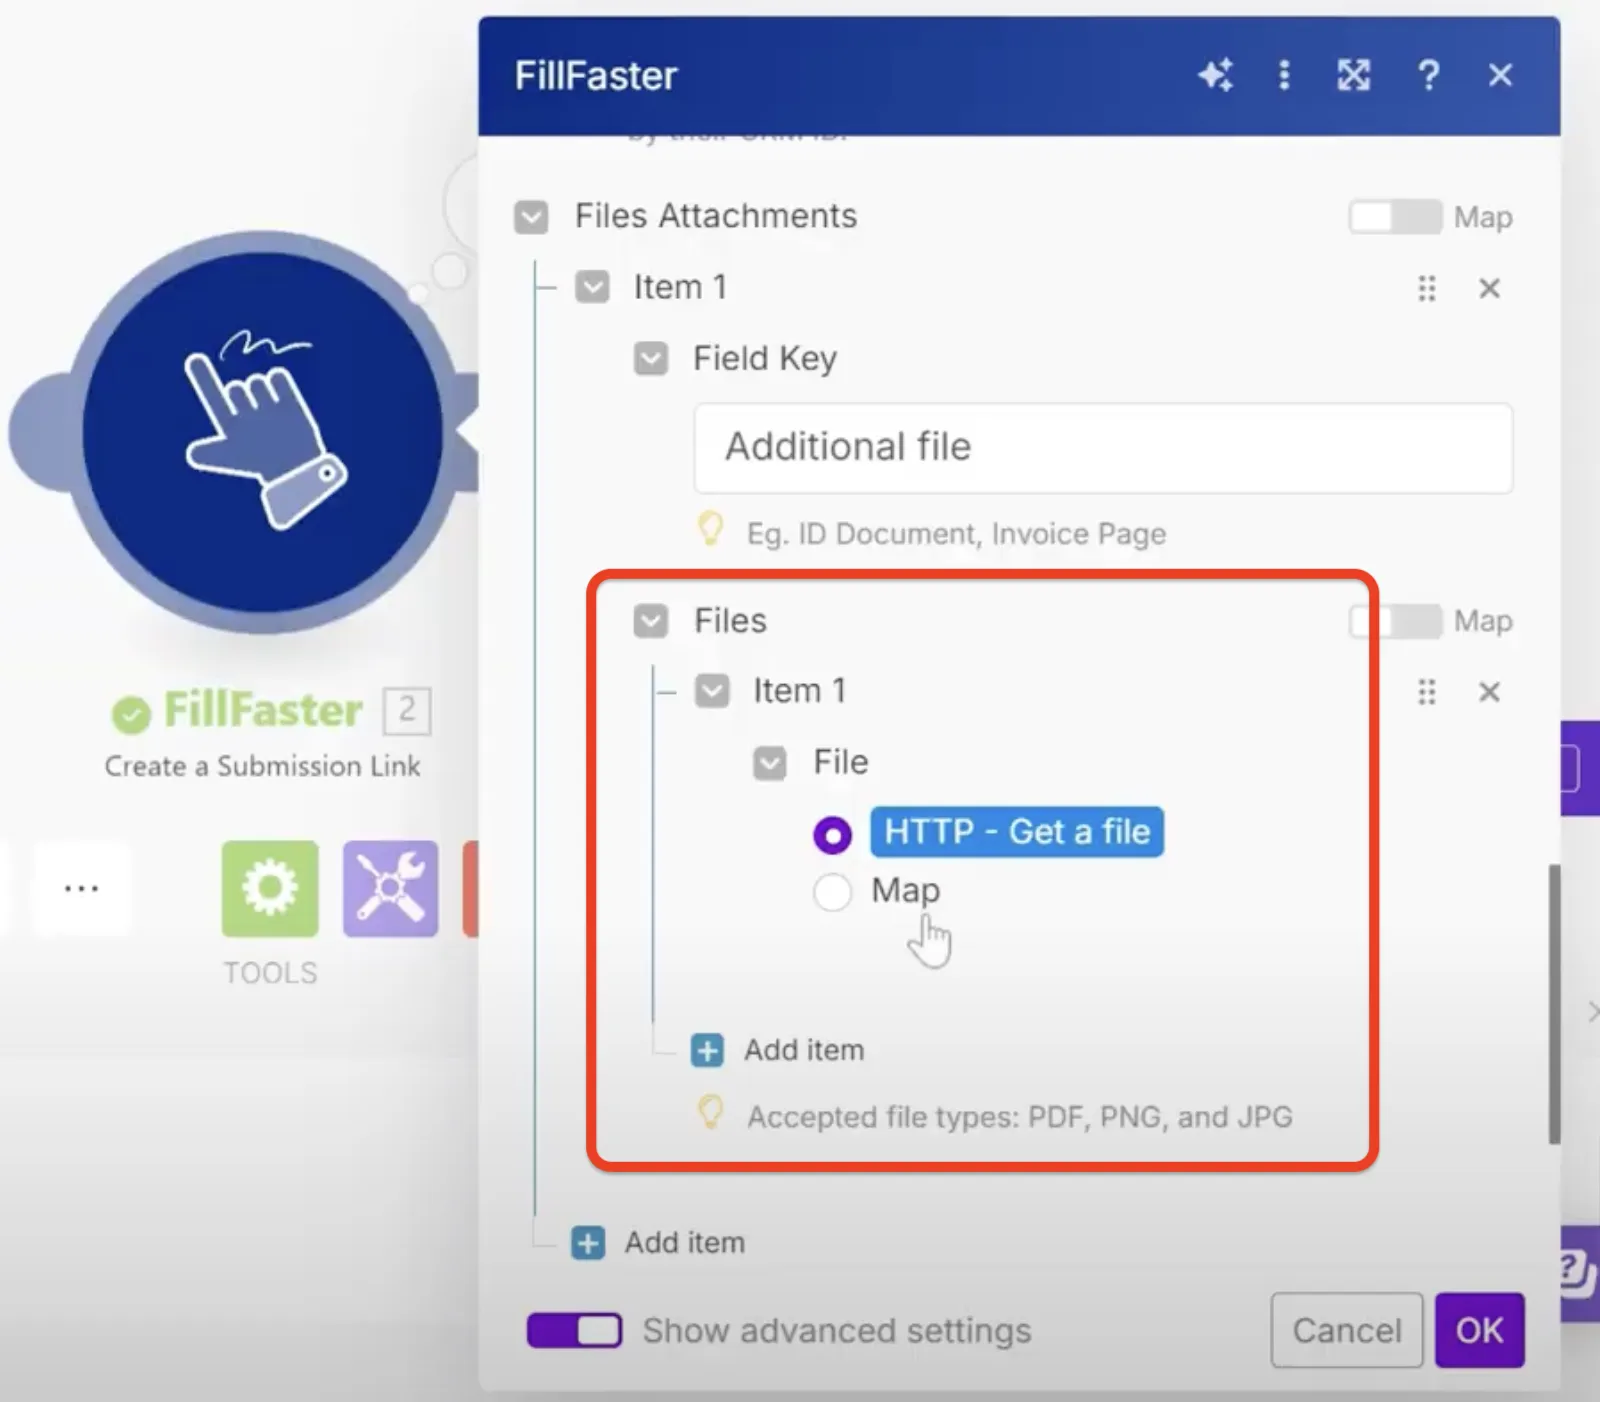
Example of getting a dynamic PDF from Google Docs:

Preview the Submission Link
Section titled “Preview the Submission Link”After creating the link, open it to preview. You’ll see that the PDF you added appears at the beginning of the document, seamlessly integrated with your form template. To the recipient, it looks like a single long document, with the dynamic PDF added seamlessly at the start.
This should help you dynamically add PDFs to your documents seamlessly!