

Multiple Signers and Signing Order
With multiple signers (also called multi-party signing, a signing workflow or sequential signing), one document is filled and signed by several people. Each signer gets a personal link by email, sees only their own fields, and everyone gets the final signed PDF when the last person signs.
What are multiple signers?
Section titled “What are multiple signers?”In the form builder, you add signers to a template (for example “Client” and “Company”) and choose which signer fills each field. When you send the document, you enter a name and email for each signer. FillFaster then:
- Emails each signer a personal link when it is their turn
- Shows each signer only their own fields. Values filled by earlier signers appear on the document, but cannot be changed
- Builds the final PDF when the last signer finishes, and emails it to every signer
This is ideal for:
- Agreements between two parties - A client signs first, then your company countersigns
- Approval flows - An employee fills a request, then a manager approves it
- Documents with a witness - The signer, then a witness, each on their own fields
Step-by-Step Guide
Section titled “Step-by-Step Guide”Step 1: Add signers to the template
Section titled “Step 1: Add signers to the template”-
Open the template in the form builder.
-
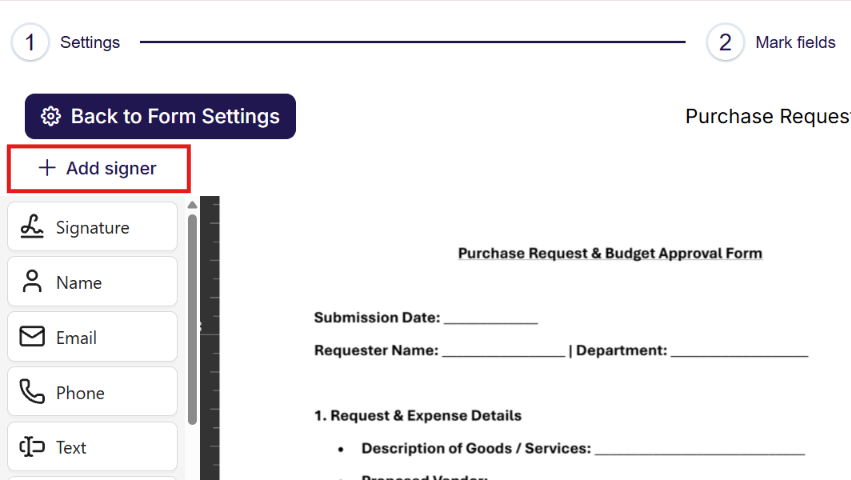
In the signers bar above the document, click Add signer. A template with one signer works exactly like a regular template. Once you add a second signer, the template becomes a multiple-signers template.
-
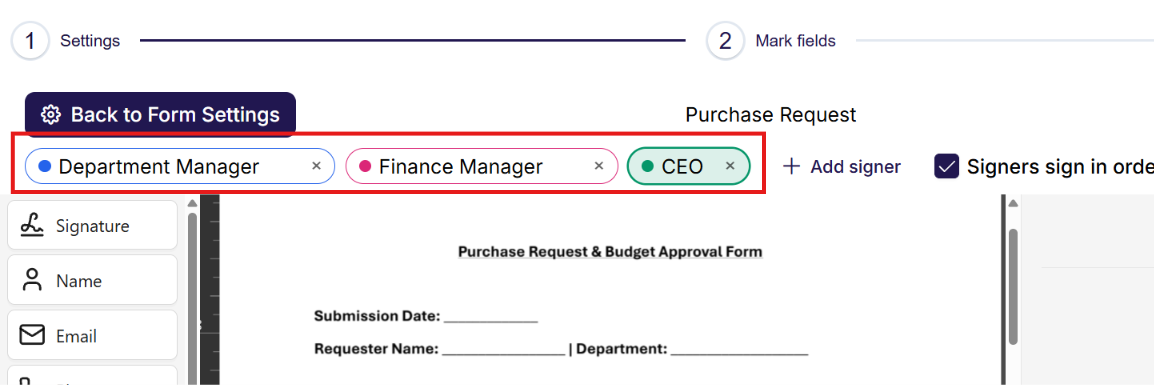
Type a new name in the signer’s name box to rename it, for example “Client” or “Company”. Each signer gets its own color, and their fields are tinted in that color on the canvas.
Step 2: Choose who fills each field
Section titled “Step 2: Choose who fills each field”-
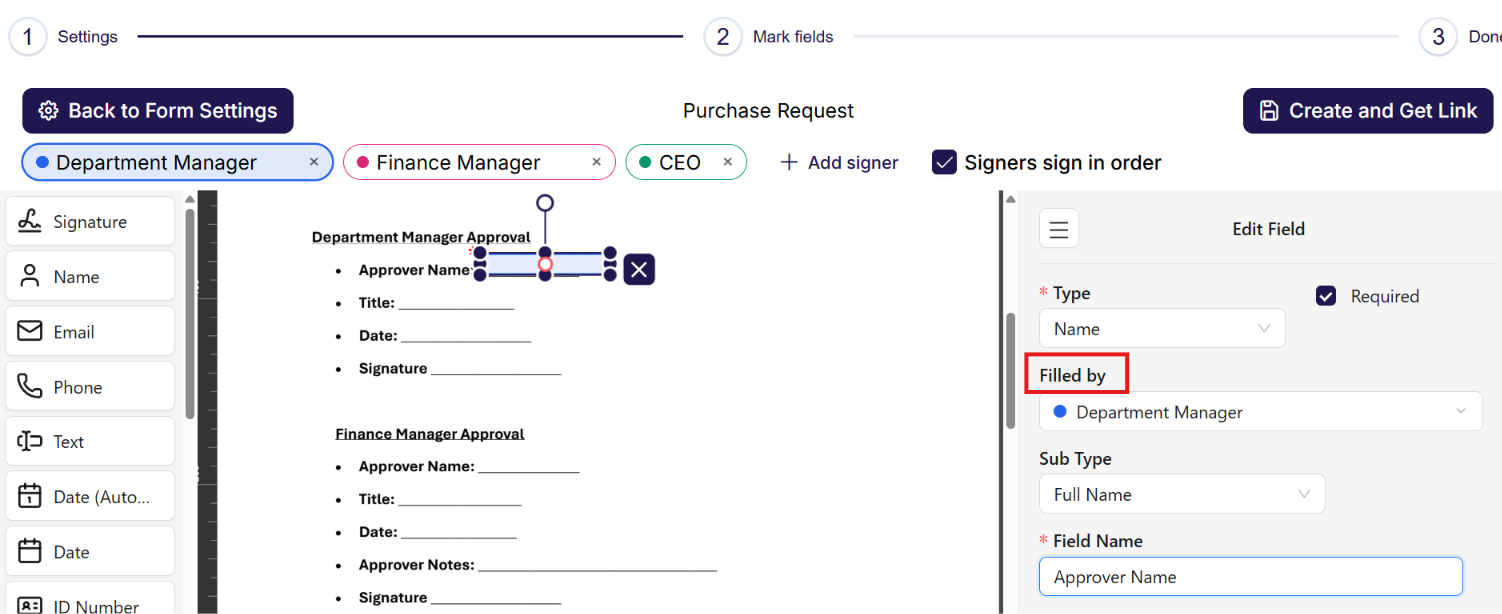
New fields go to the signer that is selected in the signers bar. Select a signer, then add their fields.
-
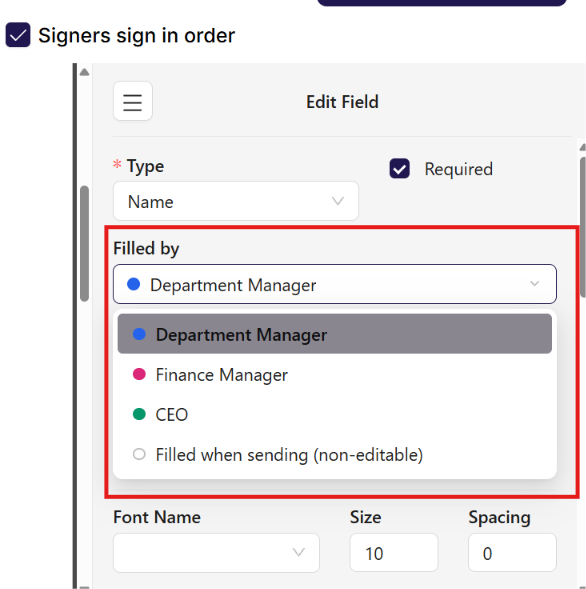
To change an existing field, select it and use Filled by at the top of the field settings. The options are:
- A signer, for example “Client”
- Filled when sending (non-editable) - You fill this field when you create the submission link, and signers cannot change it
-
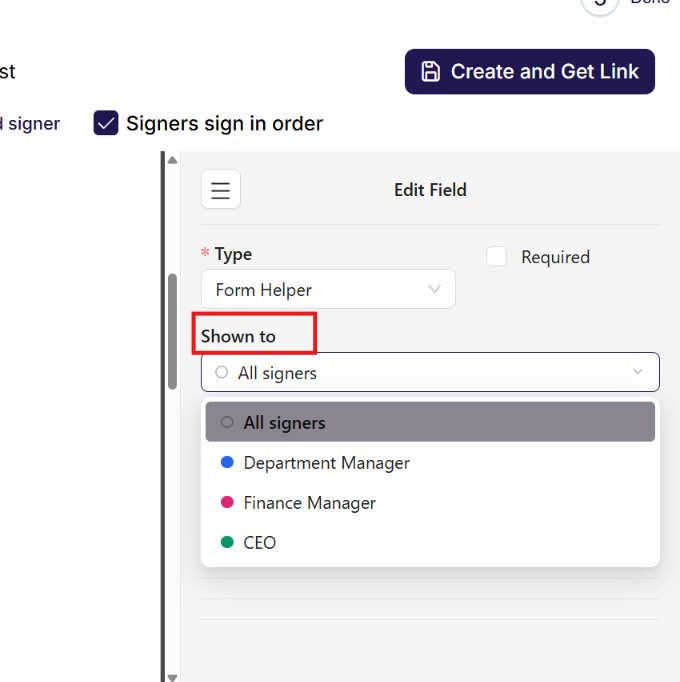
Form helper fields (such as a header, a divider or helper text) are not filled by anyone, so they show Shown to instead of Filled by. Choose one signer, or All signers so everyone sees it.
-
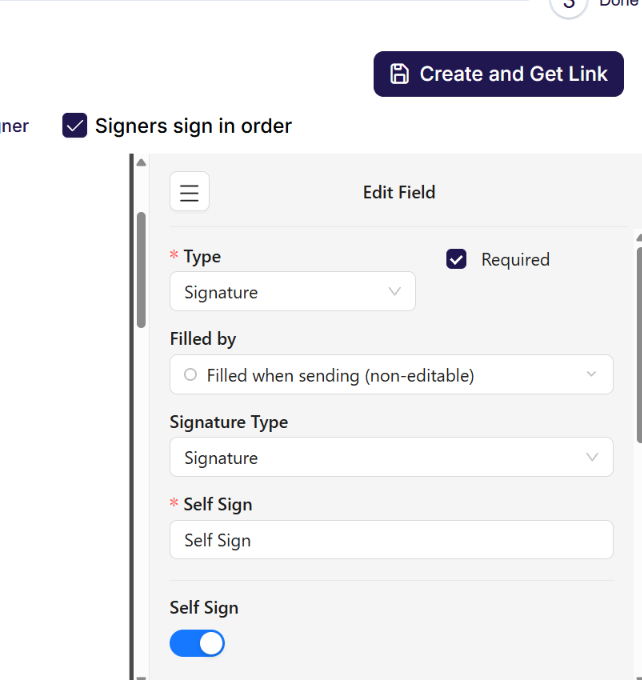
The Non-editable field switch (for a signature, Self Sign) does the same as Filled when sending (non-editable), as with one signer. Turning it on or off updates Filled by, and the other way around.
Step 3: Set the signing order
Section titled “Step 3: Set the signing order”-
Drag signers in the signers bar to change the order.
-
Turn Signers sign in order on to send the document to one signer at a time, in that order. The next signer gets their email only after the previous one signs.

-
Turn it off to send the document to all signers at the same time. Each signs their part, in any order.

Save the template.
Step 4: Send the document for signing
Section titled “Step 4: Send the document for signing”-
Open the template’s Create Submission Link screen, from the form builder or from Create Submission in the dashboard.

-
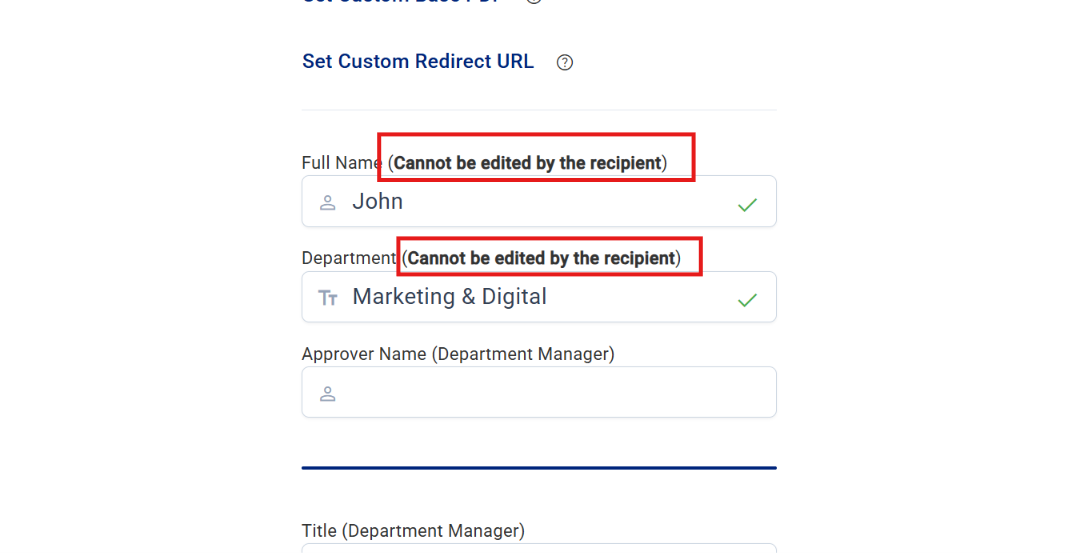
Fill in any fields marked Filled when sending (non-editable). These fields say that the recipient cannot edit them.
-
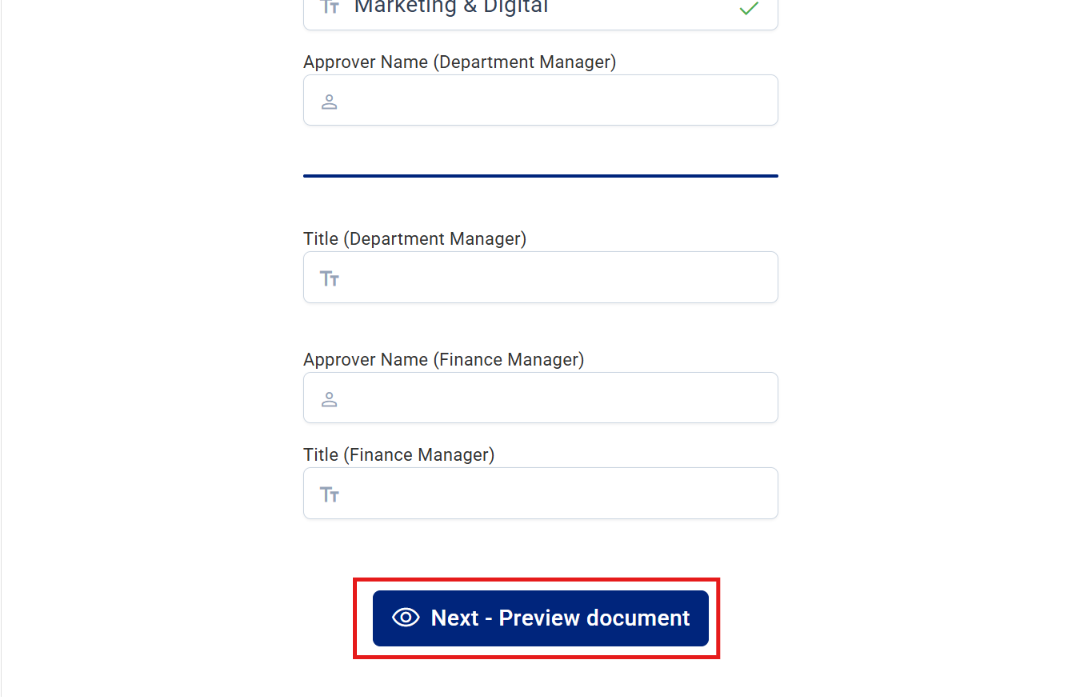
You can also prefill signers’ fields. Each of these fields shows the signer’s name. Then click Next - Preview document.
-
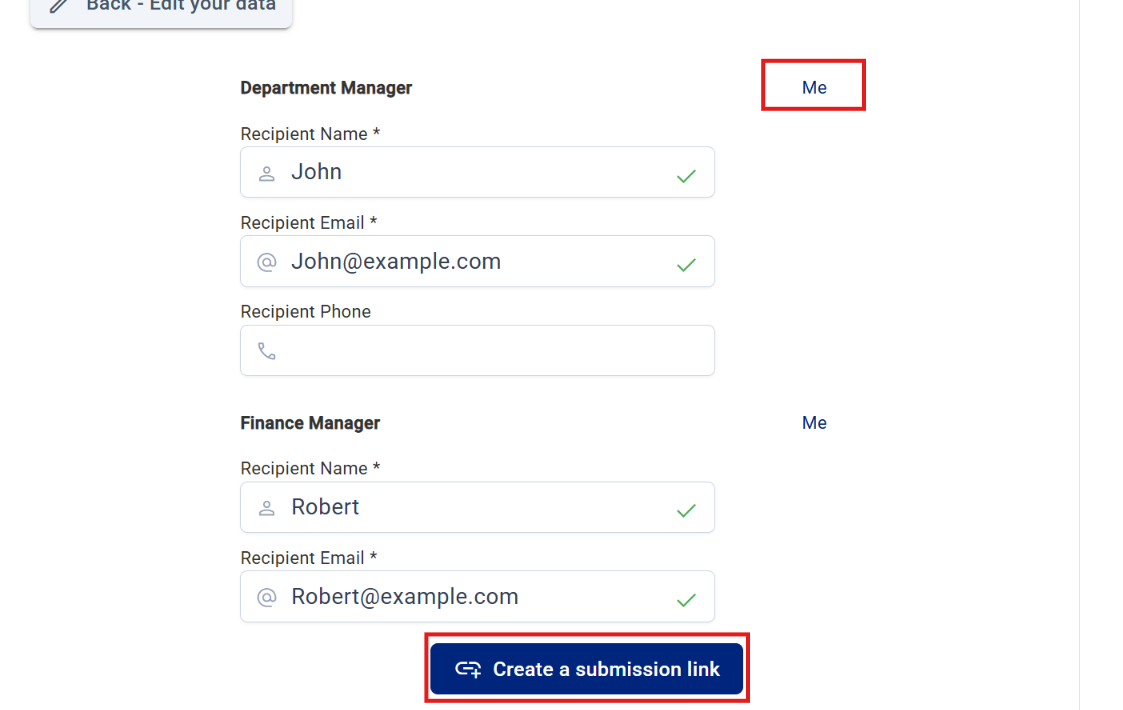
For each signer, enter a name and email. A phone number is optional. If you are one of the signers, click Me next to that signer to fill in your own name and email.
-
Create the link.
Each signer gets an email with a personal link when it is their turn. The confirmation screen also lists every signer’s personal link, with Copy and WhatsApp buttons, in case you want to share a link yourself.
Step 5: What each signer sees
Section titled “Step 5: What each signer sees”-
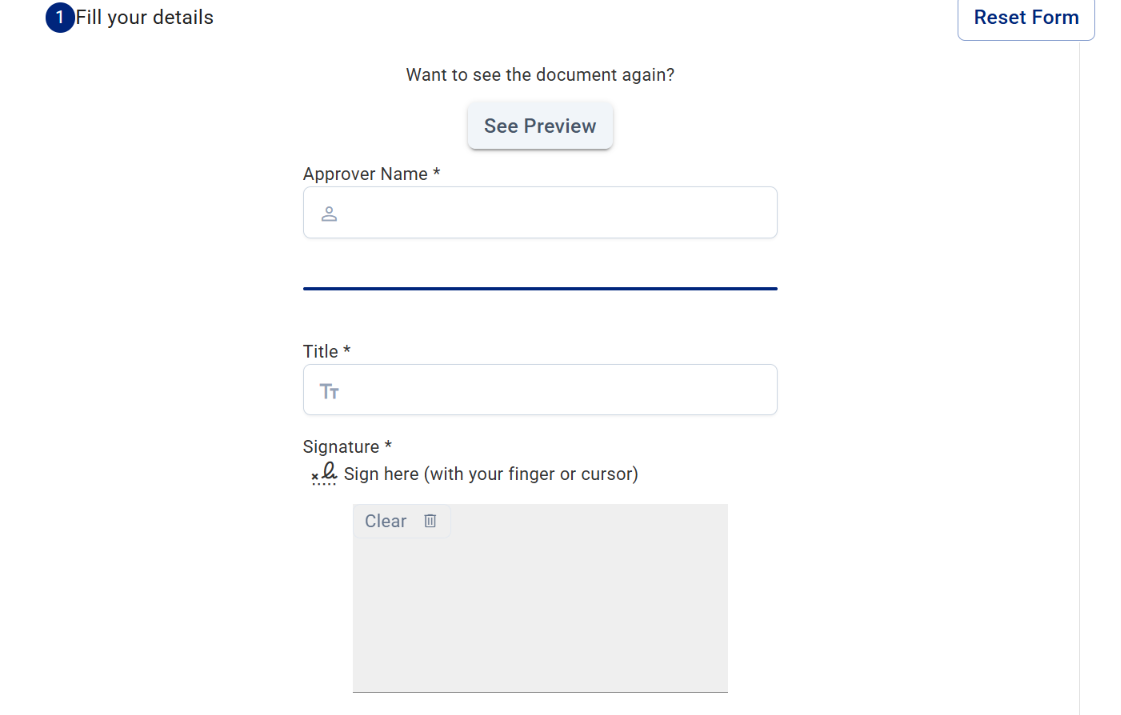
The signer opens their personal link and fills only their own fields.
-
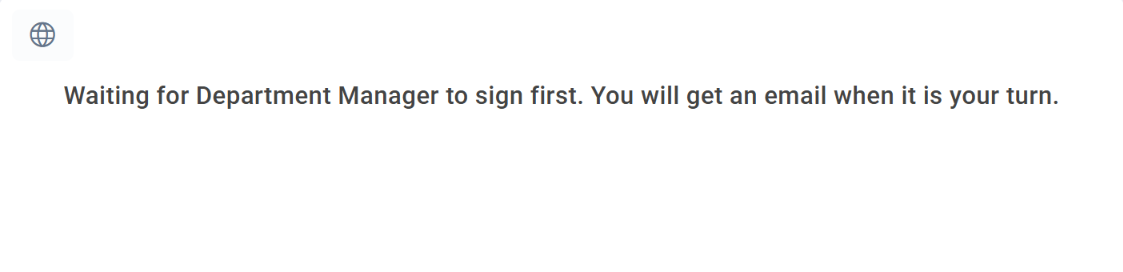
If a signer opens the link before their turn, they see a message saying who needs to sign first. They get an email when it is their turn.
-
After signing, a signer who is not the last one sees “Signed! We will email you the final document when everyone has signed.”
-
When the last signer signs, every signer gets the final PDF by email. You get it according to the form’s settings, such as your notification email or webhook.
If Enable Save Submission is on, each signer can save their progress and continue later from the same personal link.
Track who has signed
Section titled “Track who has signed”In the dashboard, open the template’s submissions list:
-
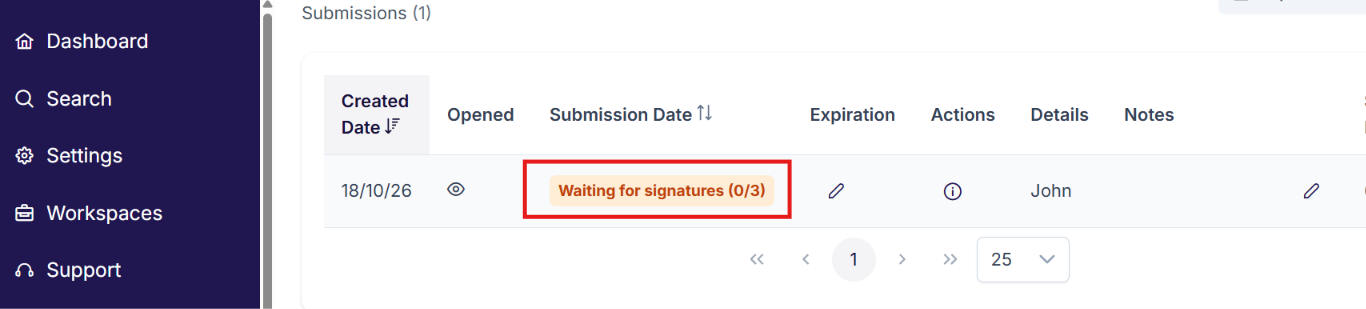
A submission that is still waiting shows Waiting for signatures (1/3), meaning 1 of 3 signers has signed.
-
Click it to open the submission page. It shows:
- Every signer in signing order, with a status: Signed, Opened, Waiting to sign or Not sent yet, and the time
- Their turn next to the signer who needs to act now
- Copy personal link for each signer who has not signed yet, in case an email was lost
- The activity of the submission: created, sent, opened and signed, with times and IP addresses
- The signed PDF, once everyone has signed
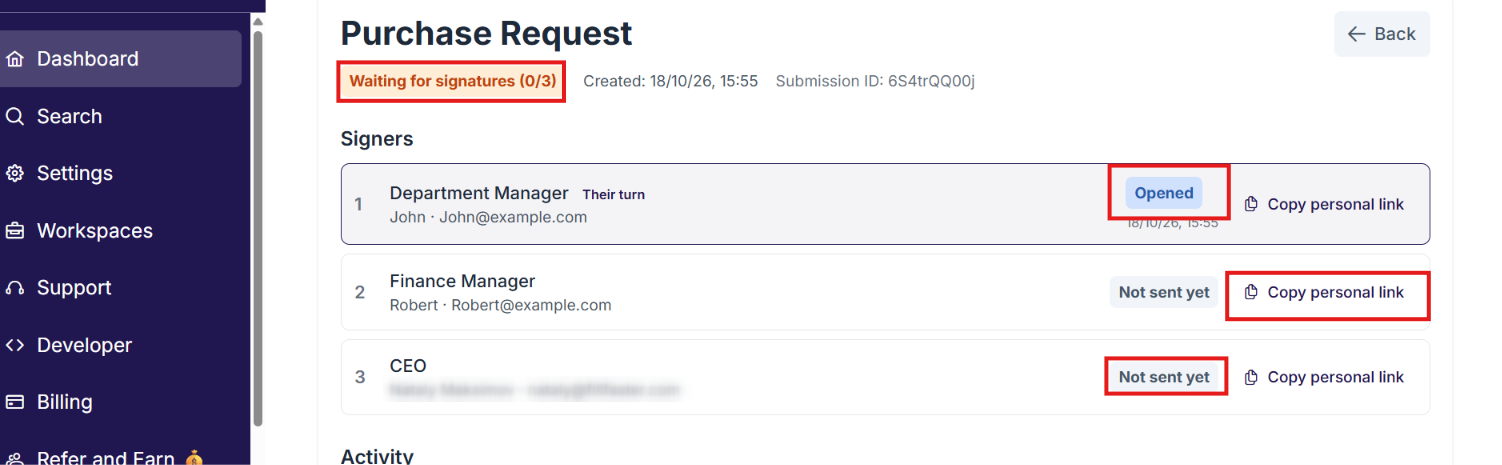
The submission page is available for every submission, including single-signer ones.
Send to multiple signers via API
Section titled “Send to multiple signers via API”When you create a submission with the API (Create a submission, POST /v1/createSubmission) for a template with 2 or more signers, send a recipients array with one entry per signer, in signing order:
{ "fid": "your-form-id", "prefill_data": { "Price": "1200" }, "recipients": [ { "role_id": "r1", "name": "Dana Levi", "email": "dana@example.com", "prefill_data": { "Full name": "Dana Levi" } }, { "role_id": "r2", "name": "Avi Cohen", "email": "avi@example.com", "phone": "+972501234567", "prefill_data": { "Full name": "Avi Cohen" } } ]}- Call Get form field schema (
POST /v1/getFormFields) first. For a template with 2 or more signers it returnsfields(the fields filled when sending) androles: each signer’srole_id,name,orderand ownfields. role_idis optional. Without it, recipients are matched to the signers by their position in the signing order. If you send an unknownrole_id, the error lists the template’s role ids.- Prefill per signer: put values for a signer’s fields in that recipient’s
prefill_data, keyed by the field name from that signer’sfields. The same field name, for example “Full name”, can get a different value for each signer. The top-levelprefill_datais only for the fields filled when sending. - The response includes a
recipientsarray with each signer’s status and personallink. - Emails are always sent to the signers, so
send_emailis not needed. - Get submission status (
GET /v1/getSubmissionStatus/{sid}) also returnsrecipientswith each signer’s status. - Get submission activity (
GET /v1/submission/activity/{sid}) returns the signers, the signing progress and the full activity timeline of the submission. - To get notified each time a signer finishes their part, choose the Signer Completed (multiple signers) event in the template’s webhook settings in the form builder, or subscribe to
recipient_completedthrough the API. The webhook includes the personal links of the signers who still have to sign. Thesubmittedevent is sent once, after the last signer.
For full request and response details, see the API reference.
Best Practice Tips
Section titled “Best Practice Tips”- Name signers by role, not by person - “Client” and “Company” work for every submission you send from the template. The person’s details are entered when you send.
- Make fields you know in advance non-editable - For example a price or a contract number, so no signer can change them.
- Use the signing order for approvals - With Signers sign in order on, the approver only gets the document after the first signer finishes.
- Check your integrations before adding a second signer - Update any Make.com, monday.com or API flow that creates submissions for the template.
Frequently Asked Questions
Section titled “Frequently Asked Questions”How do I send a document for two people (or more) to sign?
Section titled “How do I send a document for two people (or more) to sign?”Add a signer for each person in the template (Step 1), choose who fills each field (Step 2), then send it with a name and email for each signer (Step 4). Each person signs on their own personal link, and everyone gets the final signed PDF.
Can my company countersign after the client signs?
Section titled “Can my company countersign after the client signs?”Yes. Add two signers, for example “Client” and “Company”, put “Client” first and turn on Signers sign in order. The company gets the document only after the client signs.
Can I be one of the signers?
Section titled “Can I be one of the signers?”Yes. Click Me next to a signer when you send the document. You get a personal link by email like everyone else.
Can I still share the general template link?
Section titled “Can I still share the general template link?”No. The general template link is not available for templates with 2 or more signers, because each signer opens their own personal link. The Copy Link option is hidden in the dashboard. To use the template, create a submission with Create Submission.
Does every signer need an email address?
Section titled “Does every signer need an email address?”Yes. Every signer needs a name and a valid email, because FillFaster emails each signer their personal link and the final PDF.
What happens if a signer loses the email?
Section titled “What happens if a signer loses the email?”Open the submission page in the dashboard and click Copy personal link next to that signer. Then send the link to them yourself.
Does the audit trail include every signer?
Section titled “Does the audit trail include every signer?”Yes. When the audit trail is on for the form, the final PDF’s audit page lists every signer, and when each one received, opened and signed the document.
Troubleshooting
Section titled “Troubleshooting”Issue: A signer sees “Please open this document from the personal link that was sent to you by email”
Section titled “Issue: A signer sees “Please open this document from the personal link that was sent to you by email””Solution: The signer opened a link without their personal code, for example a link copied from somewhere else. Copy their personal link from the submission page in the dashboard and send it to them.
Issue: A signer sees “Waiting for … to sign first”
Section titled “Issue: A signer sees “Waiting for … to sign first””Solution: It is not their turn yet, because Signers sign in order is on. They get an email when the previous signer finishes. The submission page in the dashboard shows whose turn it is.
Issue: Creating a submission through the API returns an error about recipients
Section titled “Issue: Creating a submission through the API returns an error about recipients”Solution: The template has 2 or more signers, so the request must include a recipients array with exactly one entry per signer, each with a valid email.
Summary
Section titled “Summary”Multiple signers let you send one document to several people, in the order you choose. Set up the signers and their fields once in the template, enter the signers’ details when you send, and follow the progress in the dashboard until everyone has signed.