Set Custom Email for Signed Documents
This guide shows how to send signed documents to a different email address than the one registered to your FillFaster account, using the “Advanced Settings” menu.
When to Use This Setting
Section titled “When to Use This Setting”This setting is useful when:
- You’re working with a team and want documents of specific form to be sent to a specific email address
- You want to separate your account email from the email that receives documents
- You want to get the signed document to multiple email addresses
- You have another setting configured (like a webhook for automation) but still want to receive an email notification in addition
Configuration Steps
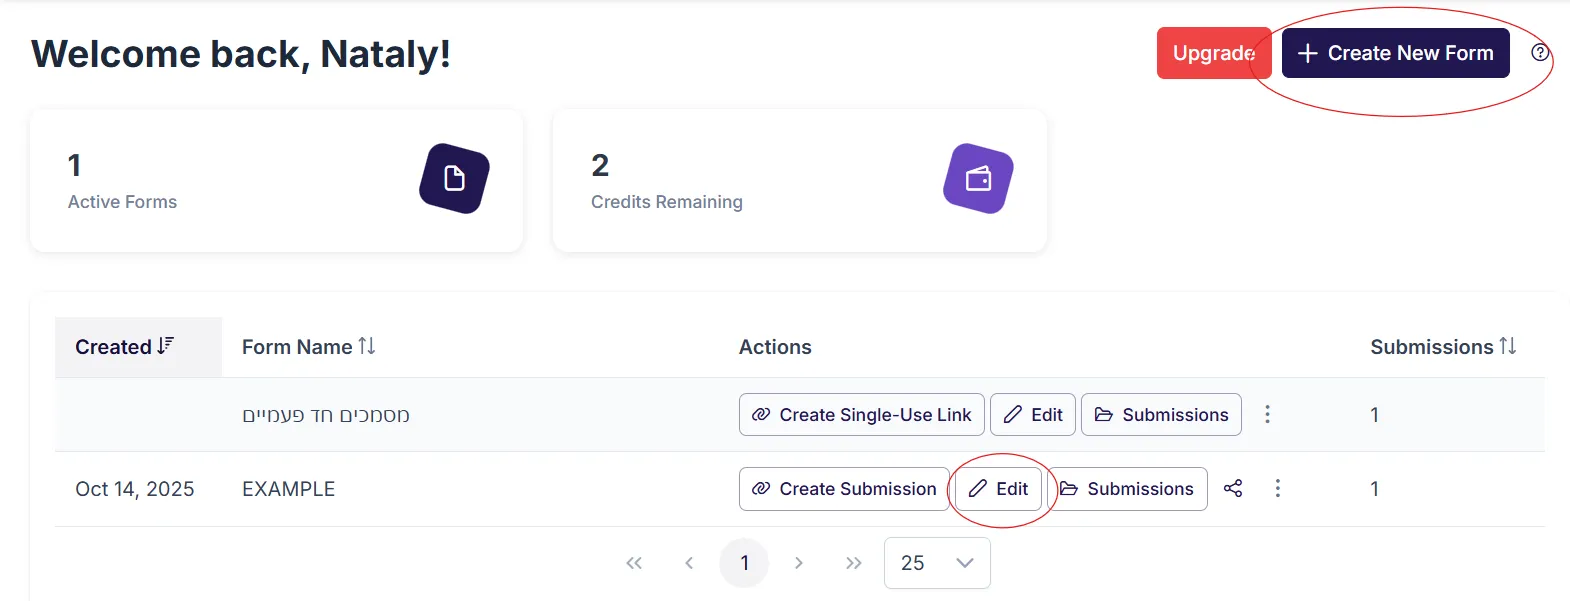
Section titled “Configuration Steps”Step 1: Access File Editing
Section titled “Step 1: Access File Editing”Log into the FillFaster dashboard and choose whether to edit an existing file or create a new one.
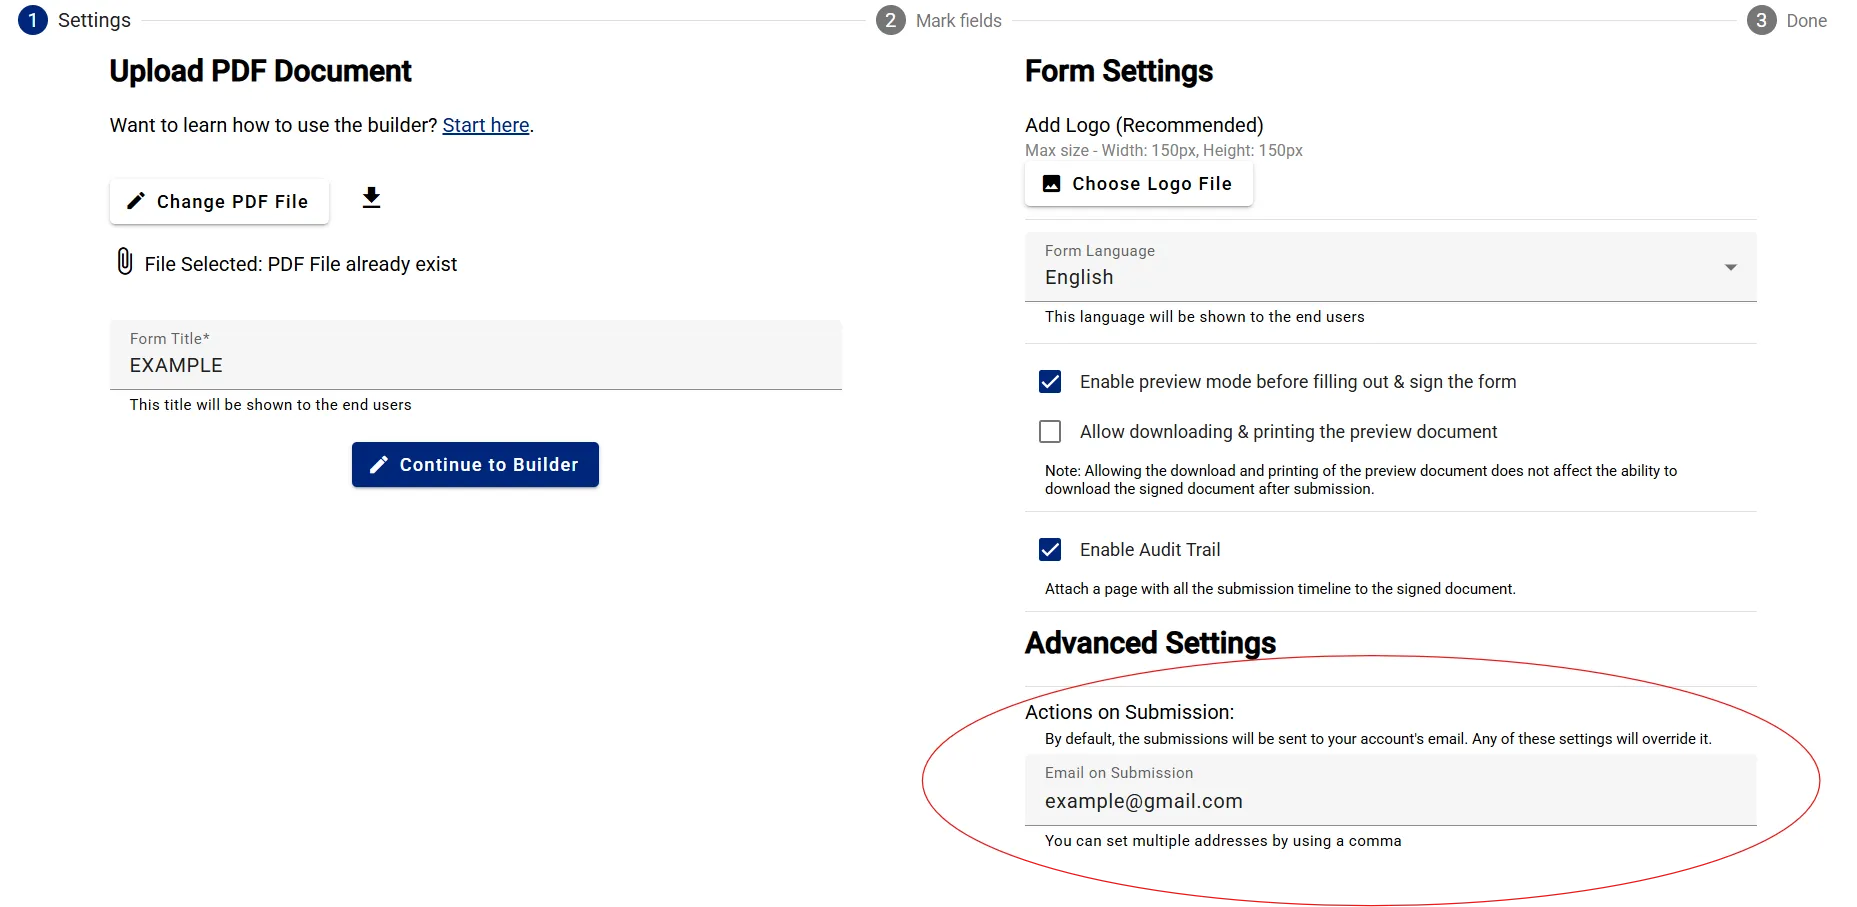
Step 2: Locate Advanced Settings
Section titled “Step 2: Locate Advanced Settings”On the side of the settings screen, locate “Advanced Settings” and within it the option “Actions on Submission”.
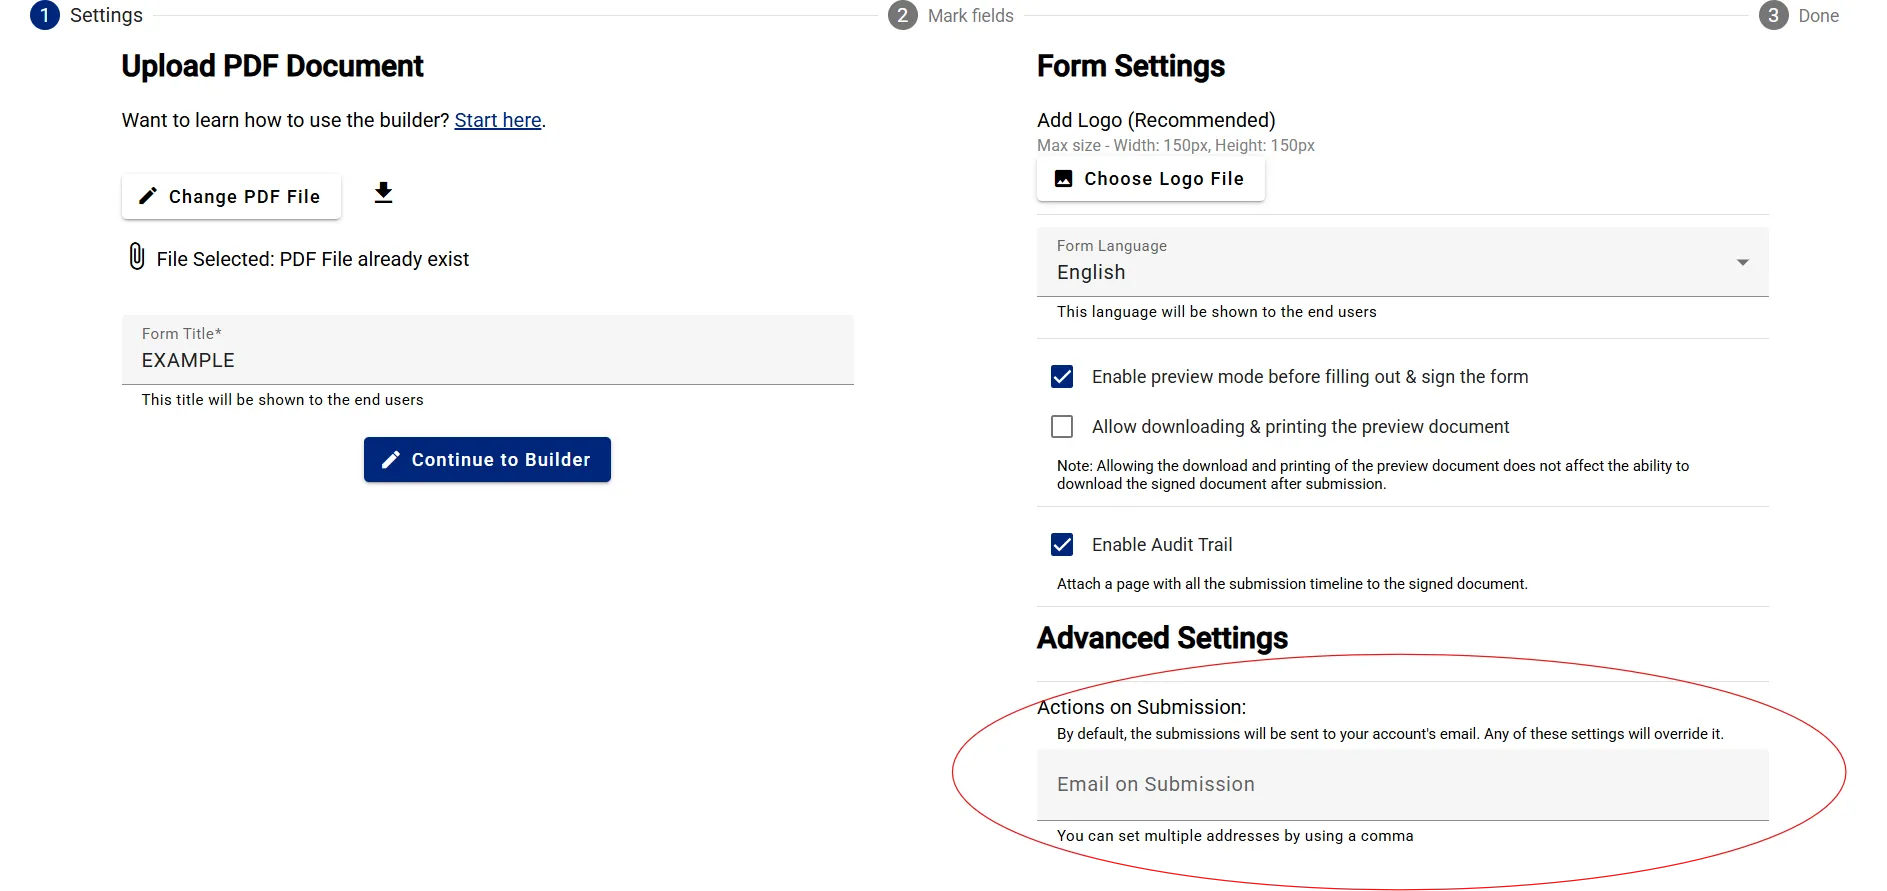
Step 3: Enter Email Address
Section titled “Step 3: Enter Email Address”Within these settings, find the “Email upon submission” option. Enter the complete and accurate email address where you want to receive the signed documents.
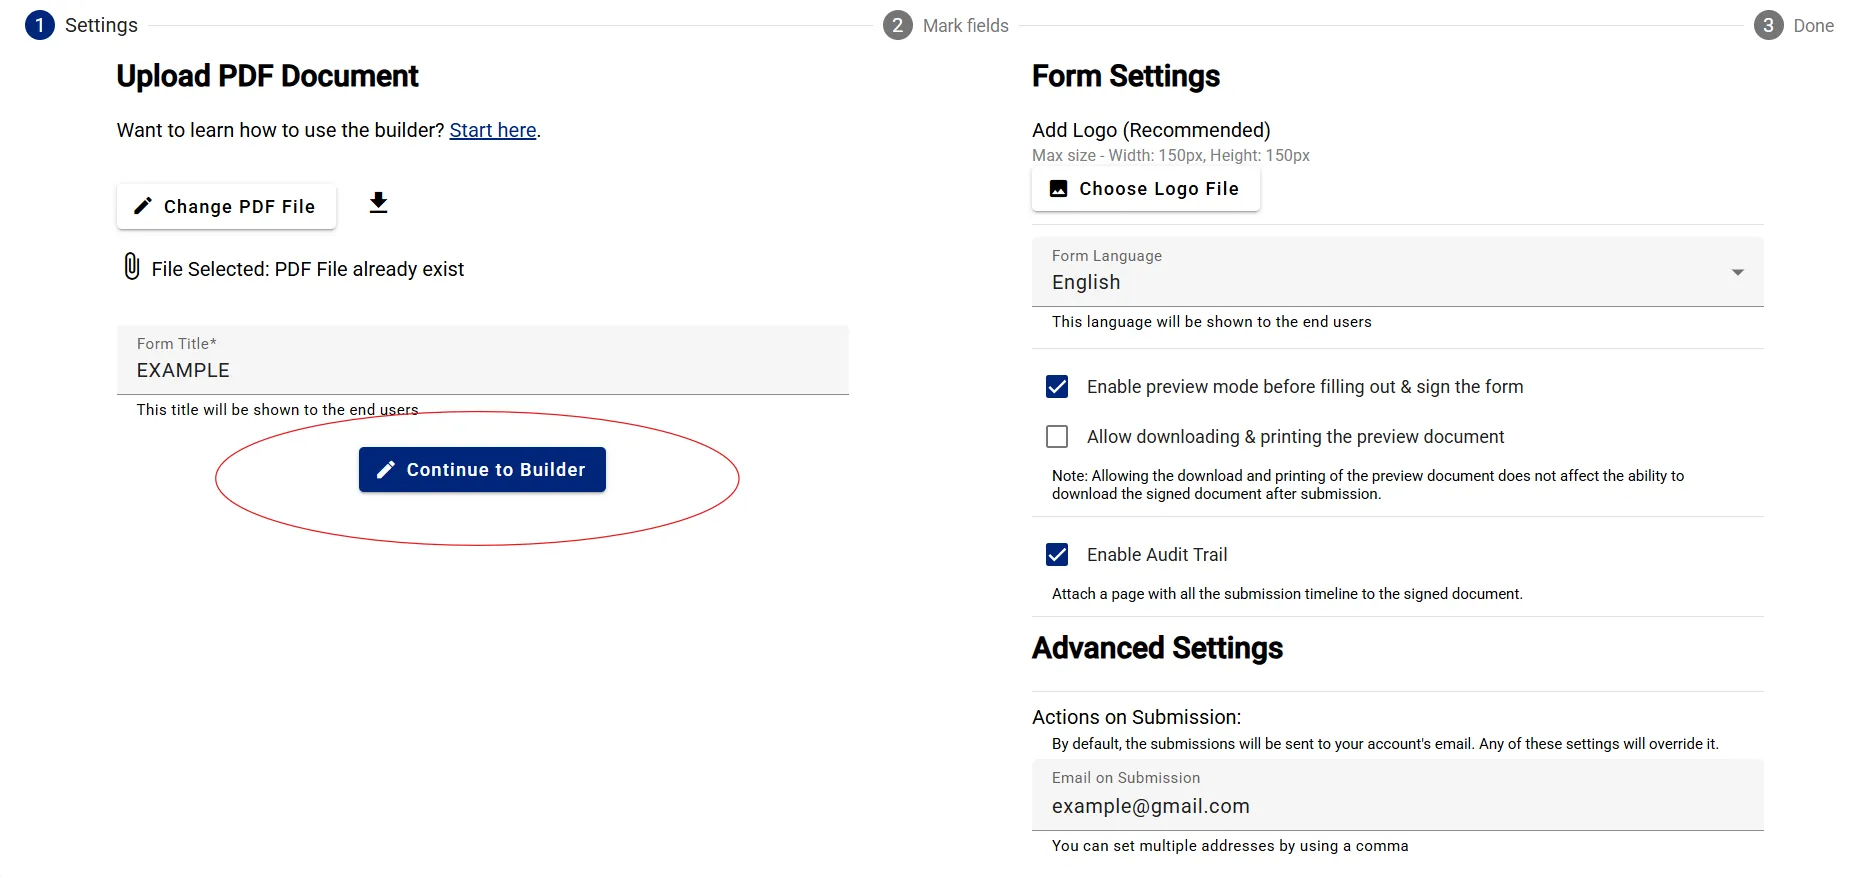
Step 4: Save and Continue
Section titled “Step 4: Save and Continue”After entering the email address, continue with form mapping or proceed to the template update step.
- The new email address will replace the account email for the signed documents of this form
- You can change this setting at any time
Thank you for using FillFaster. See you in the next guide!