Create a Submission Link via Make.com
This guide will walk you through the process of creating a submission link using FillFaster and Make.com. By following these steps, you will be able to send forms with pre-filled data and collect necessary information from your recipients efficiently.
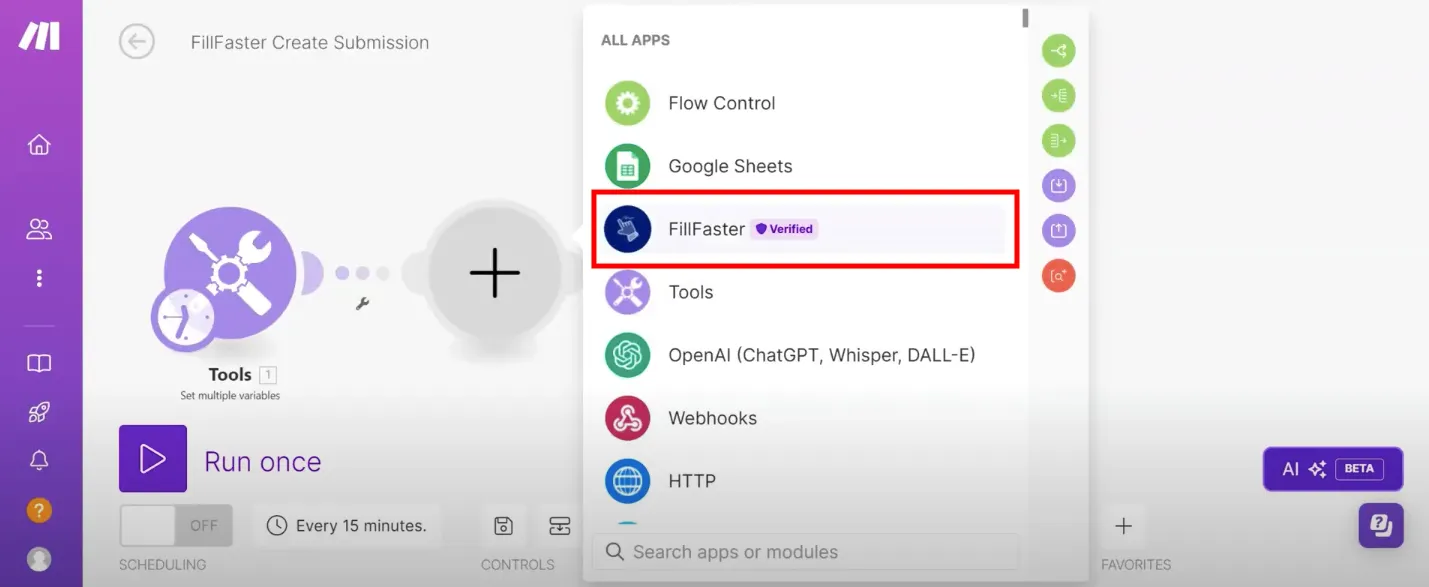
Choose the FillFaster App and Module
Section titled “Choose the FillFaster App and Module”Start by selecting the FillFaster app inside a Make.com scenario.
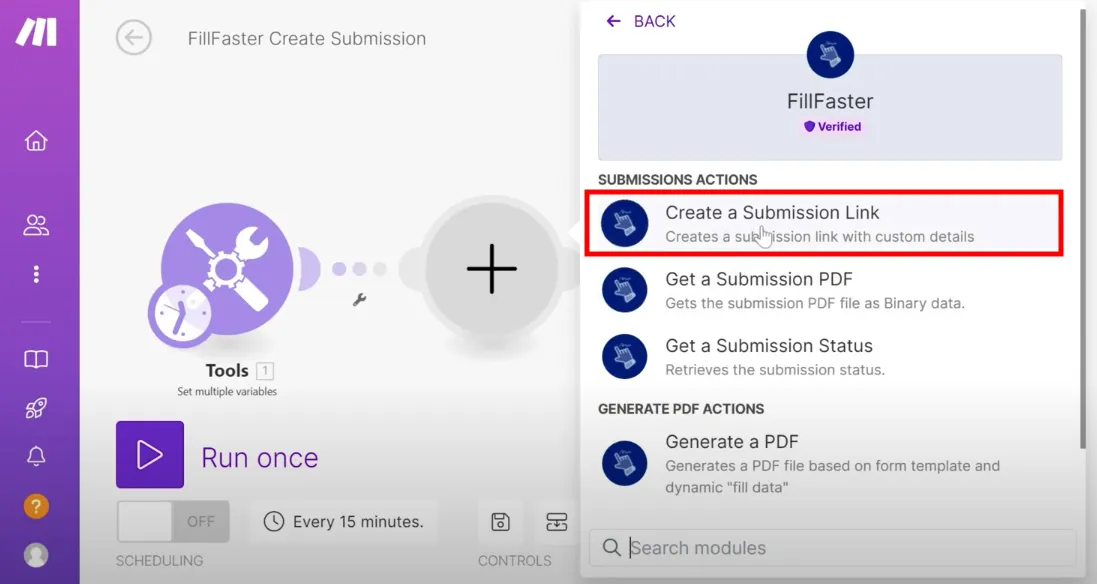
 Next, navigate to the “Create a submission link” module.
Select the Form Template
Section titled “Select the Form Template”Once you’re in the submission link creation section, you’ll see all the form templates available in your account.
Choose the appropriate form template that you want to use.

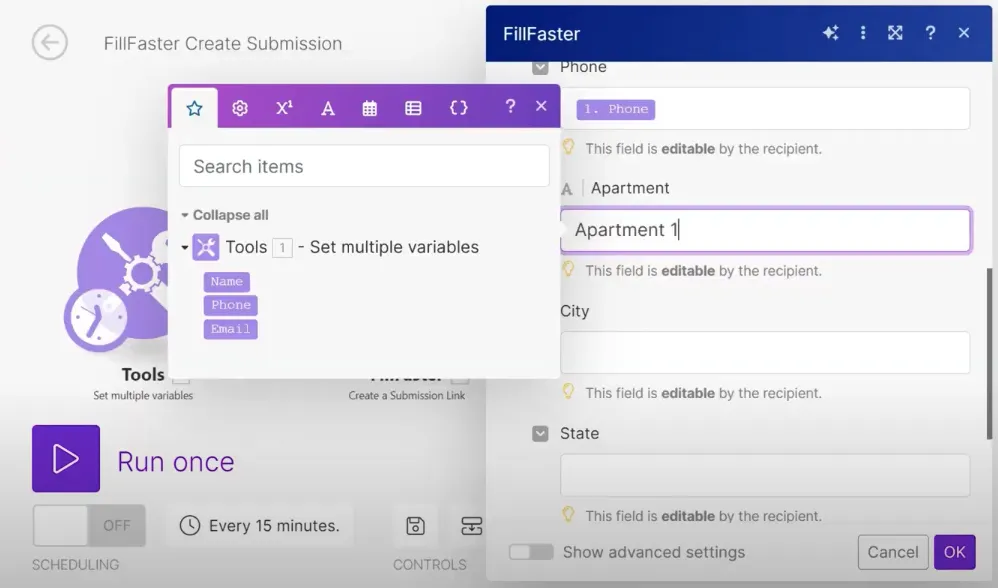
Map Data Fields
Section titled “Map Data Fields”The form will display all the fields you’ve set up in the template.
If you have existing data from a previous step in your scenario (like a new row in Google Sheets), you can map it to the corresponding fields.
You can also manually set these fields.
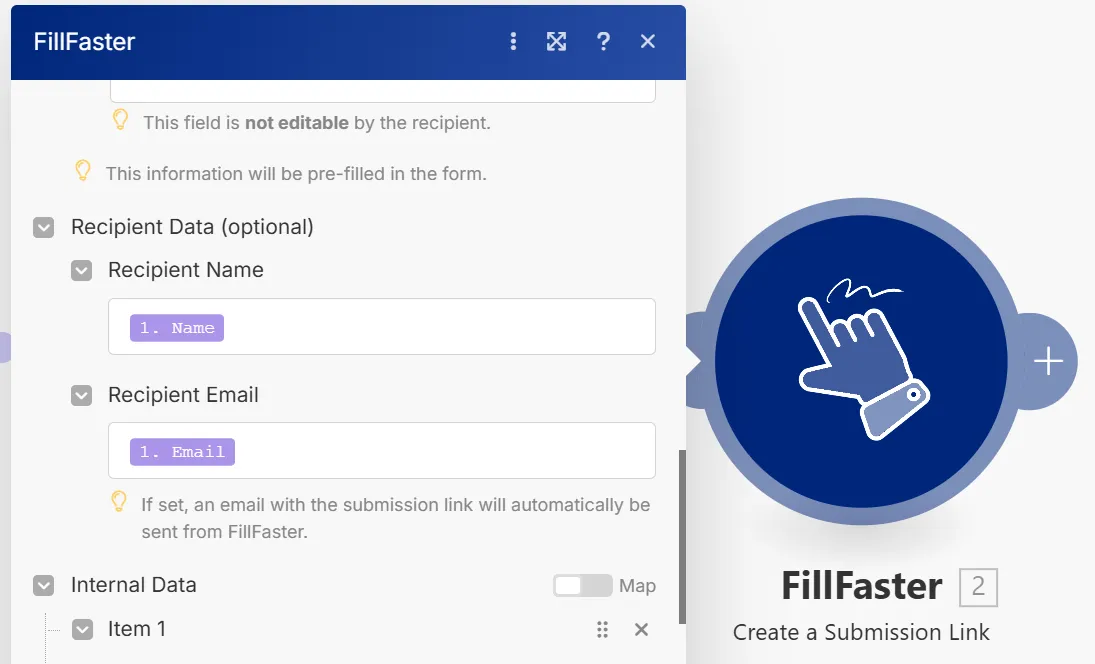
Set Recipient Data
Section titled “Set Recipient Data”Enter the recipient’s name and email (optional).
If an email is provided, a submission link will be sent automatically from FillFaster.
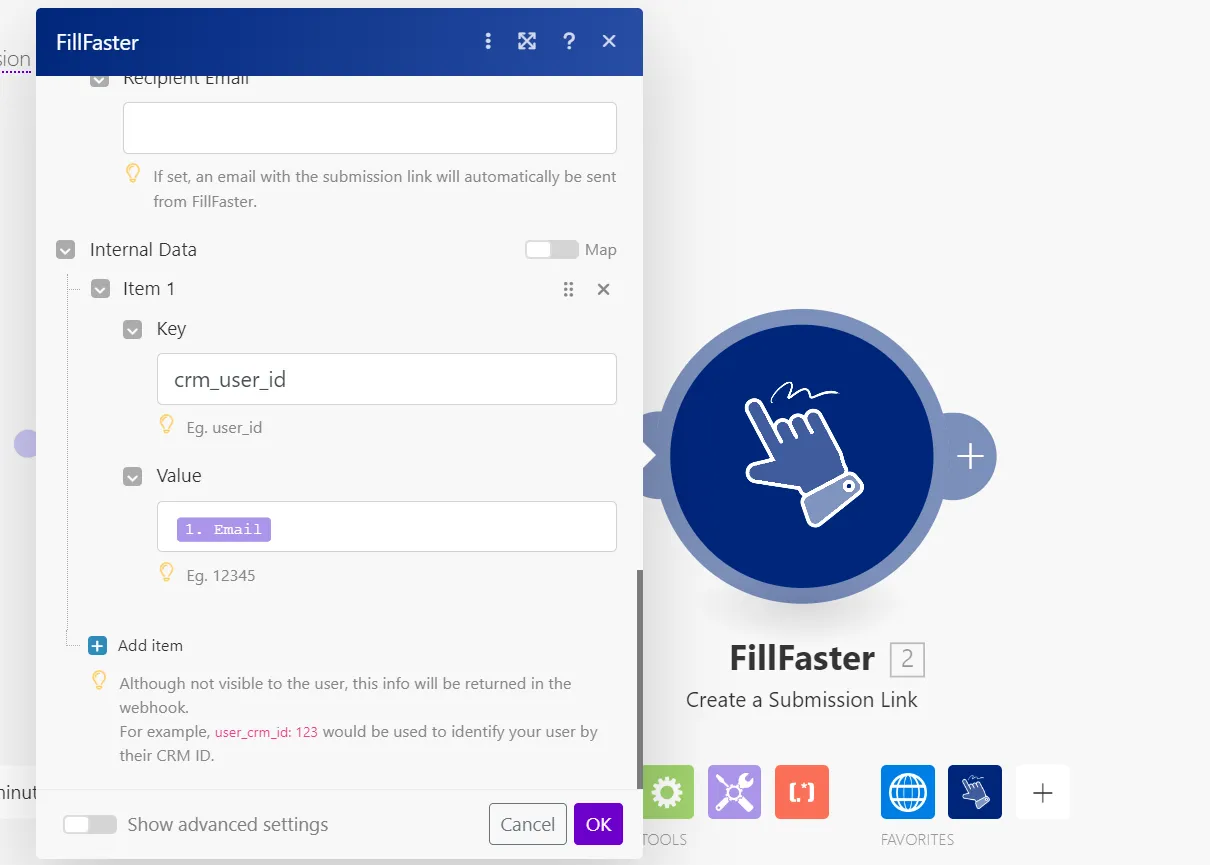
Add Internal Data
Section titled “Add Internal Data”The “Internal Data” section allows you to include data that won’t be visible to the recipient.
This data is returned in the webhook, allowing you to match records with your CRM or other sources to continue the automation workflow.
 For example, you can add a CRM user ID or an email address.
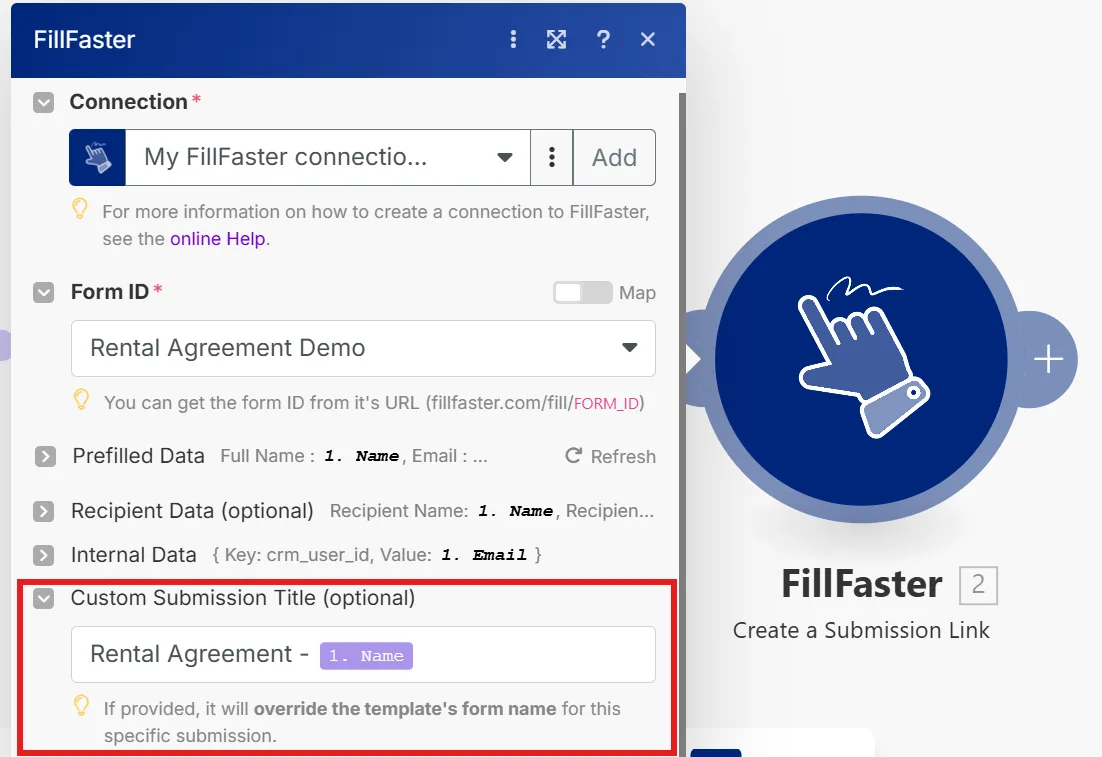
Set a Custom Submission Title
Section titled “Set a Custom Submission Title”If provided, this title will override the template’s form name for this specific submission.
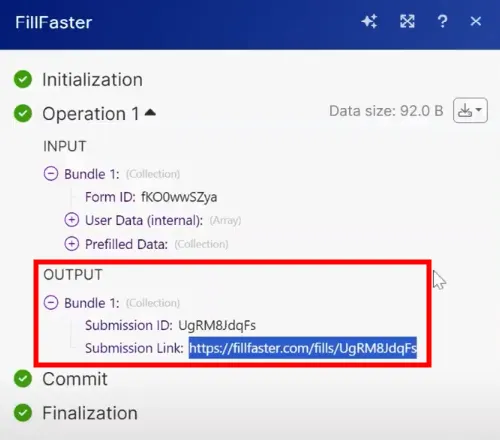
Generate the Link
Section titled “Generate the Link”After configuring the form and mapping the data, run the scenario to generate the submission link.
You can then share this link with your recipient through any communication channel you prefer.
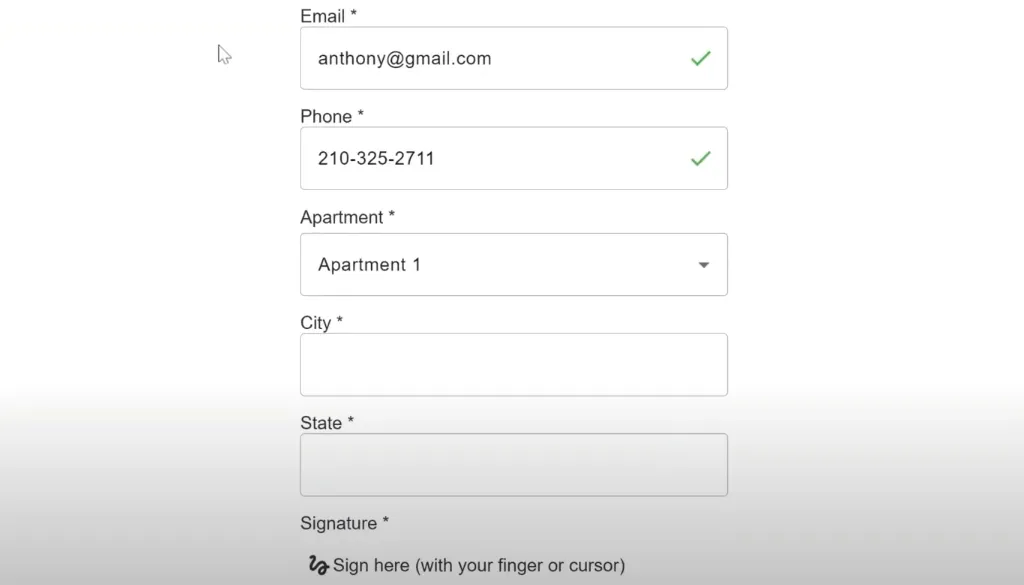
Recipient Interaction
Section titled “Recipient Interaction”When the recipient opens the link, they’ll see all the dynamic data pre-filled.
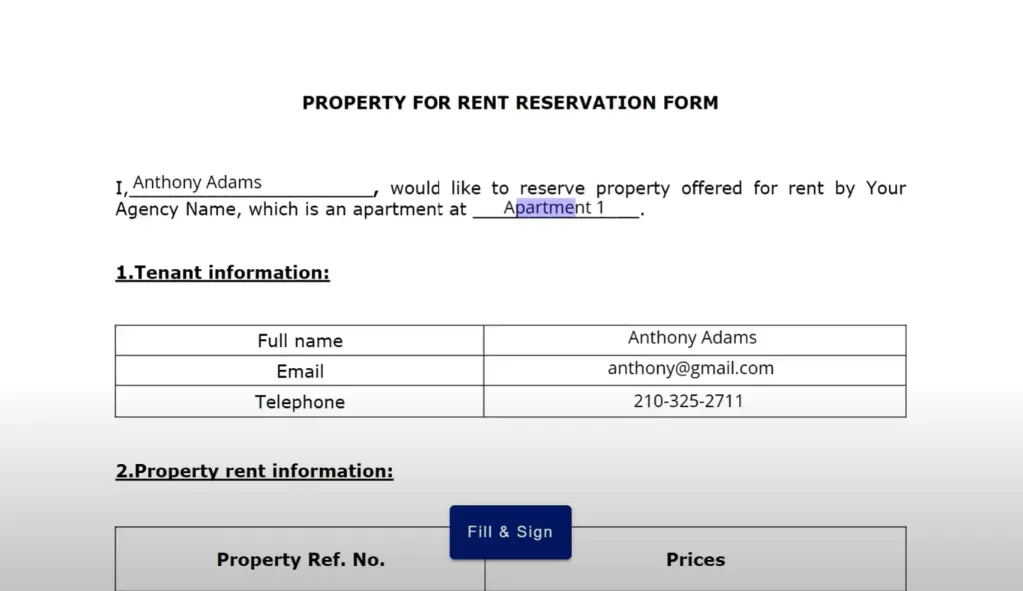 Recipients can edit fields according to each field’s settings.
Clicking “sign” allows them to finalize the submission.
Recipients can edit fields according to each field’s settings.
Clicking “sign” allows them to finalize the submission.
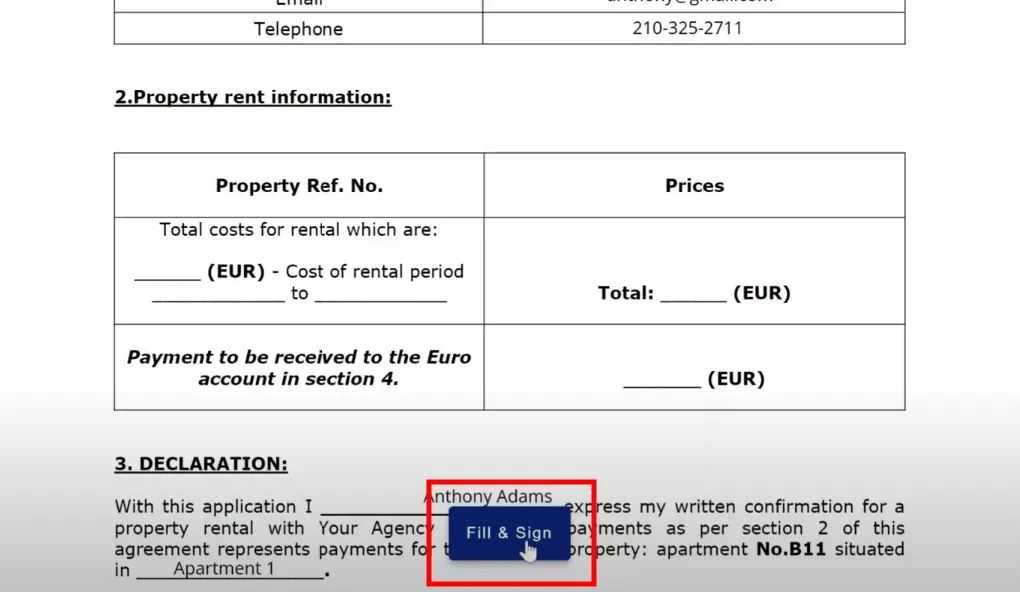 Depending on your settings, they can also add any missing data.