Using Tables
Using tables is a powerful tool that allows you to turn lists or recurring data (such as hours breakdown, product lists, or children’s details) into a dynamic table that’s easy to fill out, even from mobile devices.
What is a Table Field?
Section titled “What is a Table Field?”A table field allows recipients to fill in structured information in the form of rows and columns. Recipients can:
- Fill in data in different cells
- Add additional rows as needed
- Edit and delete existing rows
This is ideal for:
- Work Hours Breakdown - date, start time, end time, description
- Product List - product name, quantity, unit price, total
- Children’s Details - name, age, date of birth, grade
- And more…
Step-by-Step Guide
Section titled “Step-by-Step Guide”Step 1: Access Your Account
Section titled “Step 1: Access Your Account”- Log in to your FillFaster account
- Go to your dashboard
- Create a new template or edit an existing one
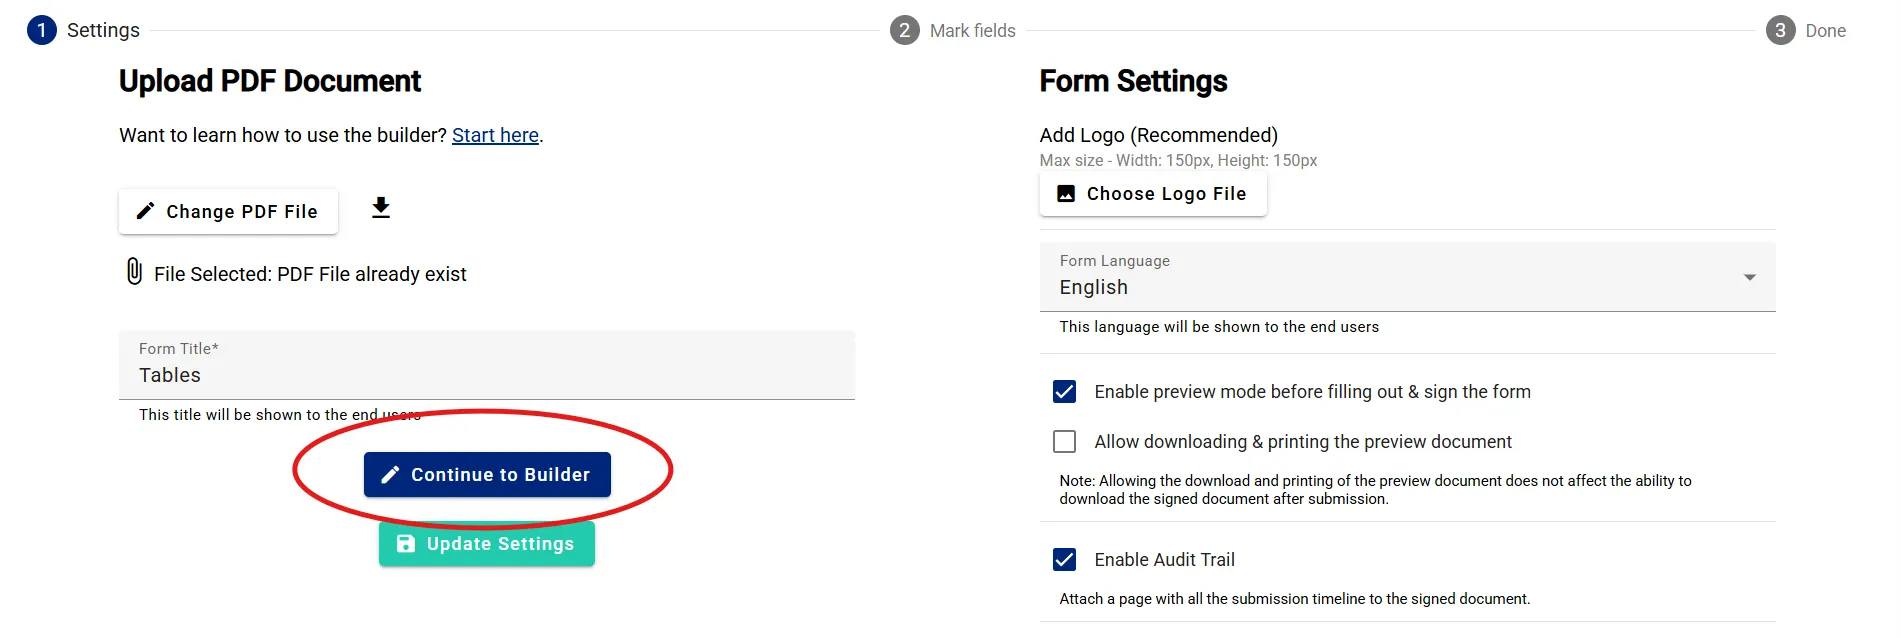
Step 2: Upload Your Document
Section titled “Step 2: Upload Your Document”- Upload your PDF file or build a form through the system
- After uploading the document, click “Continue to Builder”
Step 3: Add Table Field
Section titled “Step 3: Add Table Field”- In the fields menu (on the side of the screen), look for the “Table” component
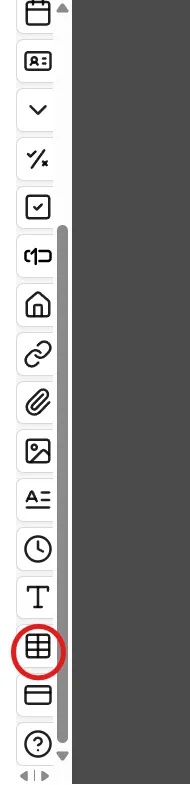
- Drag the table component to the appropriate location in your PDF document
- Adjust the table size to fit your document
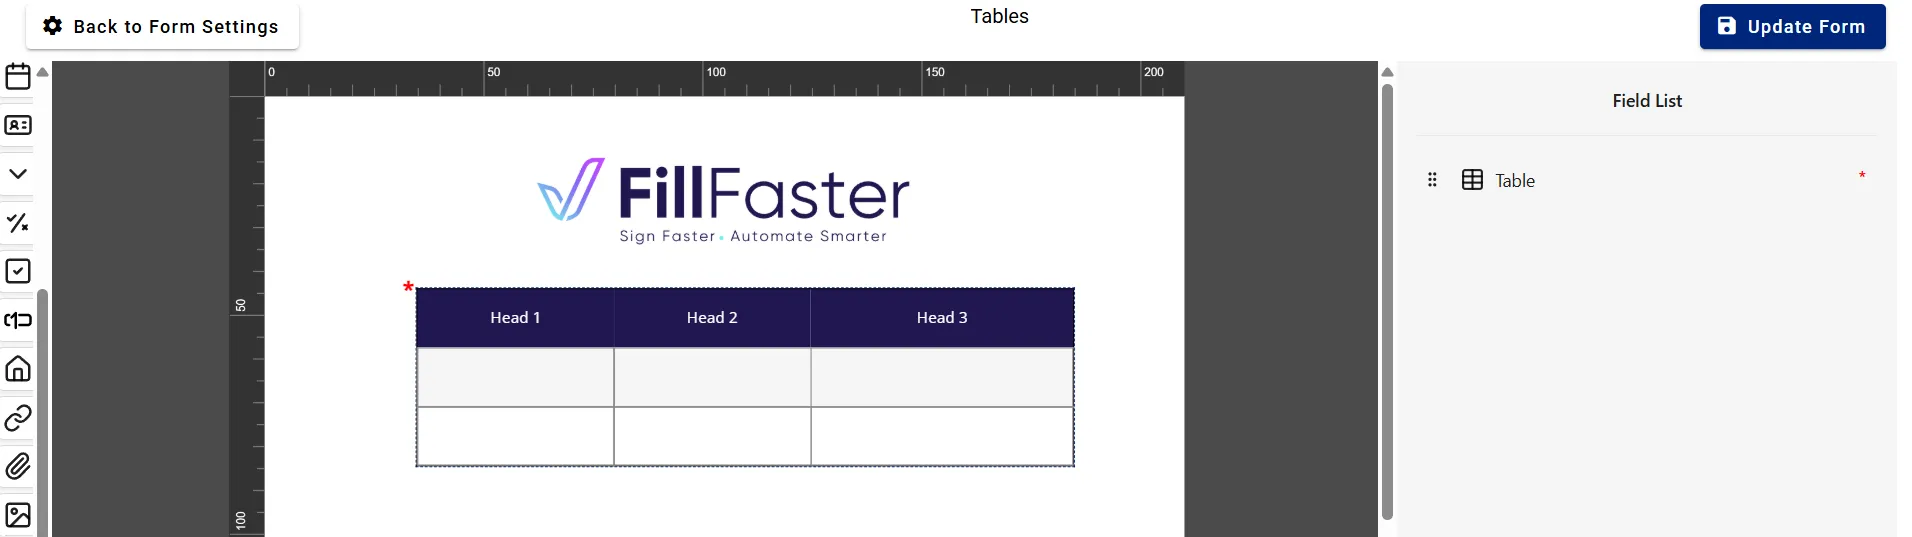
Step 4: Configure the Table
Section titled “Step 4: Configure the Table”- Click on the table to open Edit Field
- Within the table settings, you can configure:
- Table Color - Choose a background color for headers
- Text Alignment - Align left, right, or center
- Font - Choose the font type and size
- Columns - Add or remove columns

- Important: To allow the recipient to edit the table, make sure the “Non-editable field” option is unchecked
Step 5: Edit Column Names
Section titled “Step 5: Edit Column Names”- Double-click on a column name to change it
- Set clear and understandable column names (for example: “Date”, “Description”, “Quantity”, “Amount”)
- Make sure the names match the type of data the recipient will need to fill in
Step 6: Save and Send
Section titled “Step 6: Save and Send”- After finishing mapping all fields, click “Update Form” (for existing template) or “Create and Get Link” (for new form)

- Create a new submission from the template
- Send the link to your client or recipient
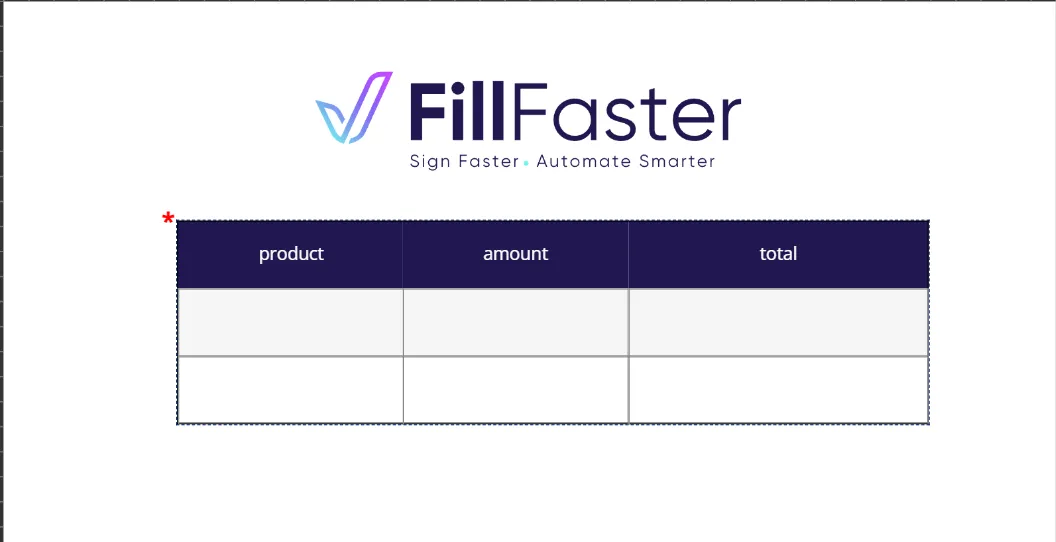
What Does it Look Like for Recipients?
Section titled “What Does it Look Like for Recipients?”Table Display
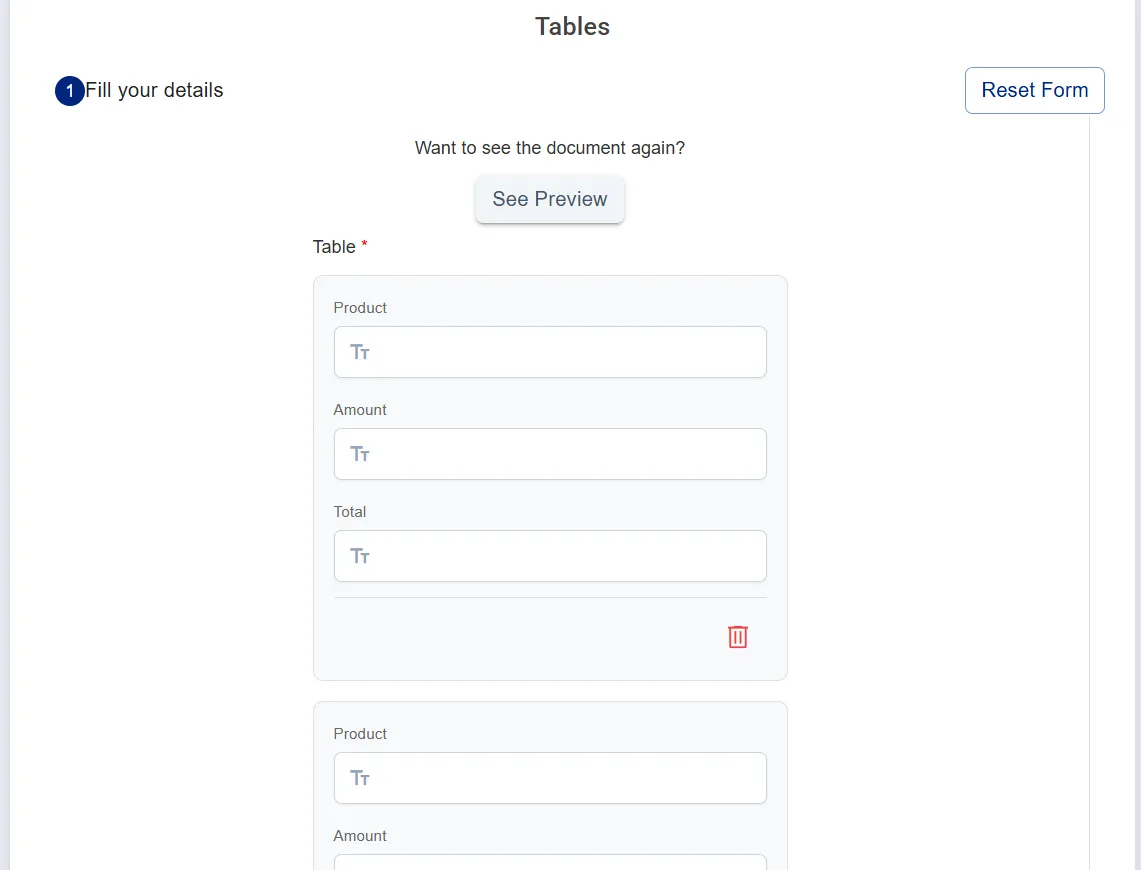
Section titled “Table Display”When the recipient opens the link, they see the table with:
- The column headers you defined
- An empty first row to fill in
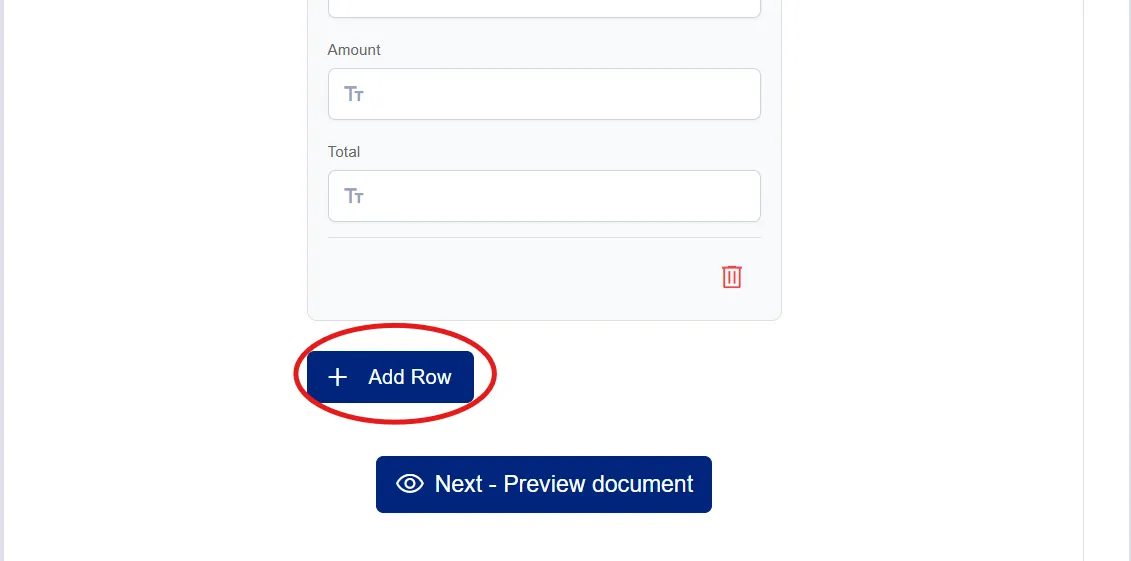
- An ”+ Add Row” button at the bottom of the table
Filling the Table
Section titled “Filling the Table”Recipients can:
- Fill in data in different cells
- Click ”+ Add Row” to add more rows
- Delete unwanted rows
- Edit existing data
Common Use Case Examples
Section titled “Common Use Case Examples”Example 1: Work Hours Report
Section titled “Example 1: Work Hours Report”Columns:
- Date
- Start Time
- End Time
- Work Description
- Total Hours
Example 2: Product Order
Section titled “Example 2: Product Order”Columns:
- Product Name
- SKU
- Quantity
- Unit Price
- Total
Example 3: Participant Registration
Section titled “Example 3: Participant Registration”Columns:
- Full Name
- Phone
- Age
- Notes
Best Practice Tips
Section titled “Best Practice Tips”- Clear Column Names - Use descriptive and clear names that explain exactly what needs to be filled in
- Appropriate Number of Columns - Don’t add too many columns - it can be confusing
- Column Width - Adjust column width to the type of information (date needs less space than description)
- User Instructions - Add a brief explanation above the table on how to fill it out
- Example - Consider adding an example row (that can be deleted) to demonstrate how to fill it in
Frequently Asked Questions
Section titled “Frequently Asked Questions”Does the recipient have to fill in all rows?
Section titled “Does the recipient have to fill in all rows?”No. The recipient can fill in only as many rows as they need and add more as required.
Is it possible to limit the number of rows?
Section titled “Is it possible to limit the number of rows?”Currently, there is no option to limit the number of rows. The recipient can add as many rows as they need.
How do I see the data filled in the table?
Section titled “How do I see the data filled in the table?”After the recipient submits the form, the data appears in the signed PDF and in the submission details in your dashboard.
Can data be imported into the table automatically?
Section titled “Can data be imported into the table automatically?”Yes! If you’re working with Make.com or API, see the Populate Dynamic Tables with Make.com guide.
Troubleshooting
Section titled “Troubleshooting”The table doesn’t display correctly in the document
Section titled “The table doesn’t display correctly in the document”Solution: Make sure the table size matches the space you allocated in the document. Try changing the table size or position.
The recipient cannot edit the table
Section titled “The recipient cannot edit the table”Solution: Check that the “Non-editable field” option is unchecked in the table settings.
Summary
Section titled “Summary”Tables in FillFaster are a powerful tool for collecting structured information from your recipients. With proper configuration and clear instructions, they can significantly simplify the data collection process and make it more convenient and faster.
Thank you for using FillFaster. See you in the next guide!