Get Signed Documents Into monday.com Board
Here’s a step-by-step video guide on how to set up signed document retrieval into Monday board with FillFaster’s monday.com Integration App.
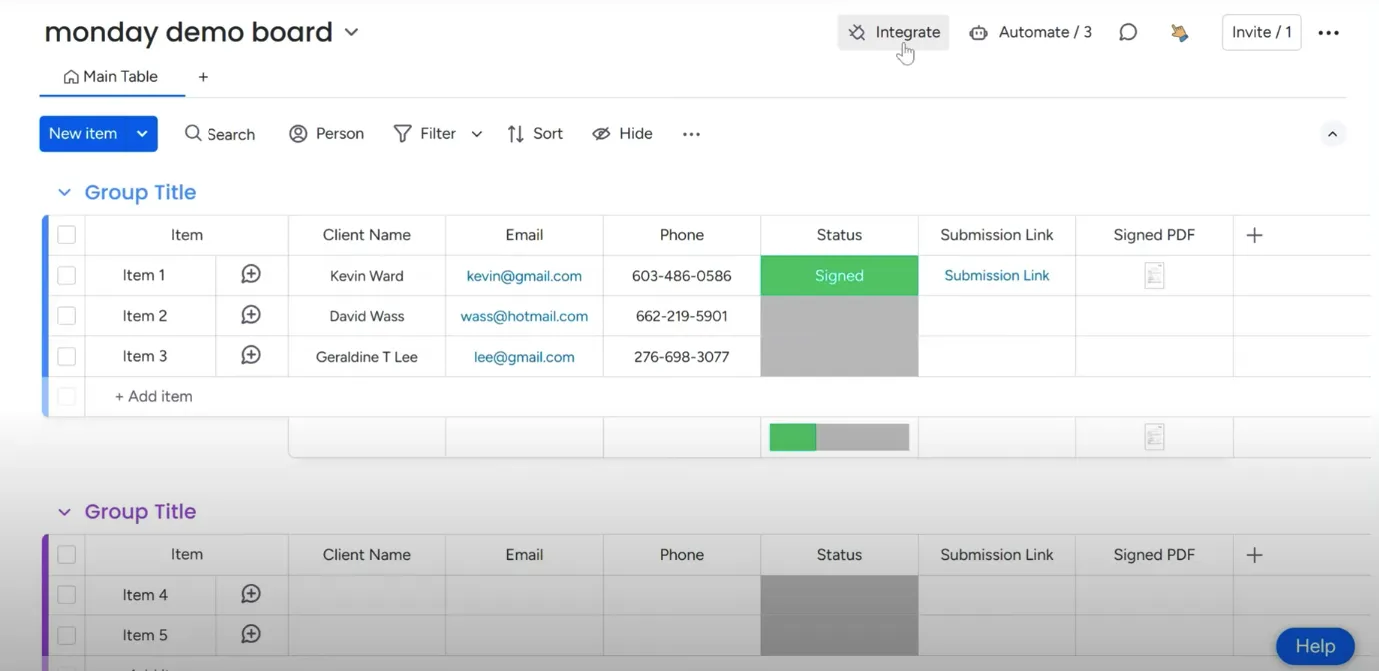
In this guide, we will show you how to set up automation that creates a submission link from your data and ensures that when someone signs that link, the PDF is uploaded to the item in your monday.com board. This allows you to view and access the signed documents directly. Let’s see how it works.
Setting Up the Automation with a Template Recipe
Section titled “Setting Up the Automation with a Template Recipe”First, go to the integration templates in your monday.com board.
Click on “Integrate”.
And search for “FillFaster eSignatures.”
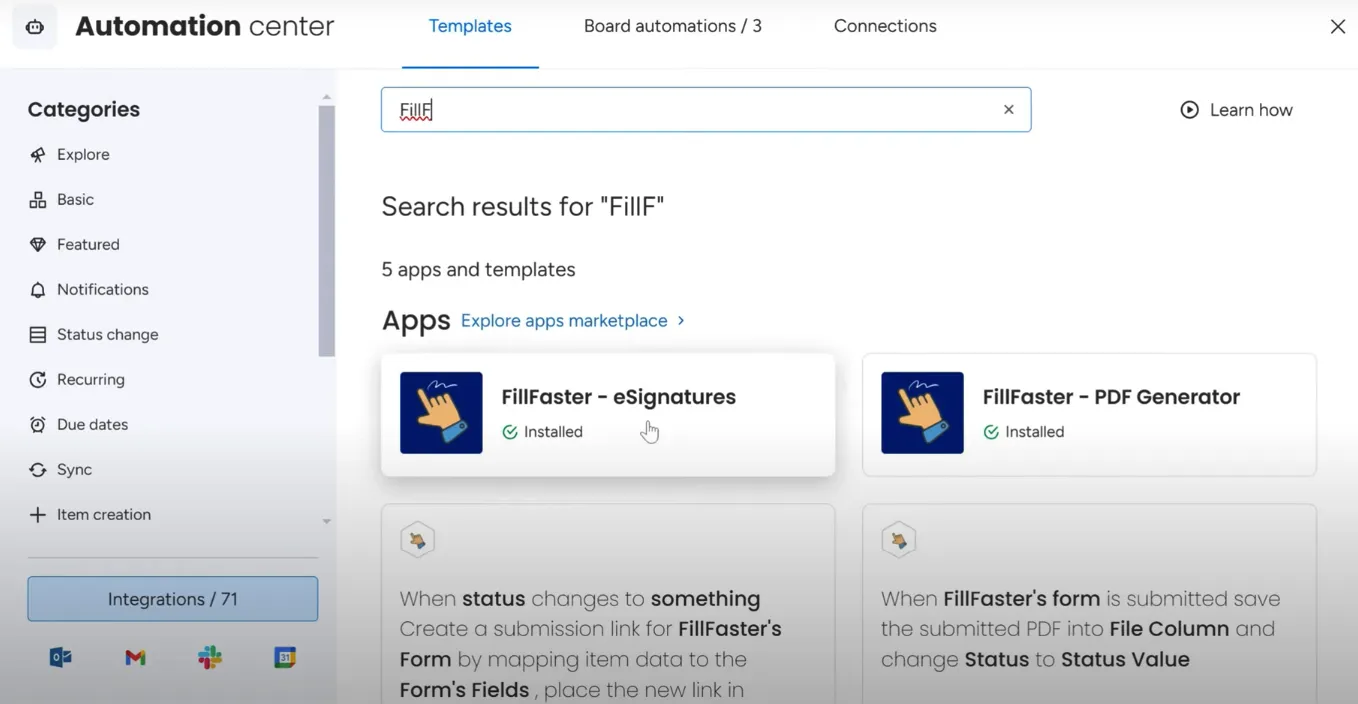
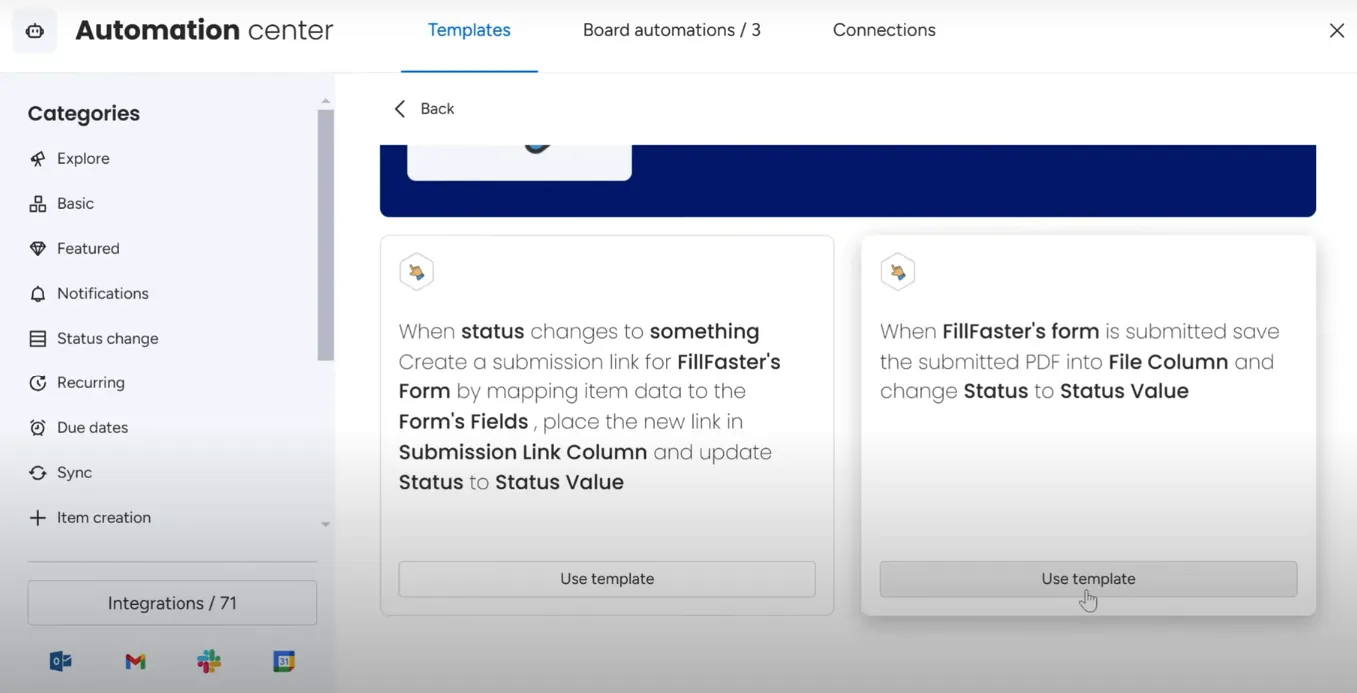
Look for the trigger “when a form is submitted, save the submitted PDF back to the file column.”
Choose the Automation Template
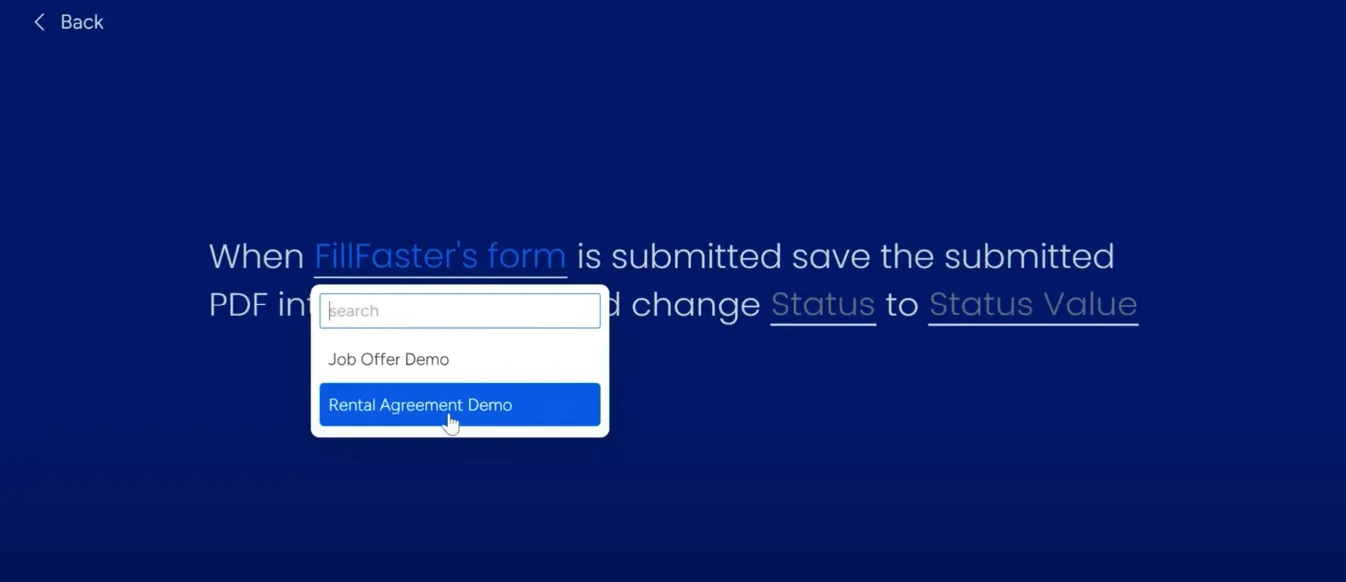
Section titled “Choose the Automation Template”Select the automation template and choose the form you are using. In this case, we use the “Rental Agreement demo” form.
Choose the file column where the submitted PDF will be saved. If you do not have a file column, you can add a new one.
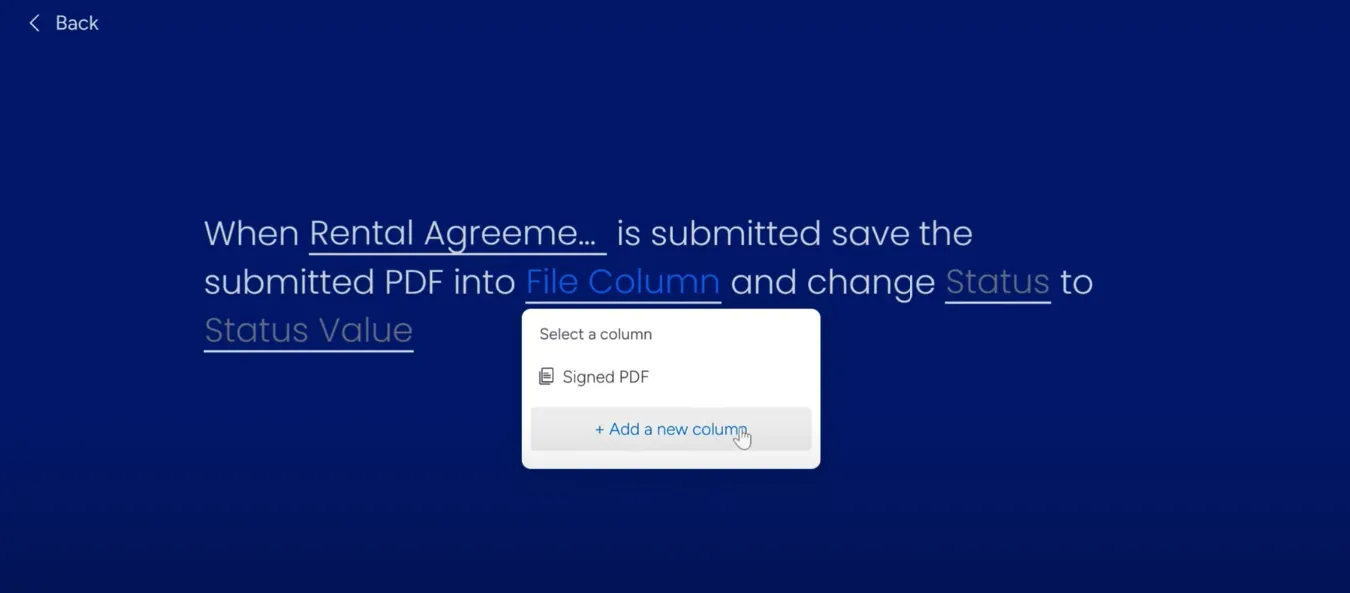
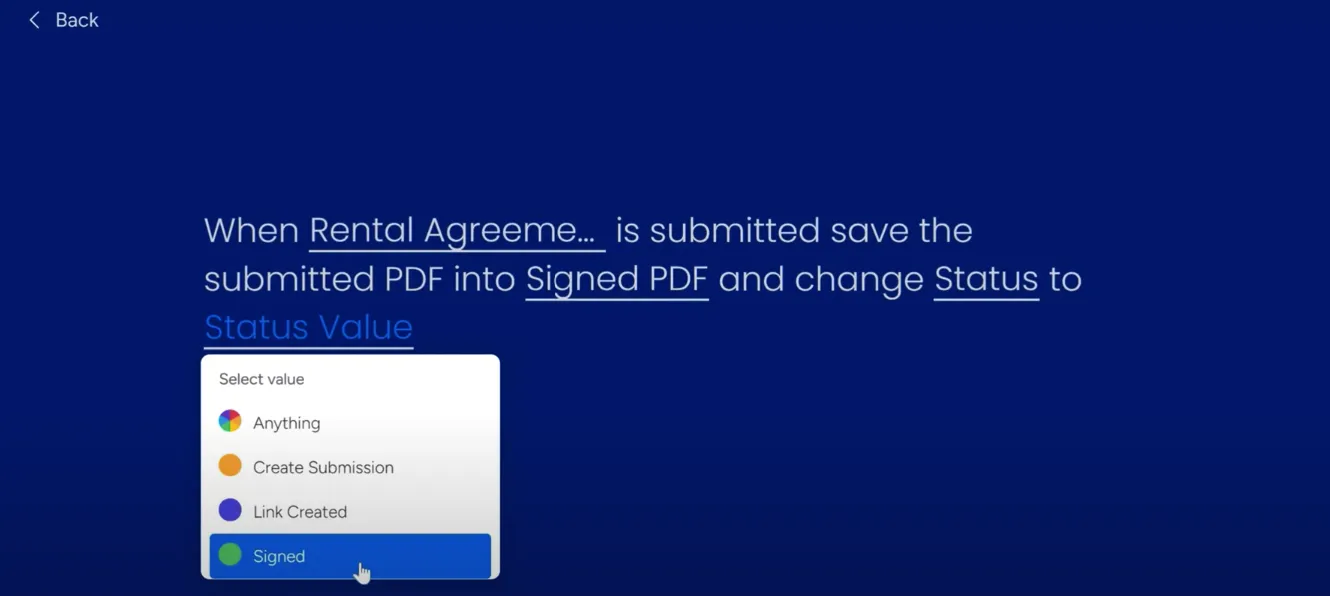
Similarly, ensure you have a status column, or create a new one if needed.
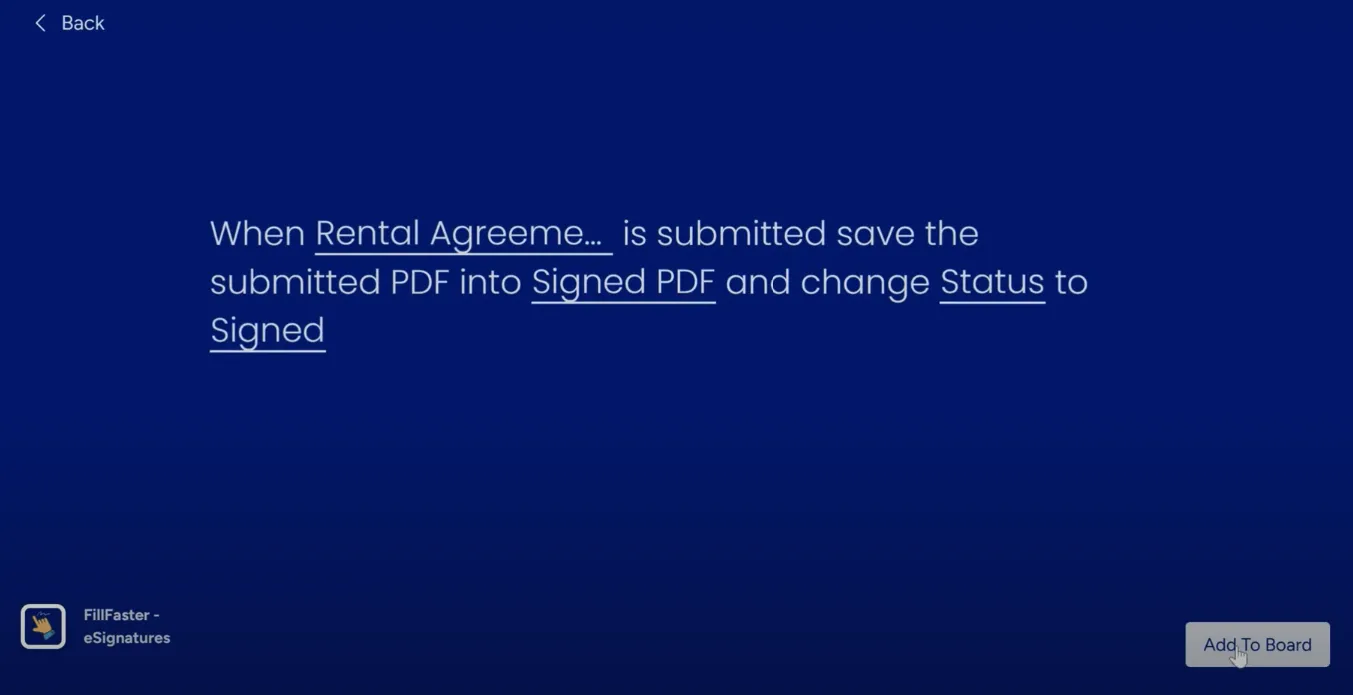
Complete the setup and ensure the automation is active.
Click “Add to Board”.
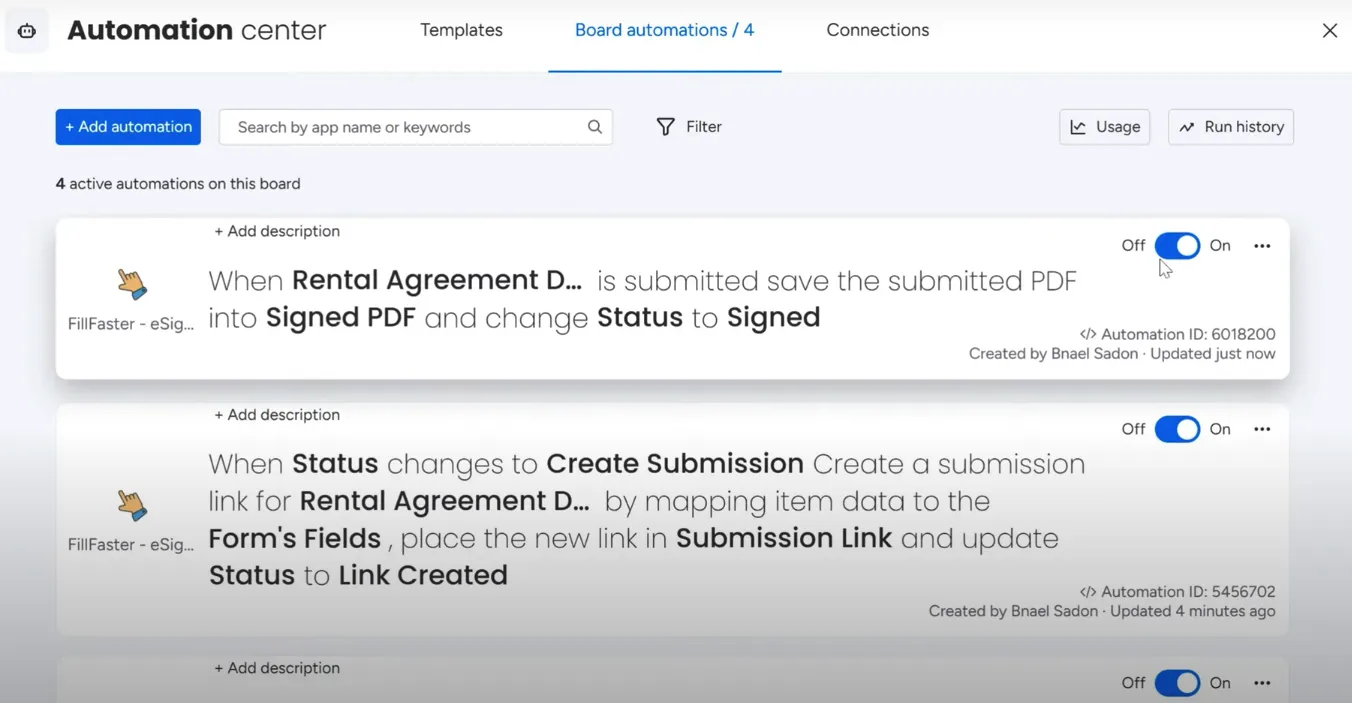
You’ll see the new automation in your automations list.
Testing the Full Flow
Section titled “Testing the Full Flow”Creating a New Submission
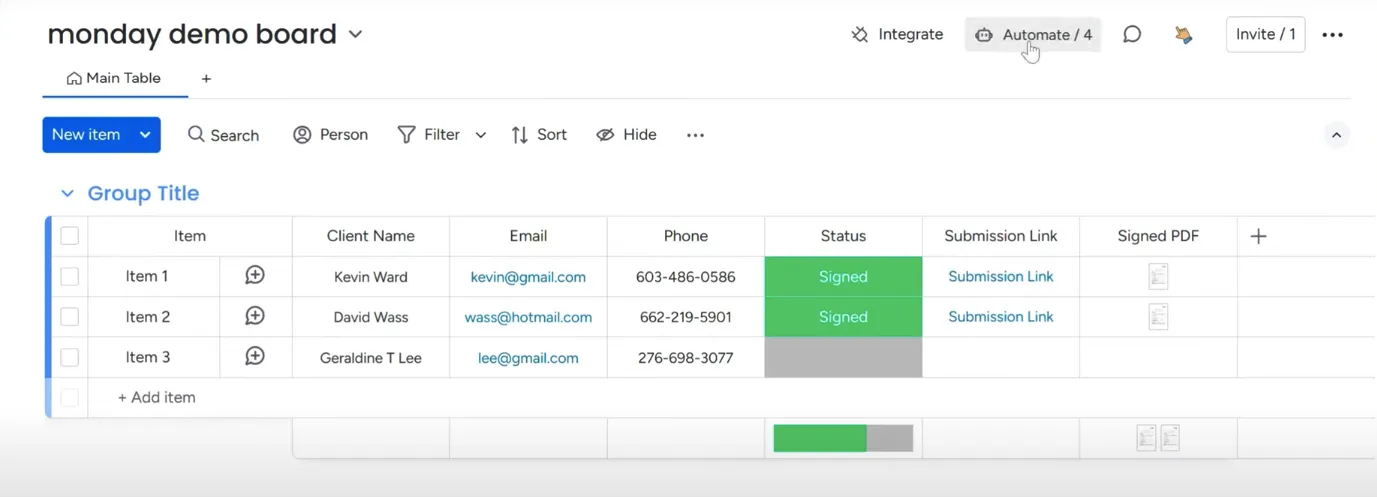
Section titled “Creating a New Submission”Go back to the board and create a new submission using the status column. Send the submission link to the recipient (e.g., David), who will receive a link to fill out the agreement.
Recipient Signing the Document
Section titled “Recipient Signing the Document”The recipient opens the link, fills out the form, and signs it.
Document Upload and Status Update
Section titled “Document Upload and Status Update”Once submitted, the PDF is automatically uploaded to the file column in your board, and the status is updated.
(Optional) Using the Automation Builder for More Complex Automations
Section titled “(Optional) Using the Automation Builder for More Complex Automations”Setting Up a Multi-Step Automation
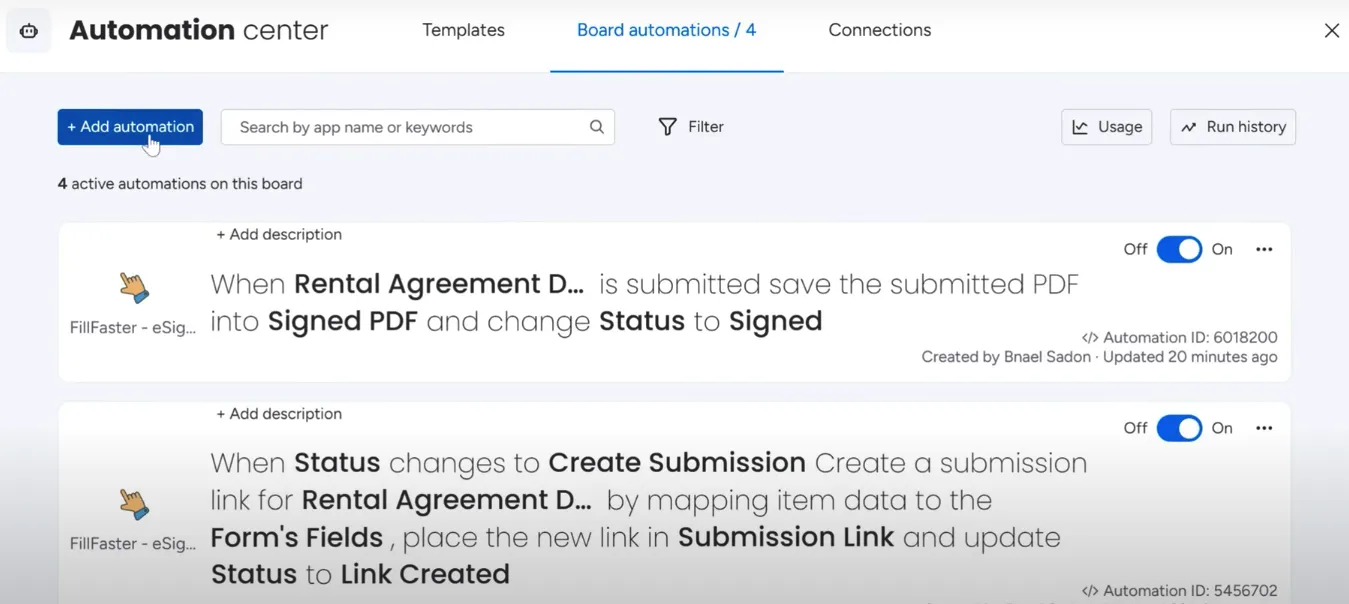
Section titled “Setting Up a Multi-Step Automation”Click on “Automate”.
And then “Add Automation.”
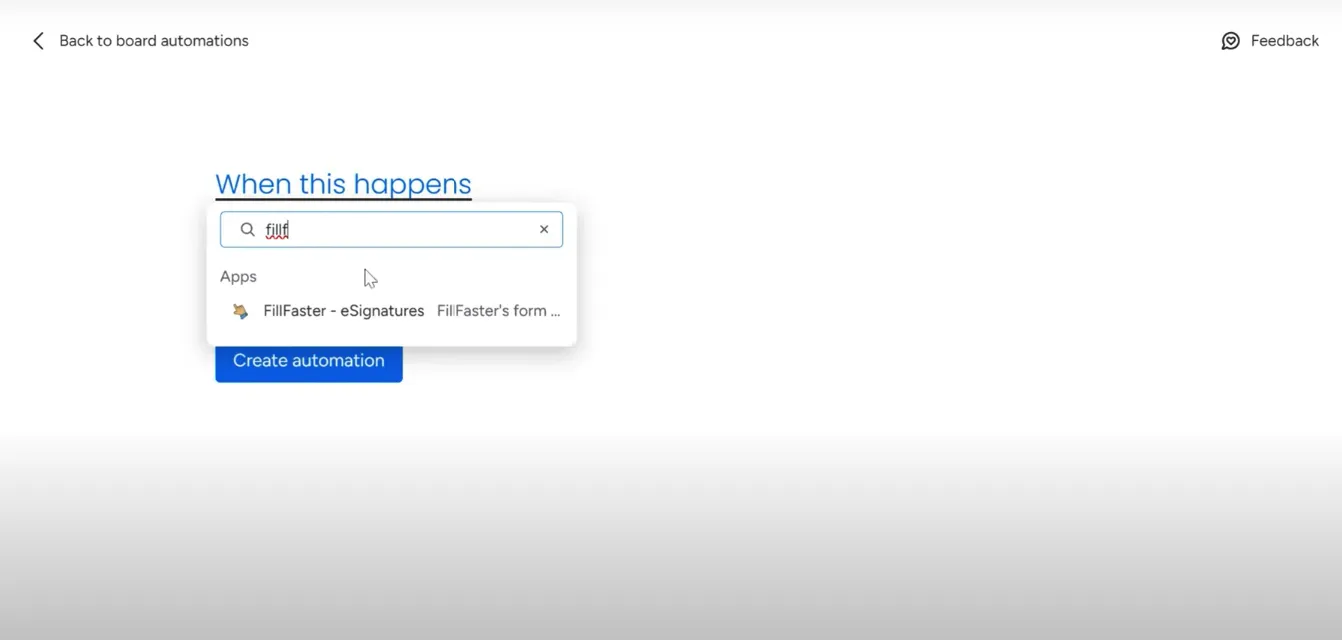
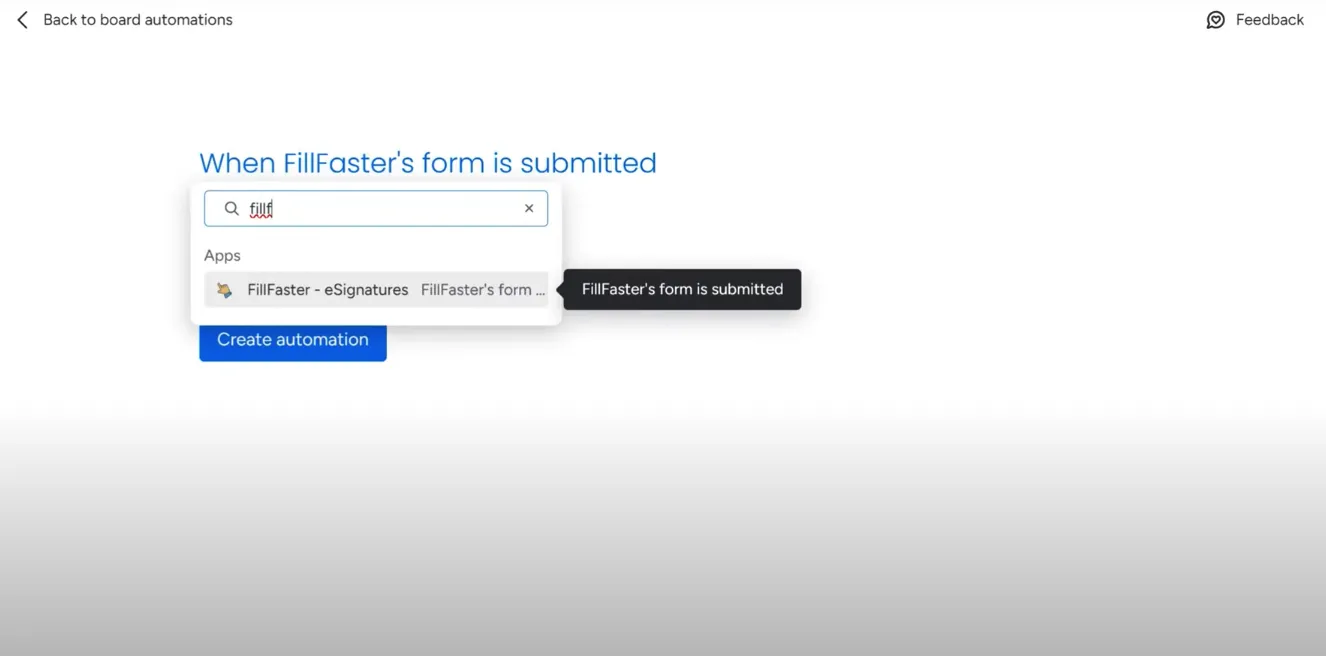
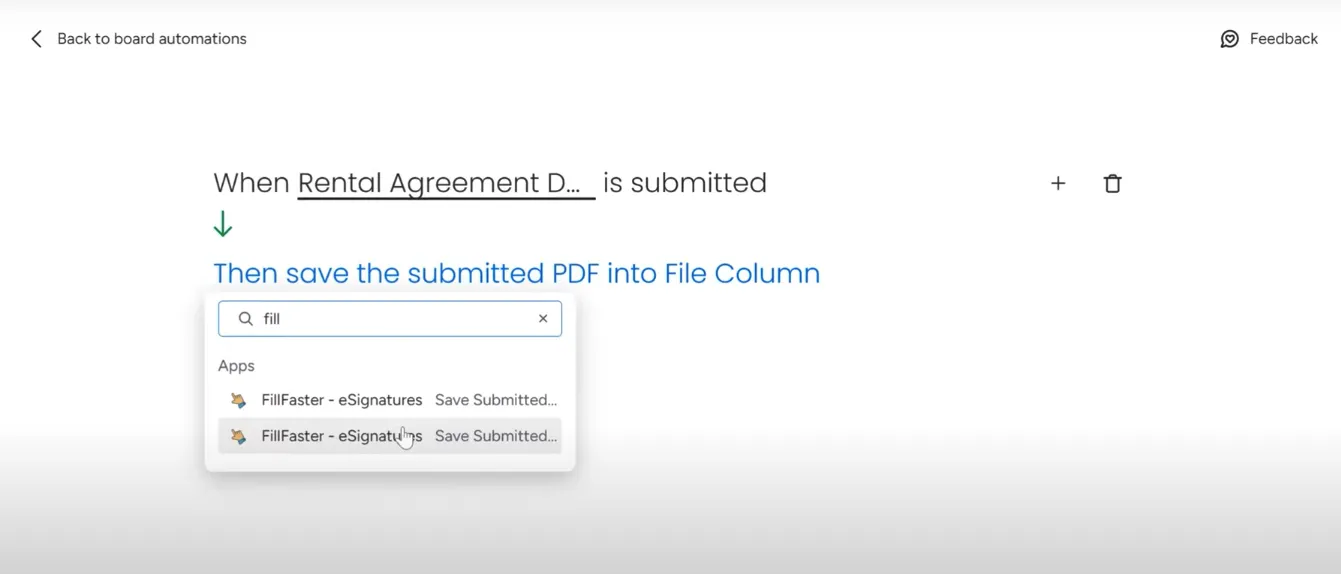
Choose the trigger by searching for “FillFaster”.
And select “FillFaster’s form is submitted.”
Choose the form and the action. You have two options:
- Save the submitted PDF into the file column.
- Save the submitted PDF into the file column and change the status.
Adding Additional Steps
Section titled “Adding Additional Steps”After selecting the action, you can add more steps, such as sending an email, changing the status, assigning a person, or sending a notification.
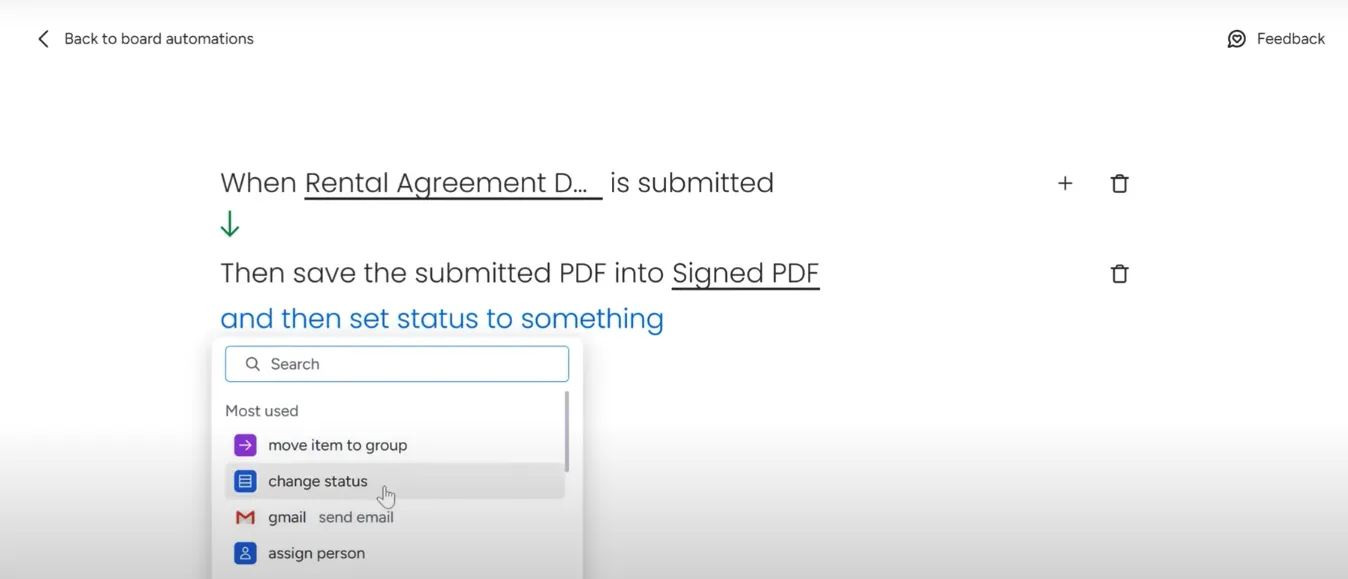
Configure these additional steps to complete your automation flow.
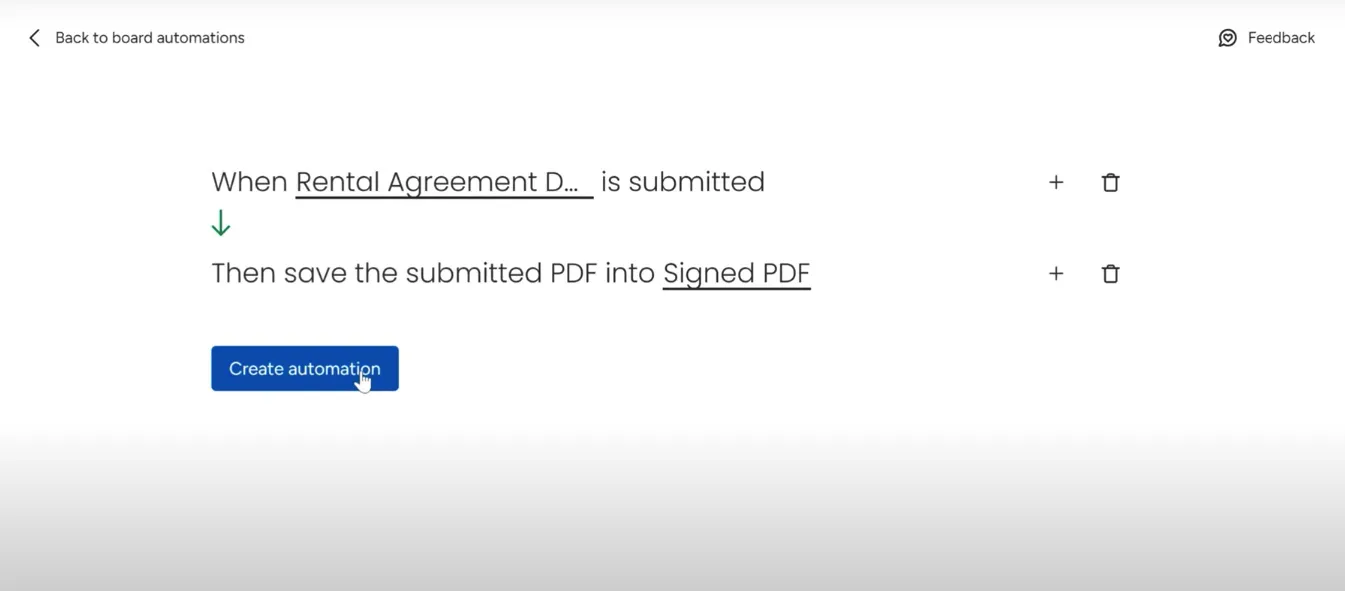
Now you have successfully set up automation to get signed documents into your monday.com board using FillFaster’s integration app. This allows you to manage and access signed documents efficiently.
Thank you for using FillFaster. See you in the next guide!