Install FillFaster's monday.com Integration App
Here’s a step-by-step guide on how to install and set up FillFaster’s monday.com Integration App.
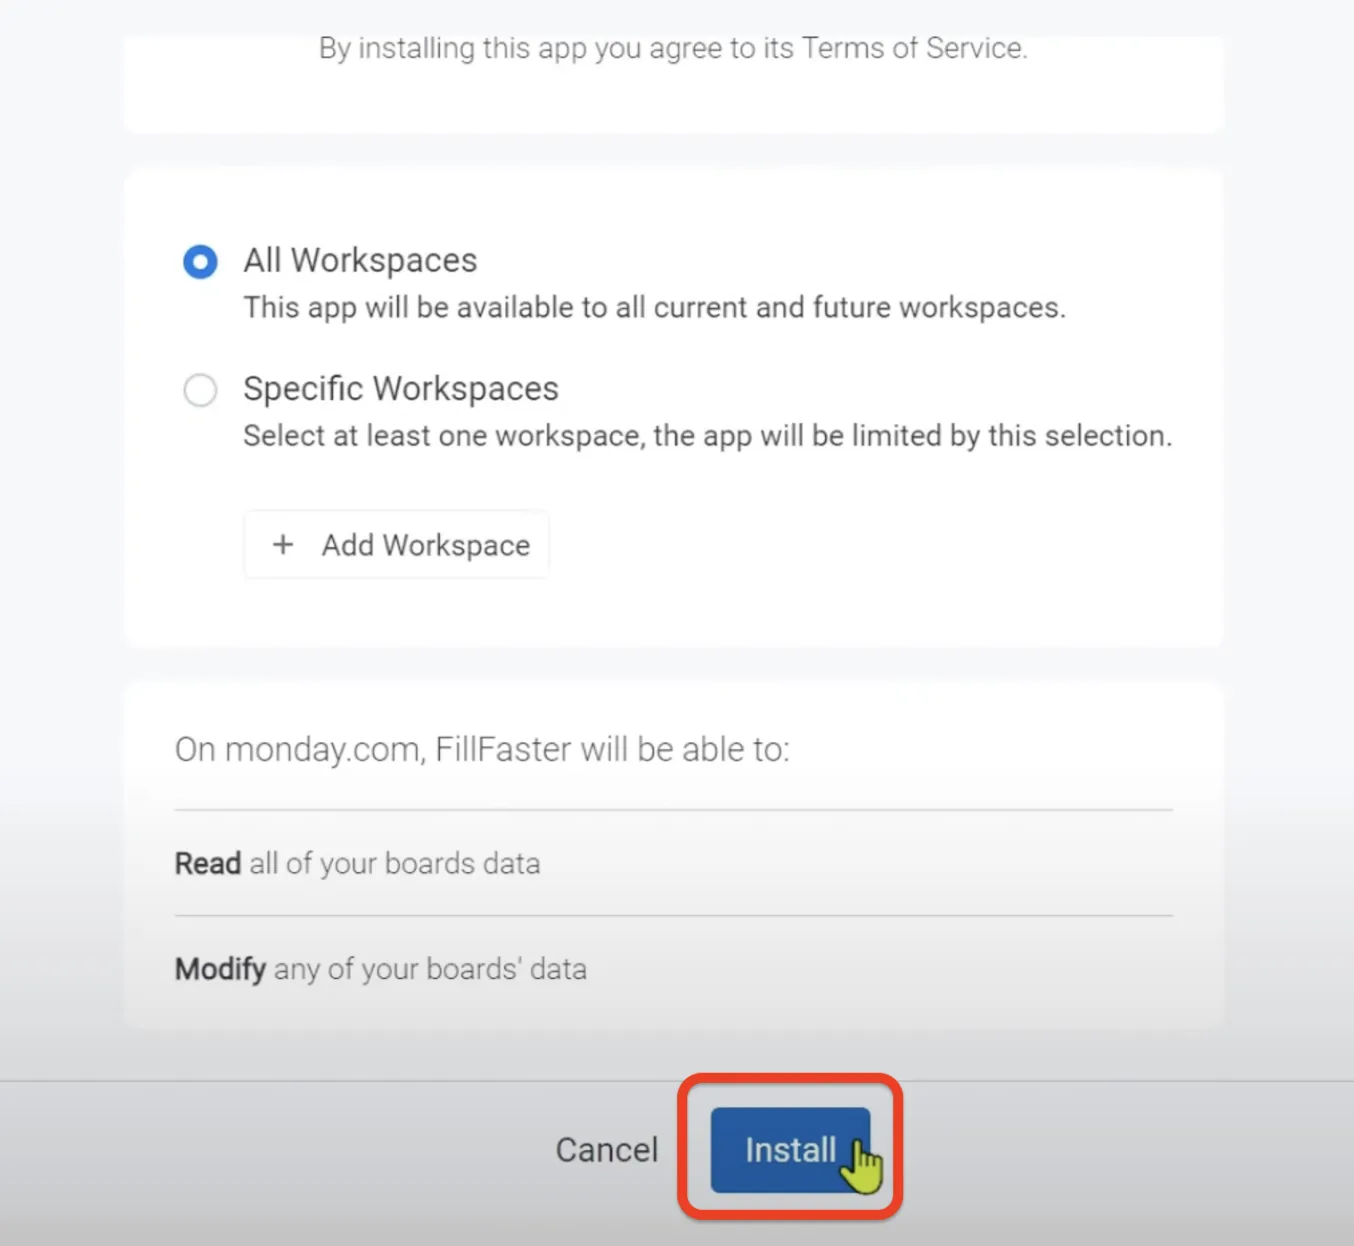
Install the FillFaster app
Section titled “Install the FillFaster app”Click here to install the FillFaster app in your monday.com account or click the button below.
Click Install.
Navigate to your monday.com dashboard and click “Automate.”
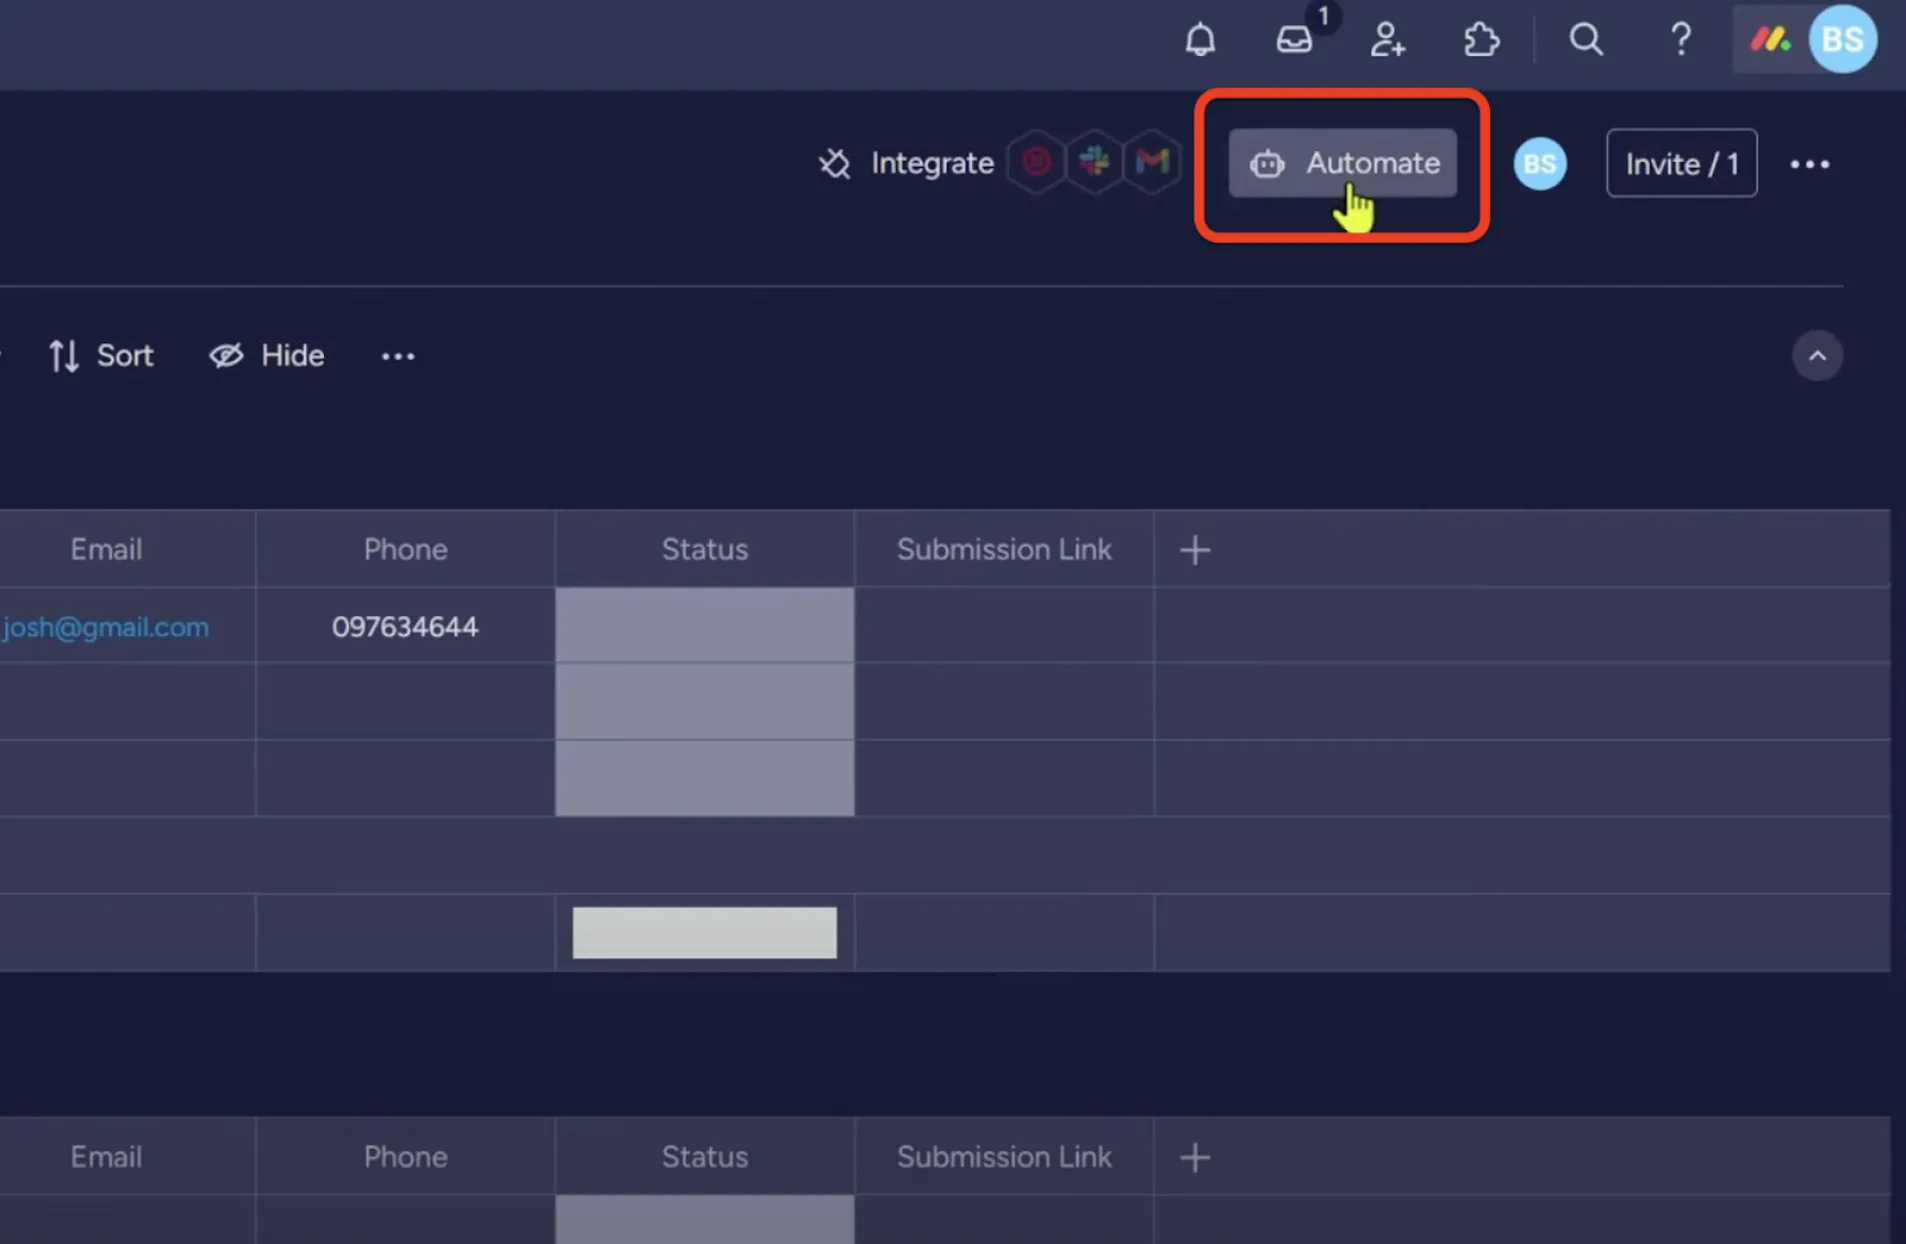
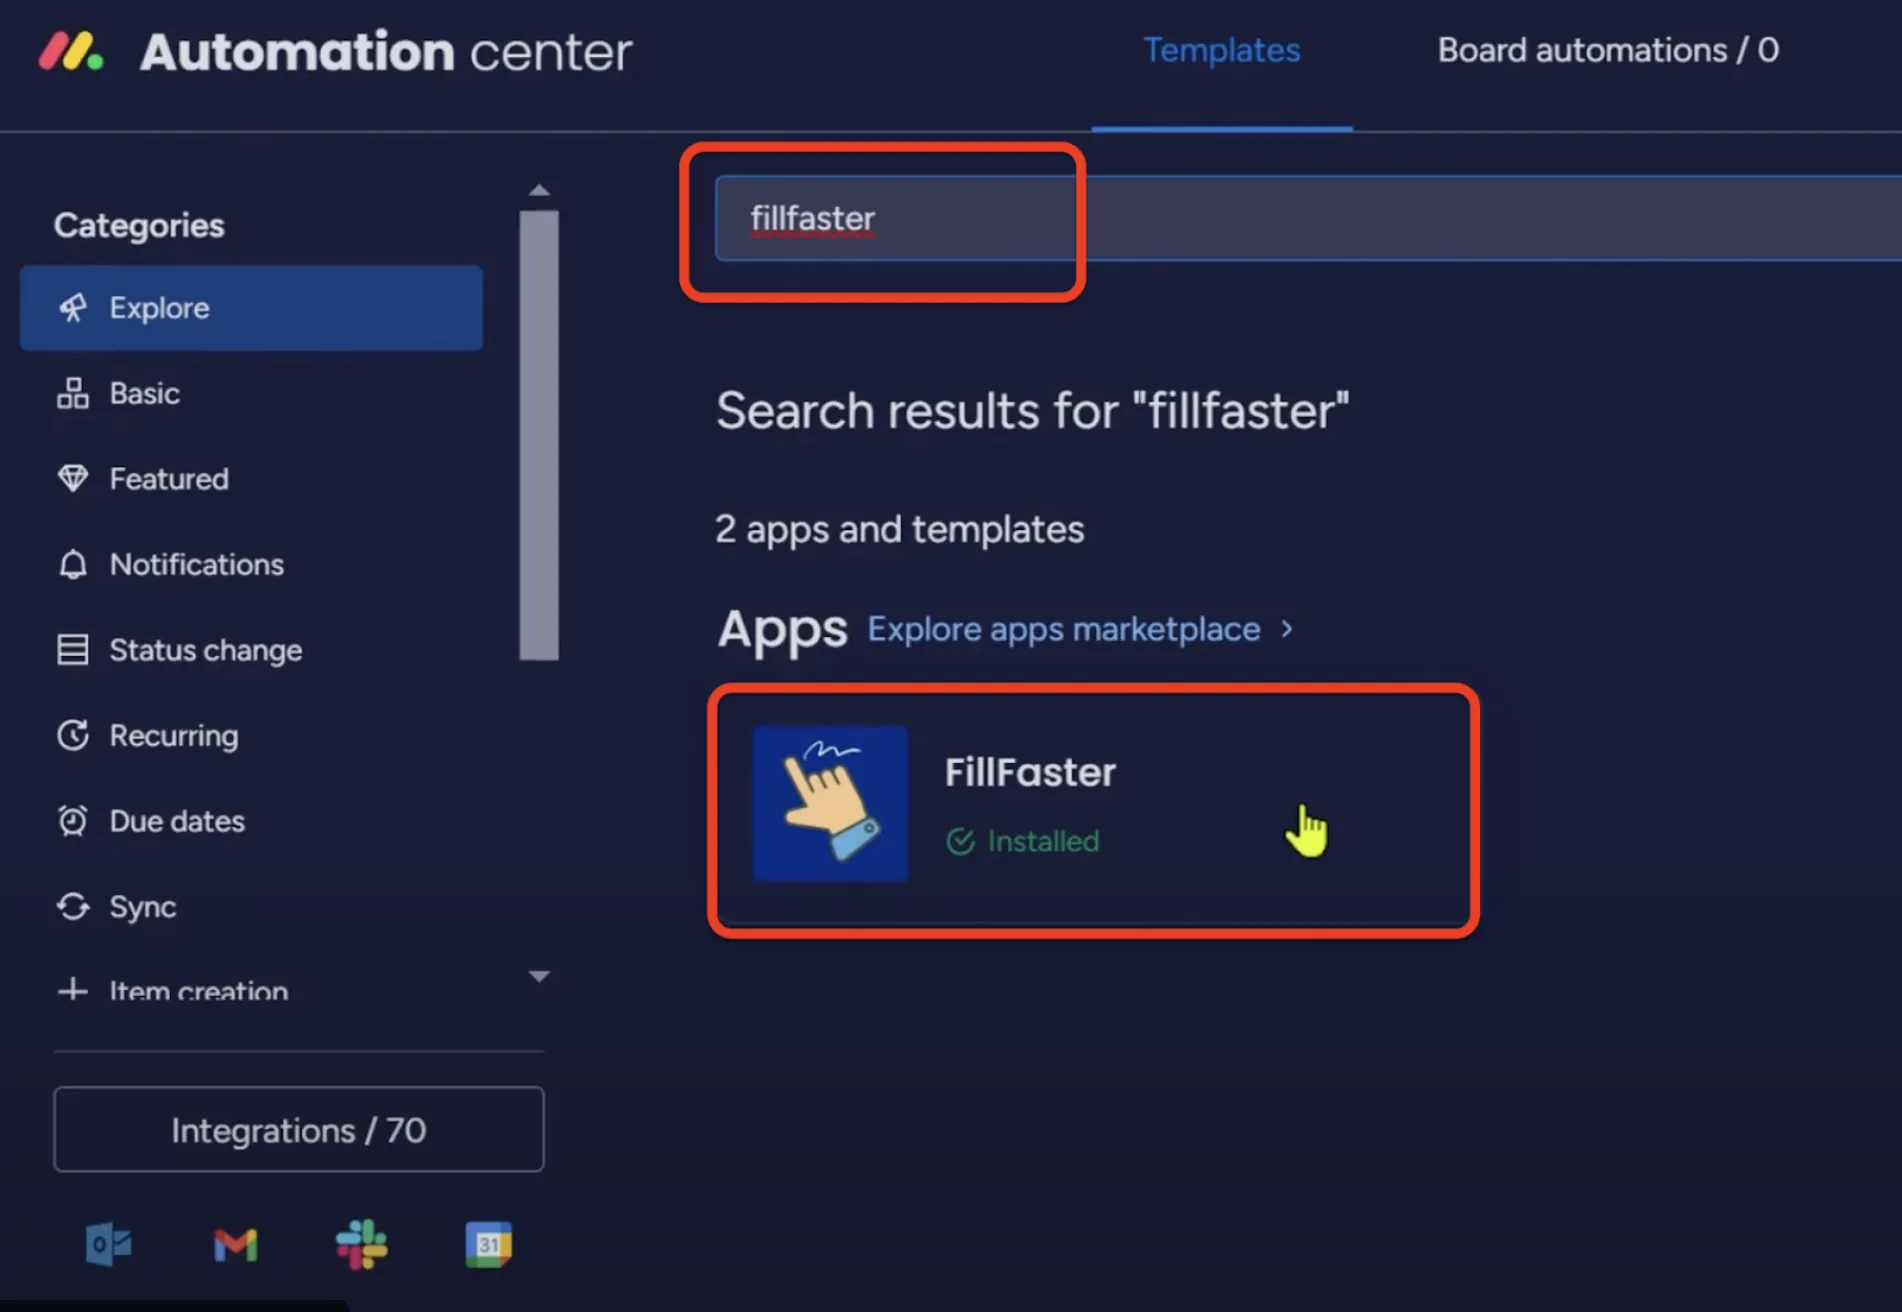
Search for the app by typing “FillFaster” on the templates search box.
Click on the FillFaster app.
Click “Use template.”

Allow monday.com to get your FillFaster API Key
Section titled “Allow monday.com to get your FillFaster API Key”You will be redirected to FillFaster’s website to allow monday.com connect with your FillFaster account.
If you’re not logged in to FillFaster, please login at that screen.
A confirmation page will show. Click “Allow.”
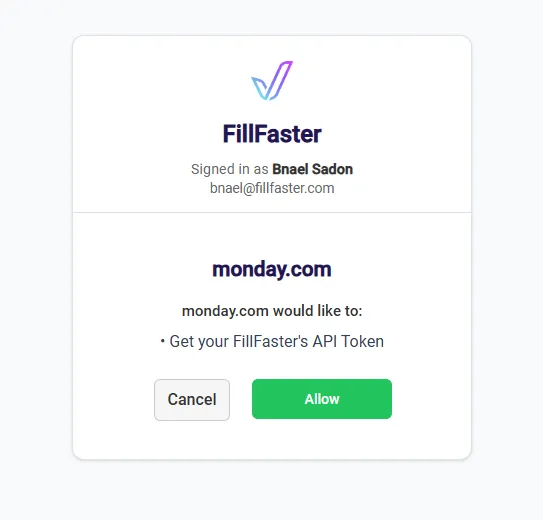
When confirming, you’ll be redirected back to monday.com to set up the recipe.
Set up a recipe
Section titled “Set up a recipe”Fill out all the fields in the recipe to make sure it works as expected. You will have to choose a template form from your FillFaster account, so make sure you have one in advance.
Click on “status” and choose the status you want to trigger the link creation.
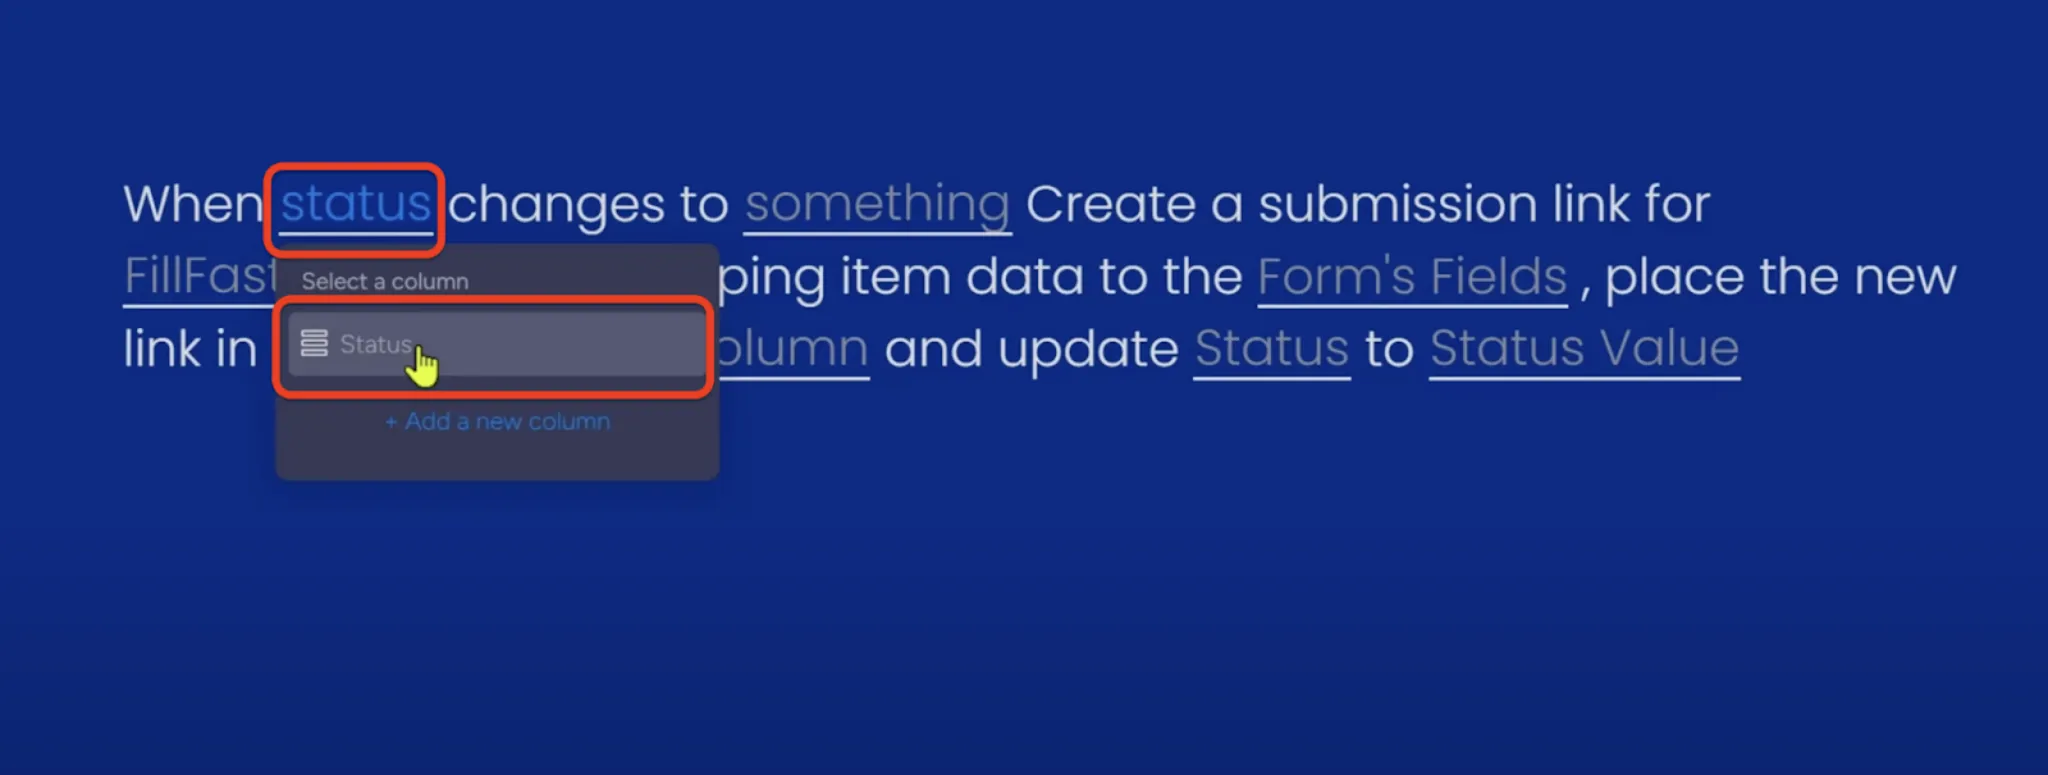
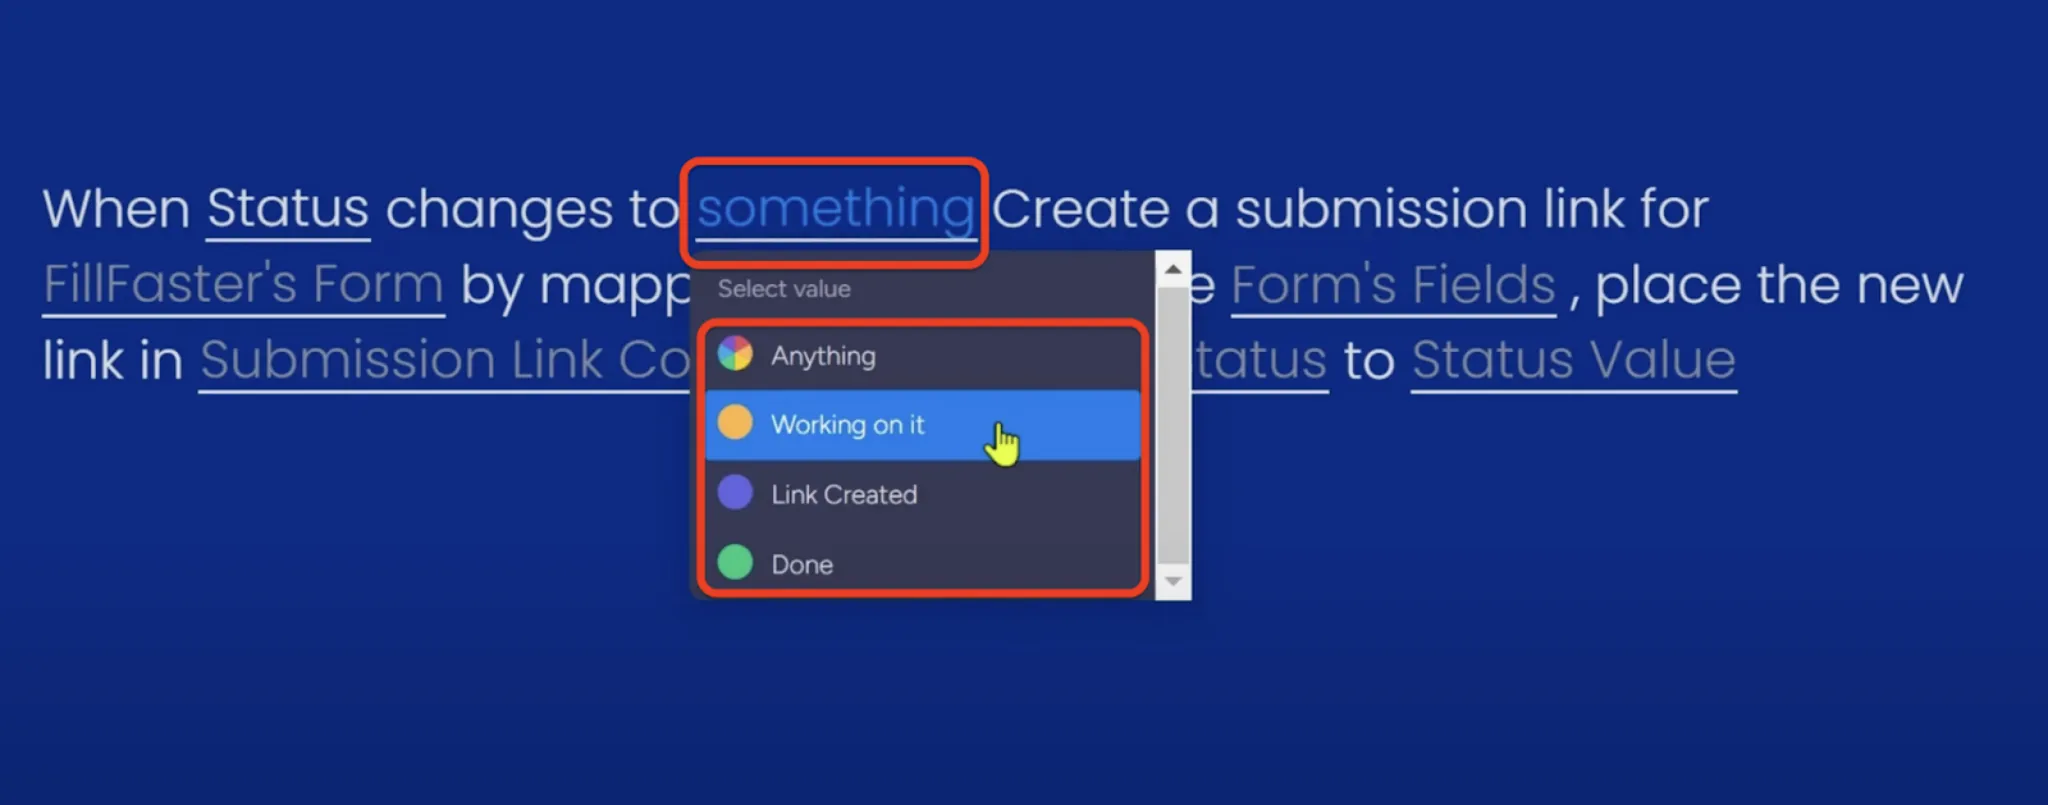
Click “something.”
Choose any status you like to trigger. For example, “create a submission.”
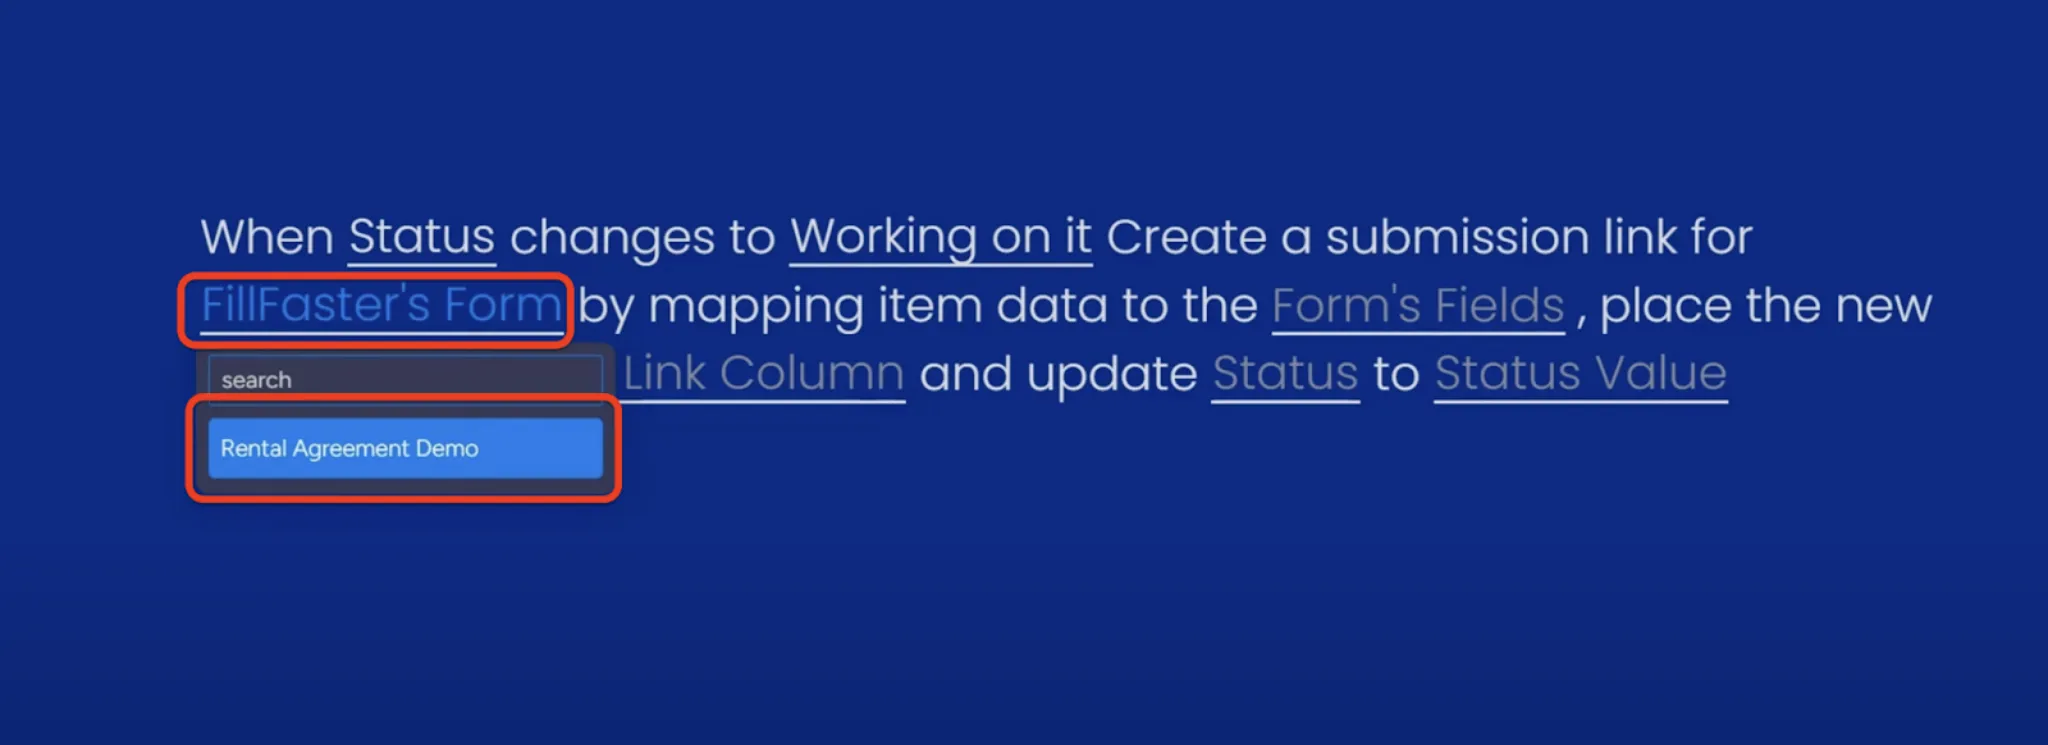
Click “FillFaster’s Form” to show the list of all of your forms.
Choose the form template you want to use.
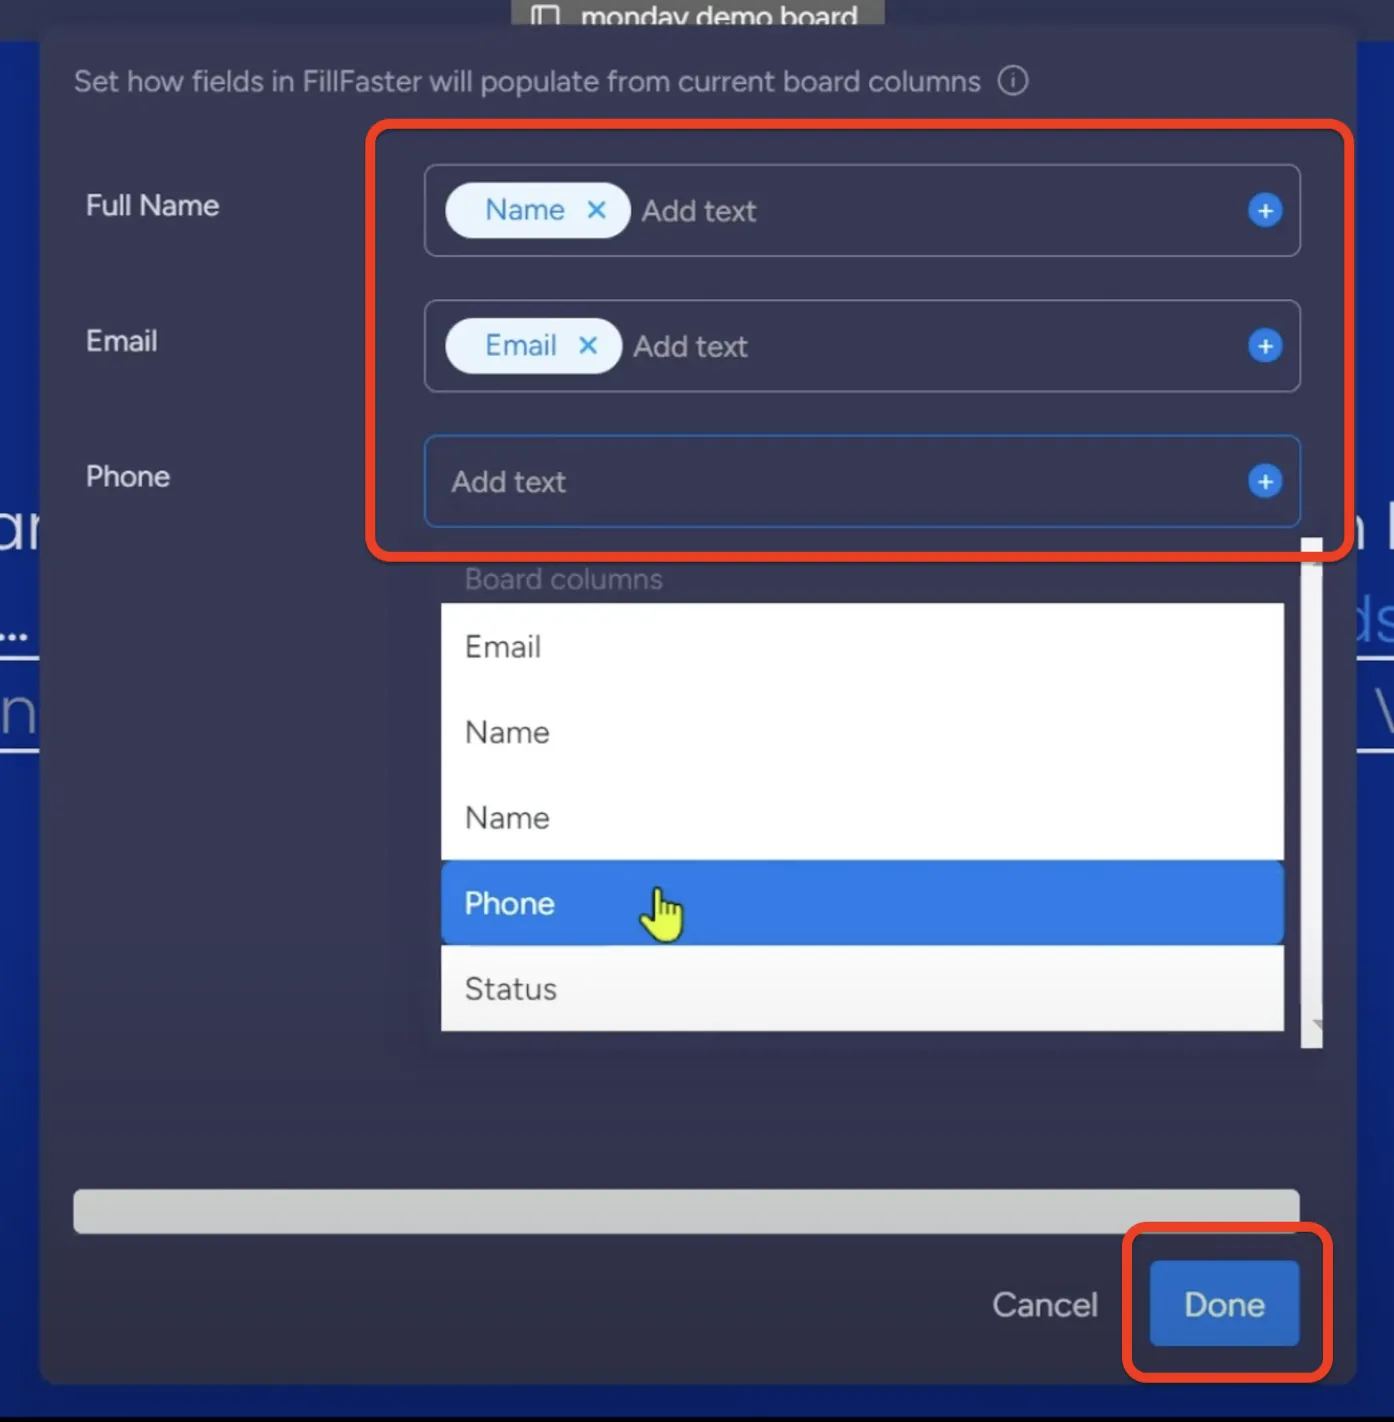
Click “Form’s Fields”.
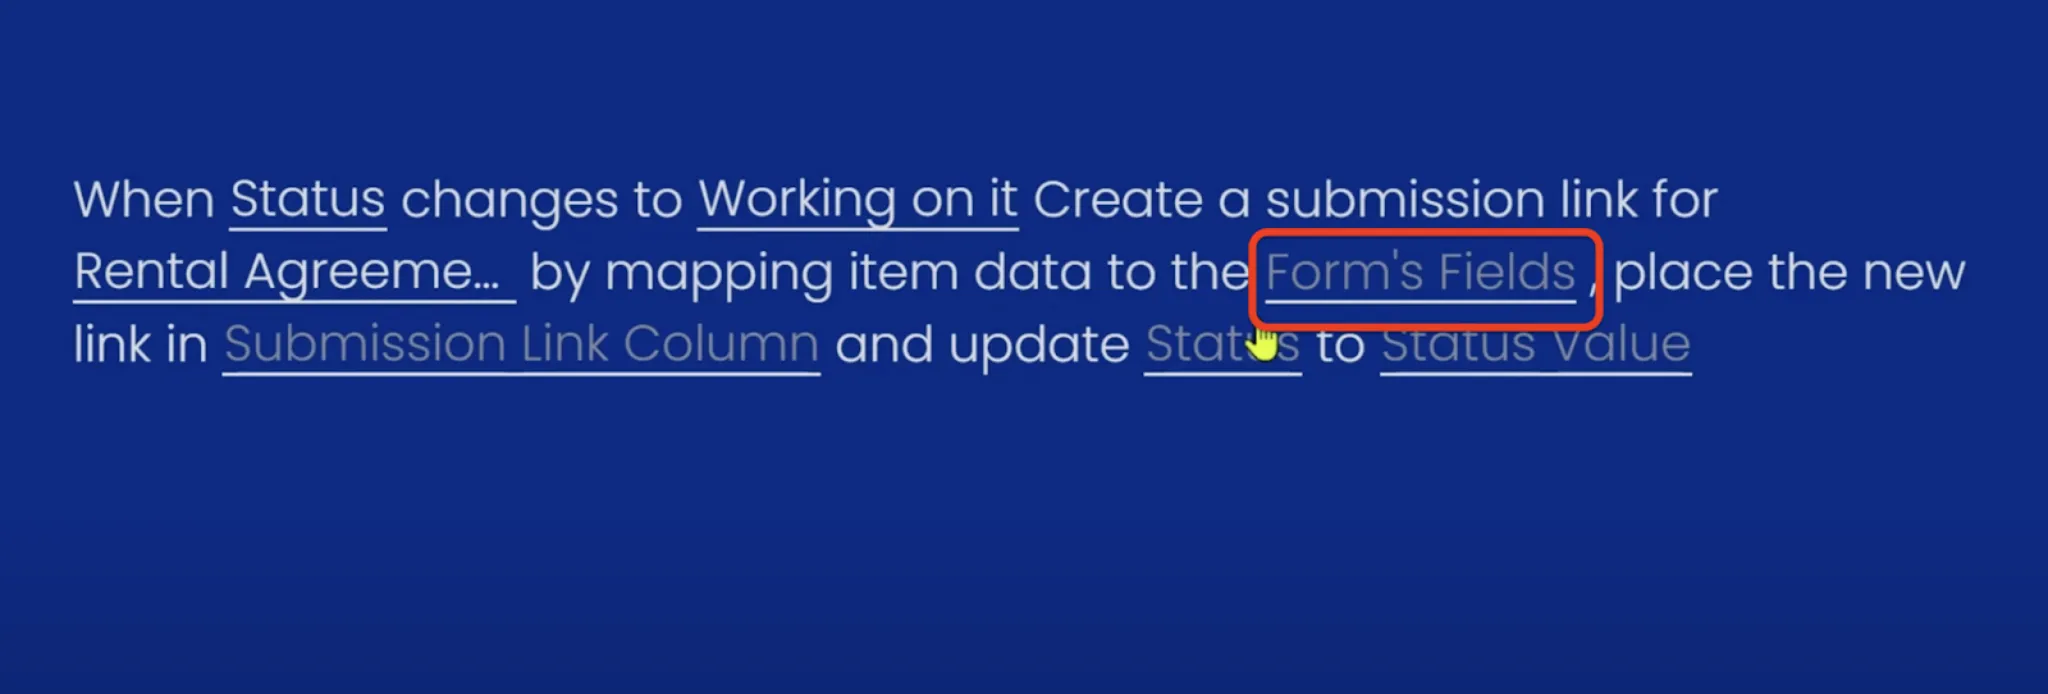
And a screen will open to map your form’s fields to your item data. Currently, the app supports mapping any ‘text’ fields.
When you finish mapping, click “Done.”
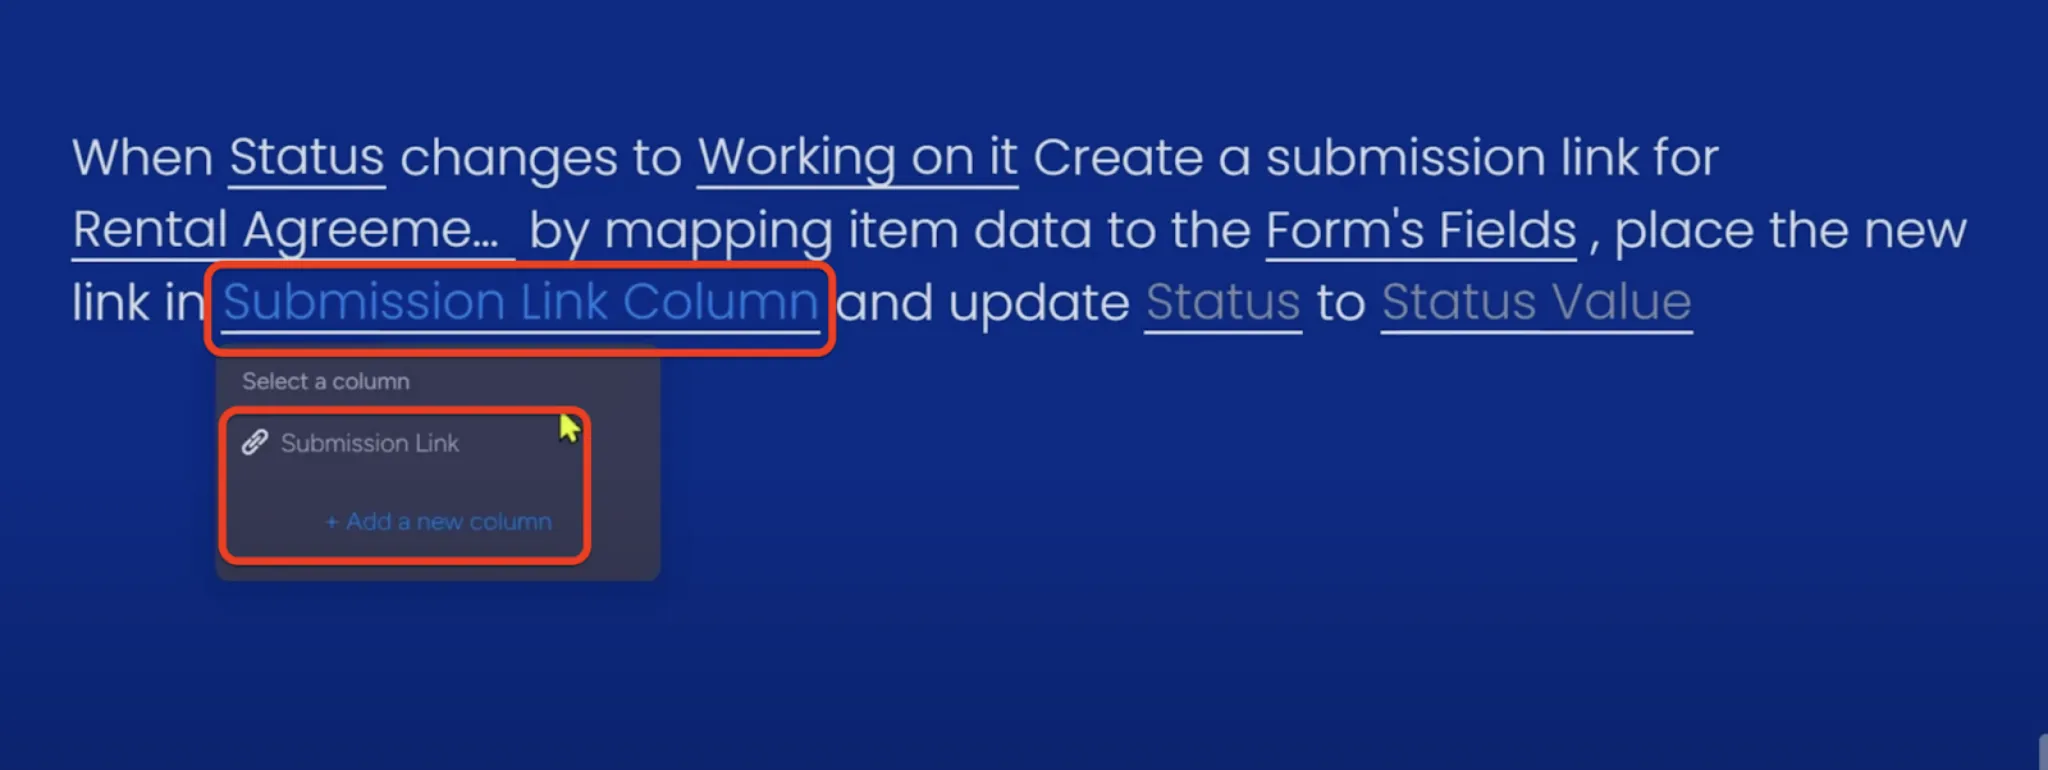
Click “Submission Link Column.” Here, the new link will be placed when created.
Choose the column you want to place the new link in.
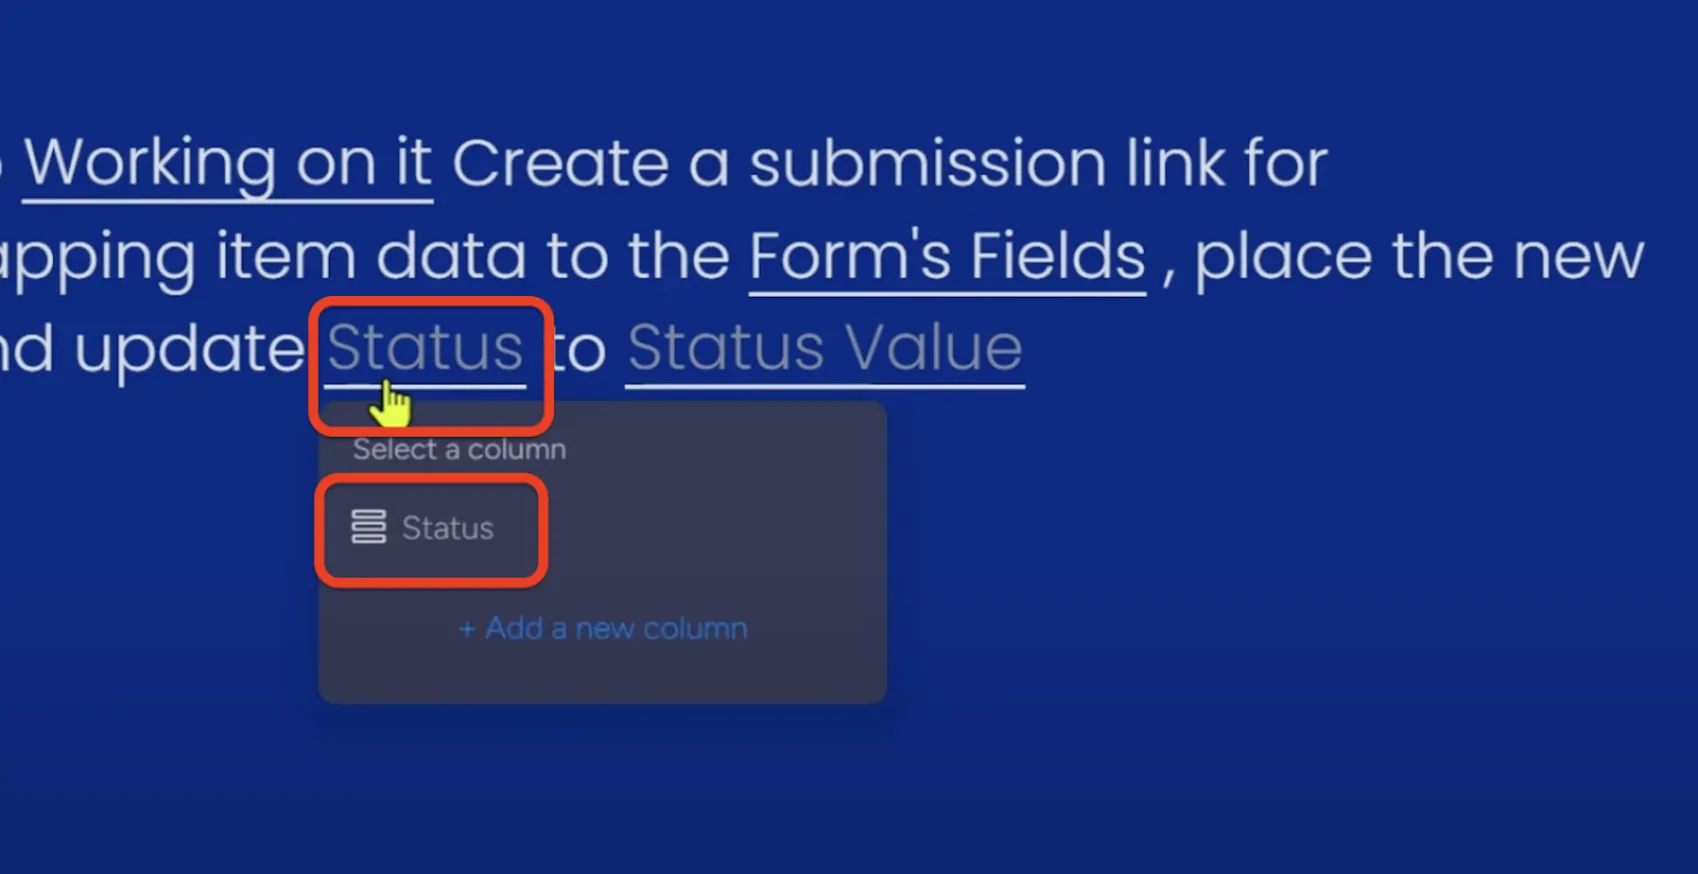
Click “Status”, this can be the same column as you choose before.
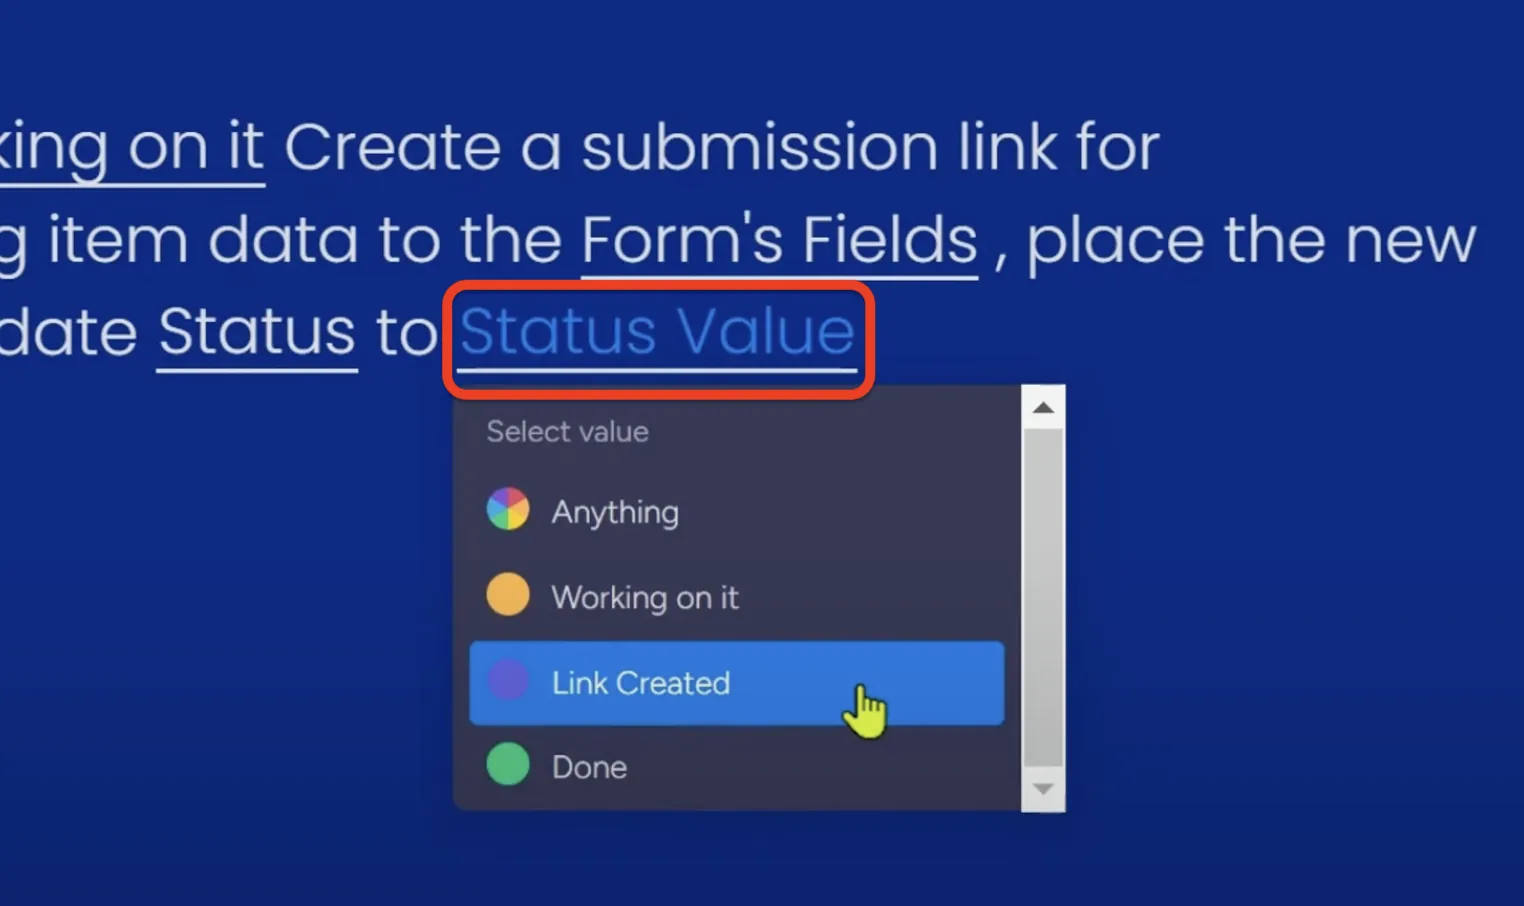
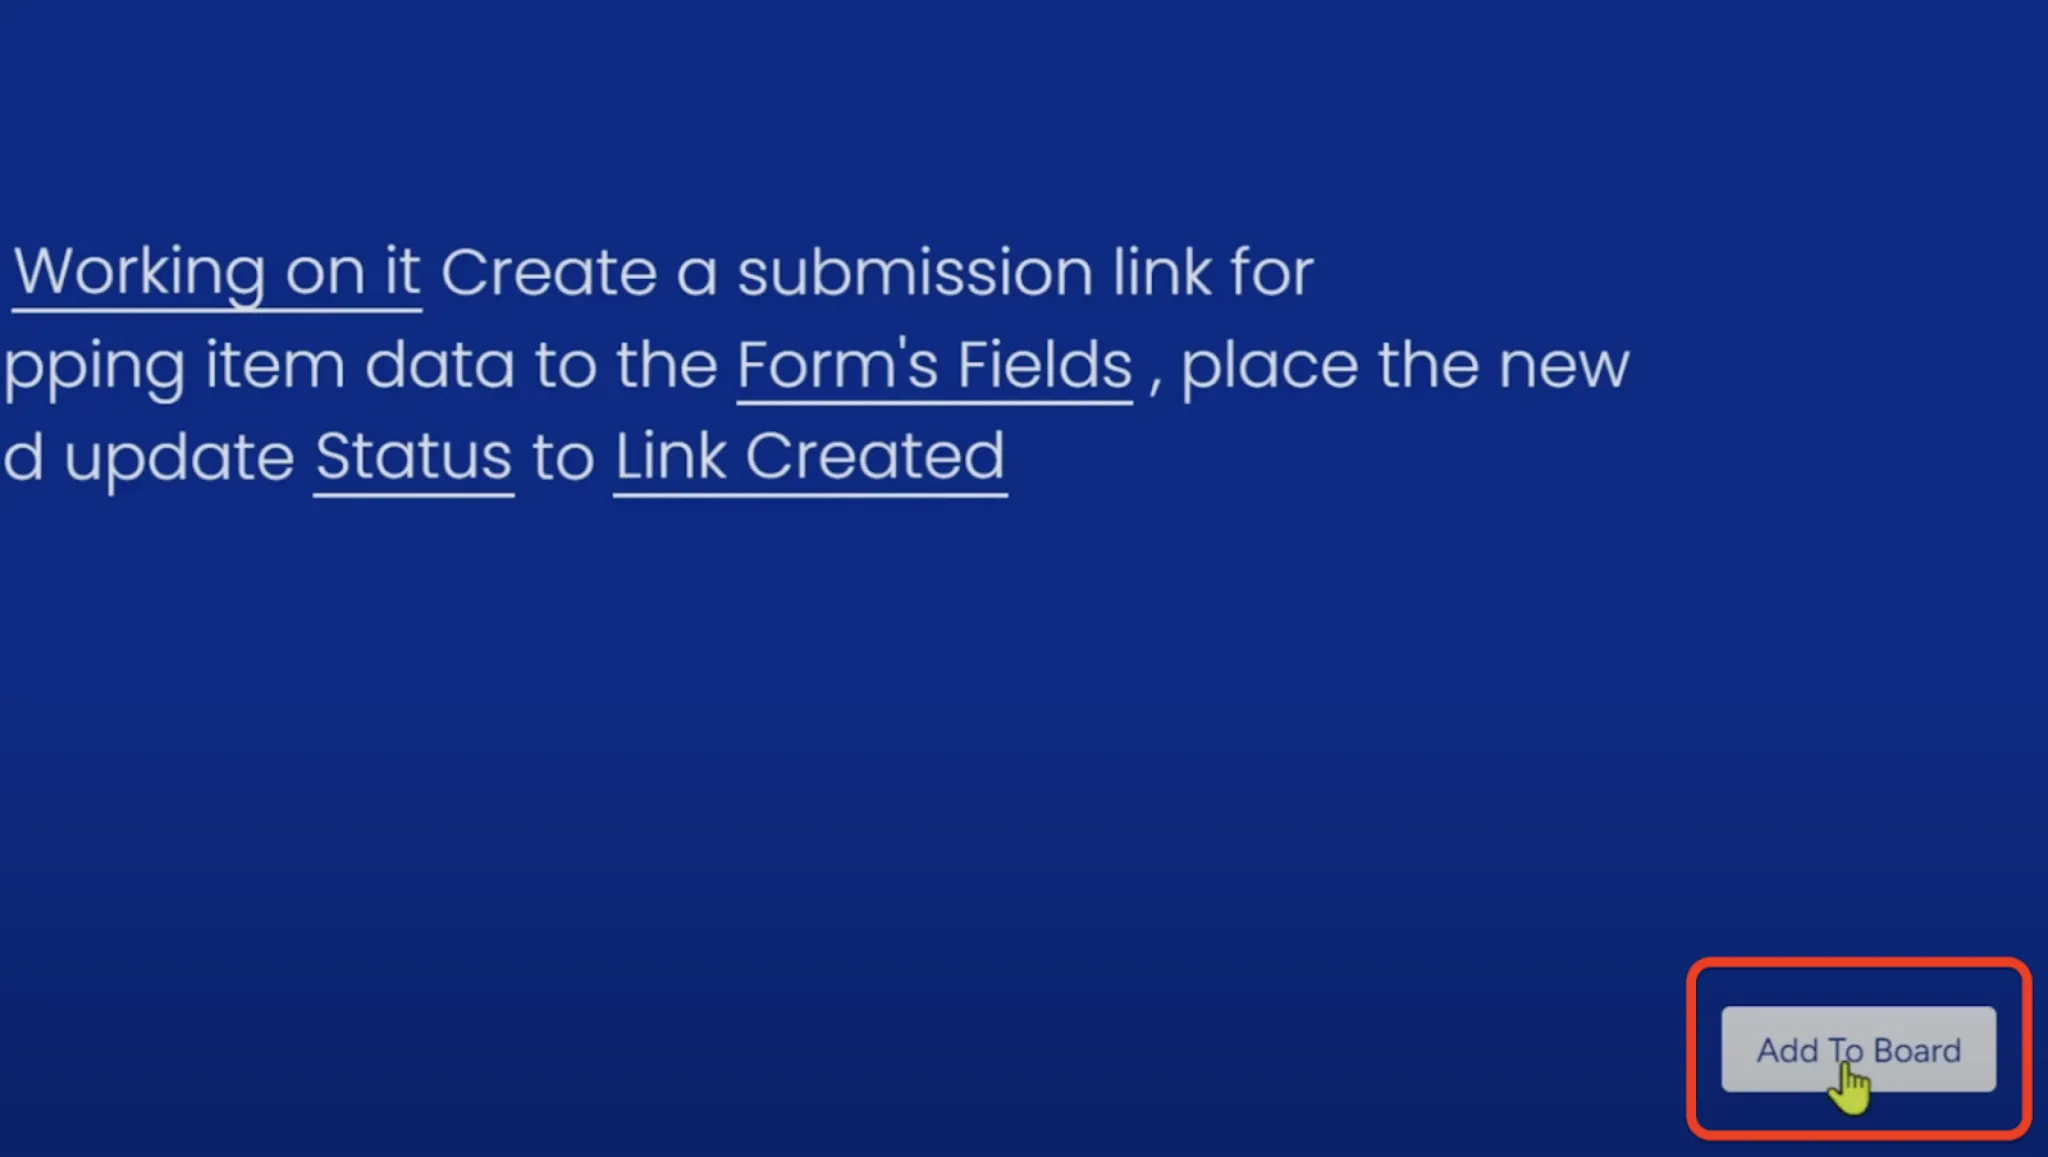
Click “Status Value” to set the new value.
Click “Add To Board.”
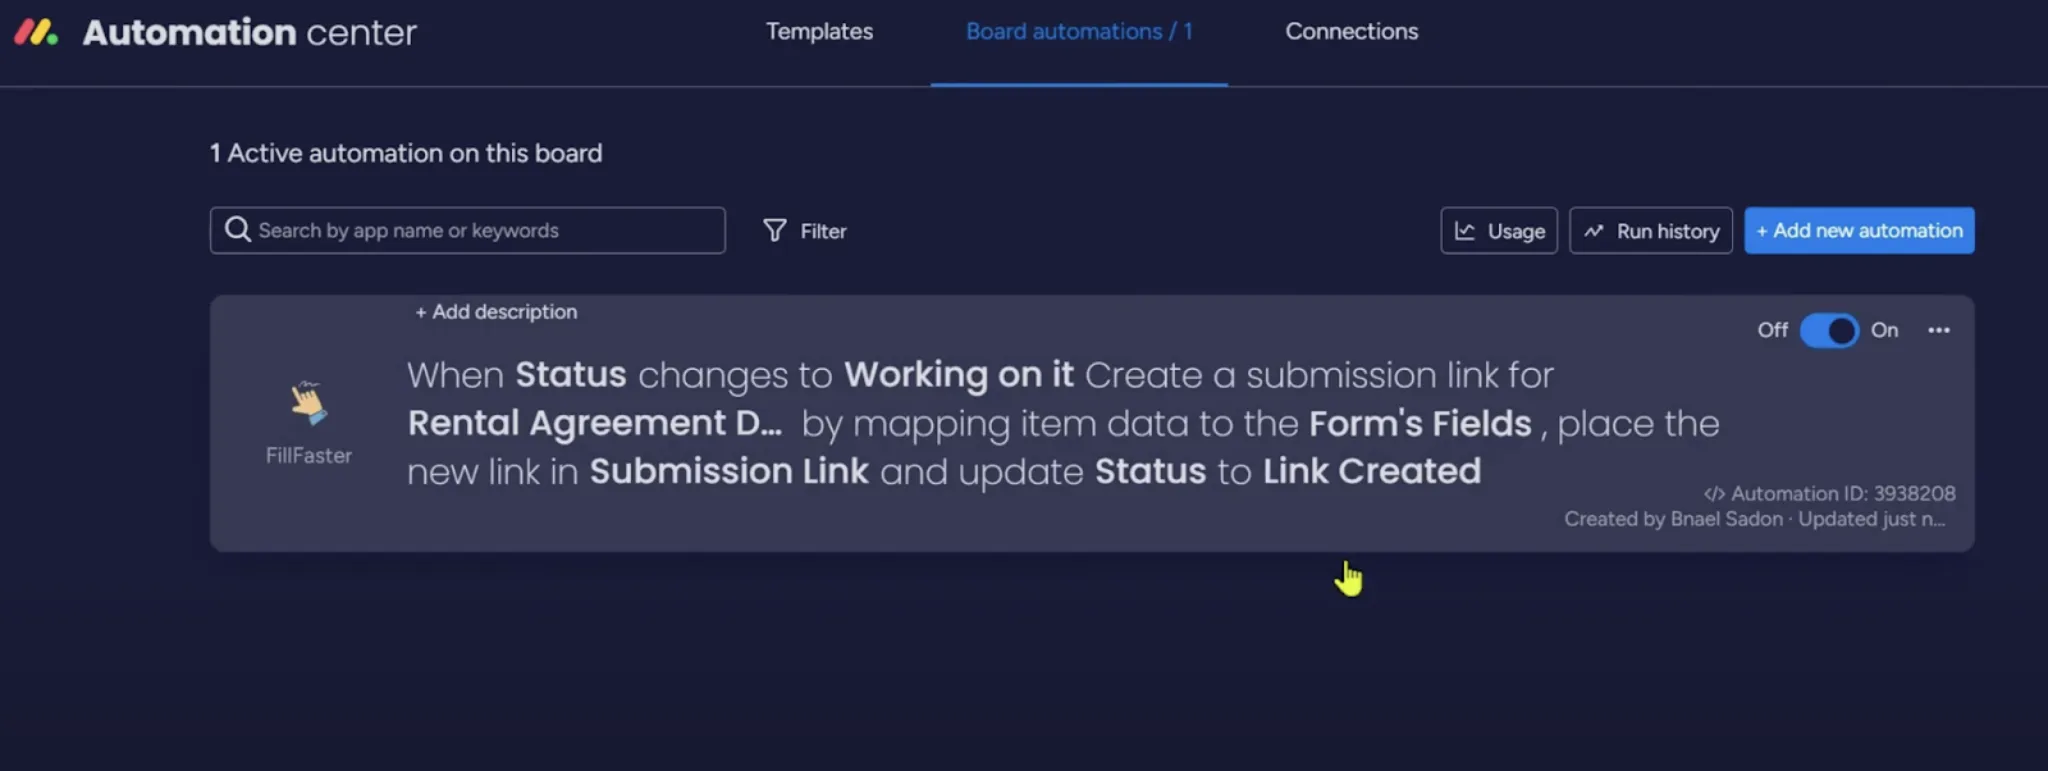
You’ll see your new automation ready. Close the automation screen to go back to the dashboard.
Run a test
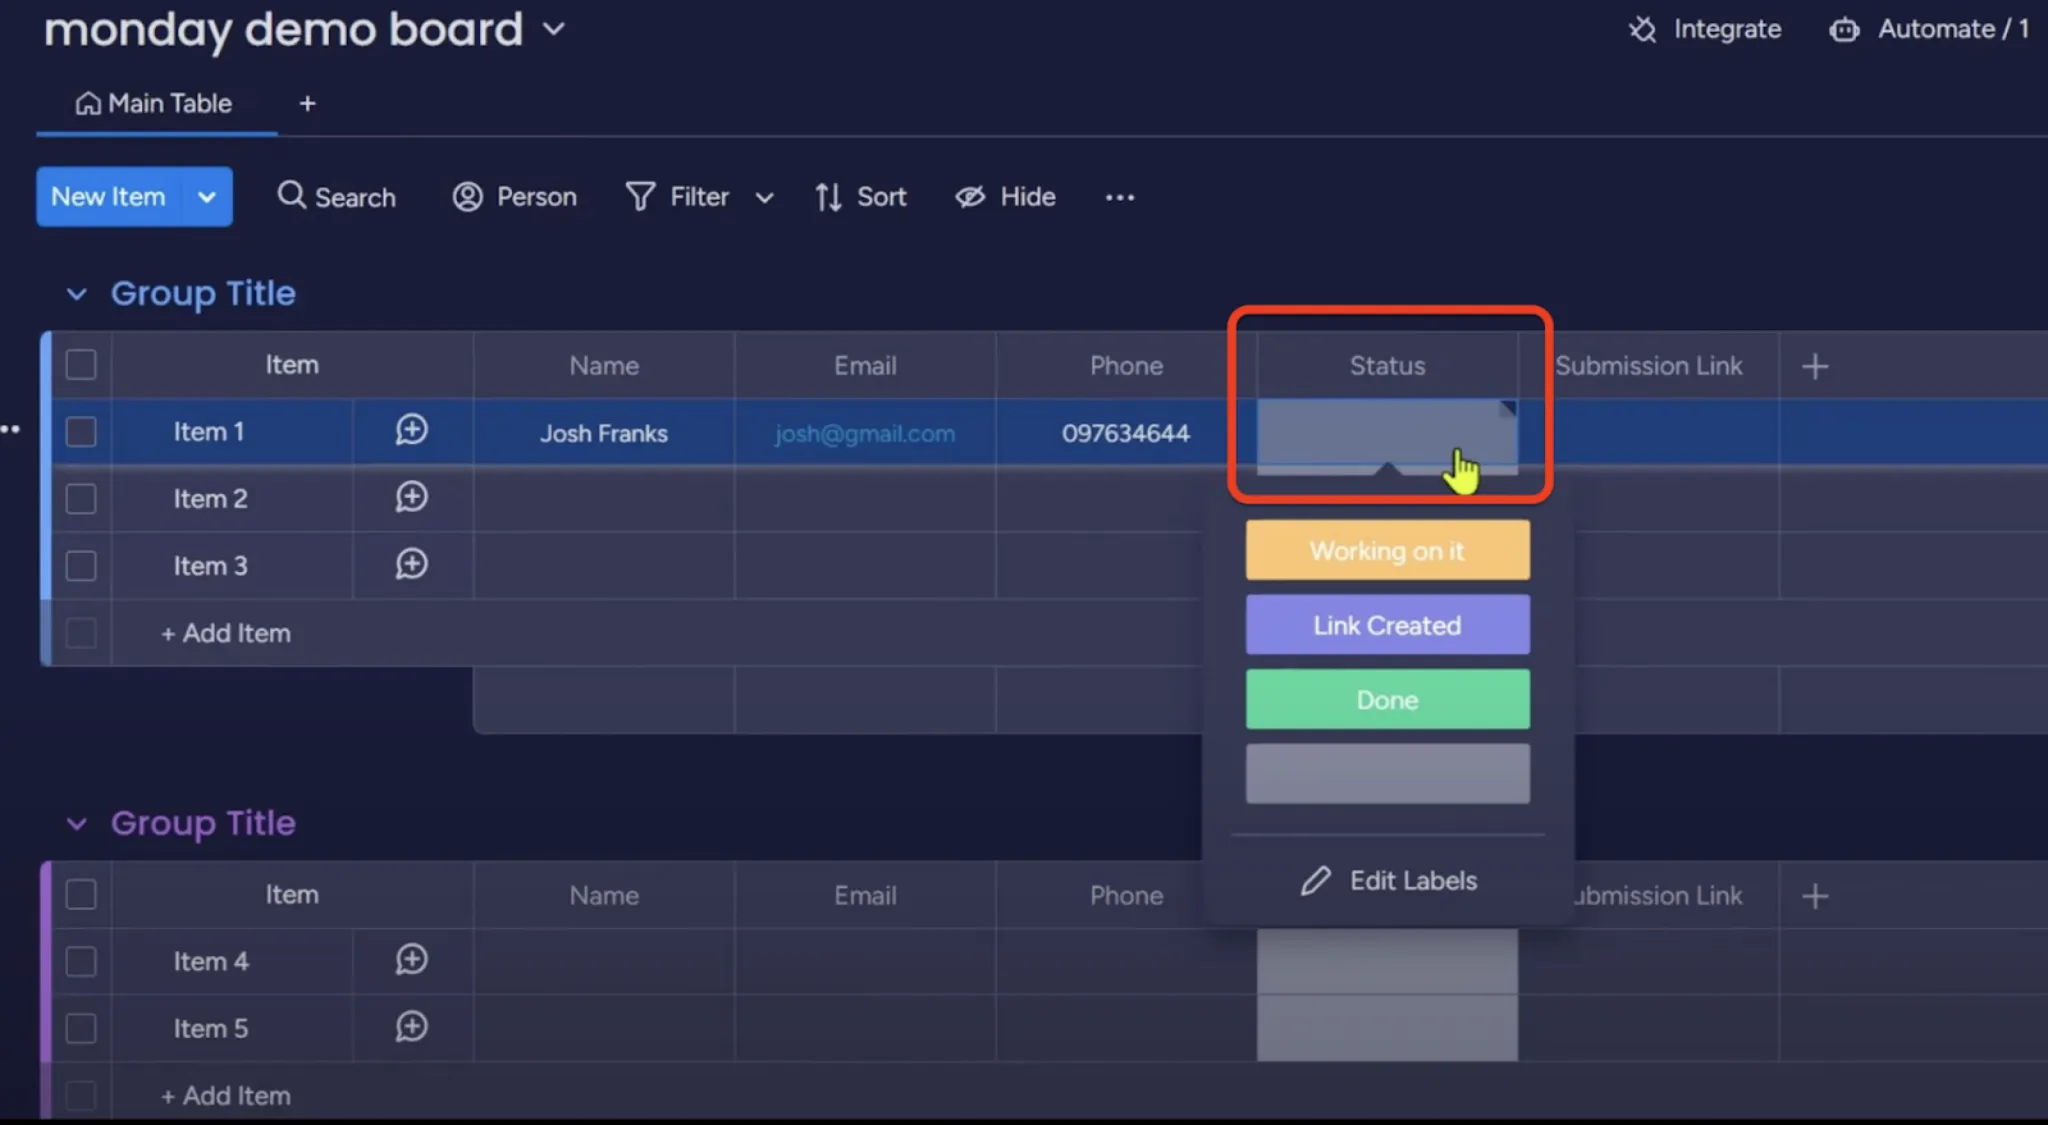
Section titled “Run a test”Fill out some data on the item and change the status to your trigger status.
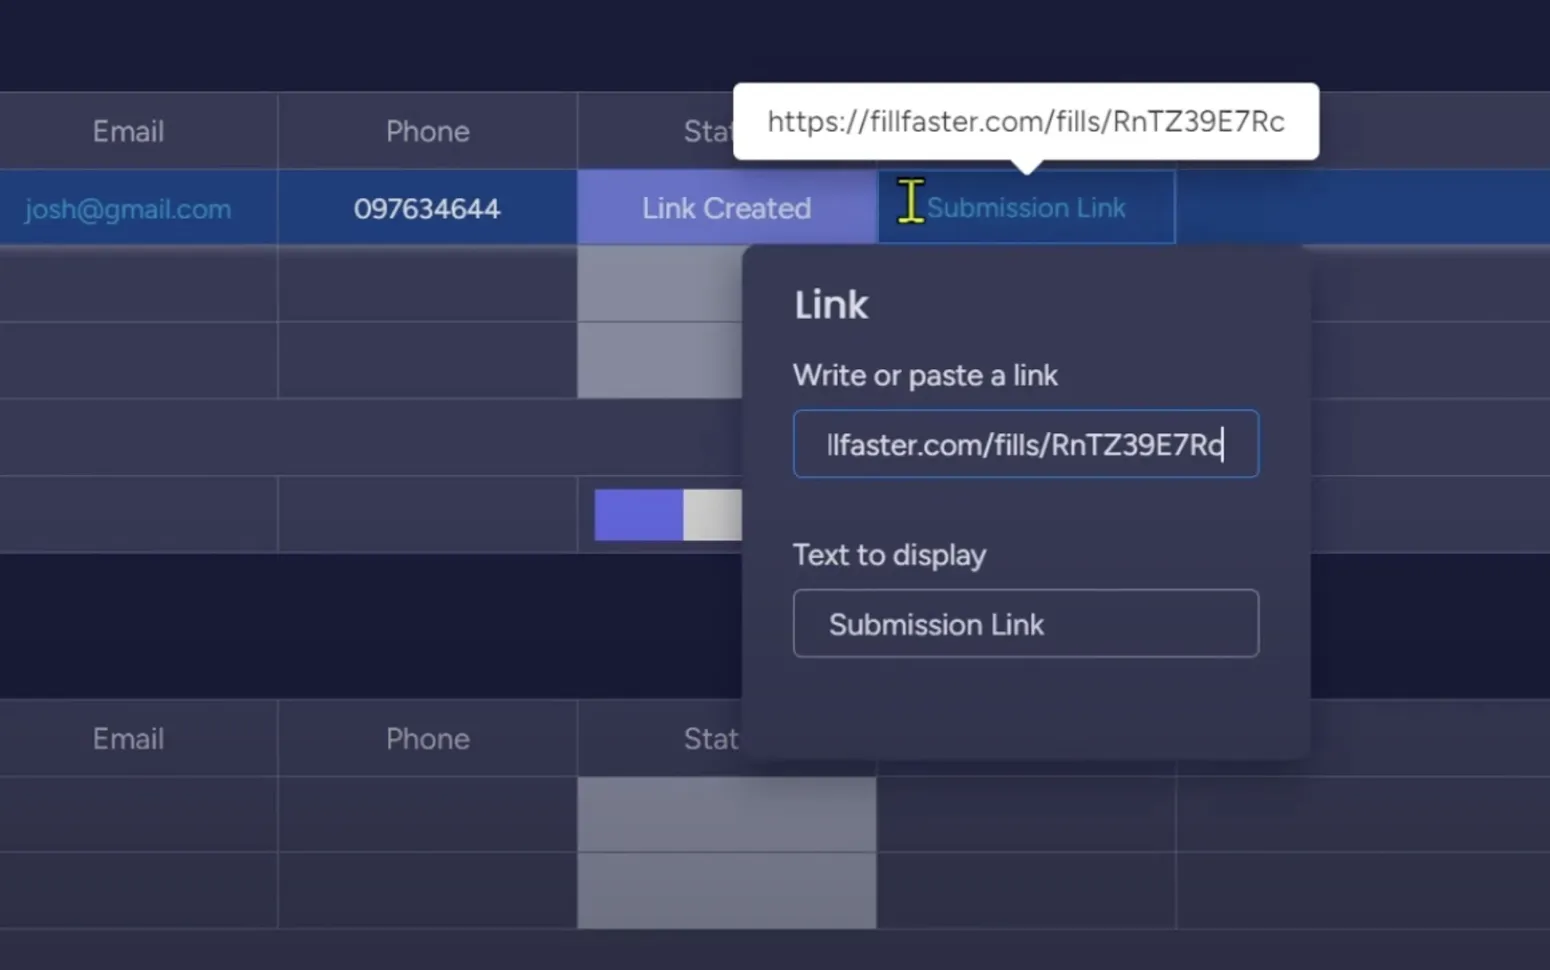
A new submission link will be created and placed in the submission link column. You can then share the link with your recipient by copying it or creating another automation. The status will also be updated.
From now on you can create and share submission links in one click within your monday.com board.